Thursday, July 30, 2009

Quote of the day.....

"A good cook is like a sorceress who dispenses happiness."


- Elsa Schiaparelli

Sunday, July 26, 2009

Ispirazione Italiana!

My inspiration for the flavours of this rack of lamb is the famous Italian pasta dish, Spaghetti Puttanesca (Whore's spaghetti) which traditionally uses capers, chilli and anchovies. I have used these ingredients as part of a marinade for the lamb, resulting in a salty, slightly spicy taste that goes beautifully with the meat. If you are (god forbid!!) an anchovy hater, don't be put off. The anchovies add a beautiful piquant element to the dish that isn't remotely fishy. It may even convert you to the merits of anchovies in cooking. I personally think that no pasta sauce is complete without a few of those salty lil' fishies, but that's for another day and another recipe :)

To go with the lamb I have chosen Risoni - small, rice shaped pasta flavoured with mushrooms and pumpkin. You will find Risoni in the dry pasta section of most supermarkets. If you have trouble finding it, continental delis or food stores will stock it. It may also be called Risi, or if you happen to be buying it from a Greek food store like I did, it will be called Orzo. Regardless of the name, you will recognise it by its rice shape. It may come in a few different sizes too - choose whatever takes your fancy. Obviously the smaller they are, the quicker they will cook.

Over to you - inizi a cucinare! (that's Italian for start cooking!)
Rack of Lamb
with Pumpkin and Mushroom Risoni


For the lamb......
You will need: 2 x trimmed racks of lamb (4 cutlets on each rack), 1/4 cup olive oil, 1 tablespoon balsamic vinegar, 3 cloves crushed garlic, 3 teaspoons finely chopped capers, 1 teaspoon very finely chopped red chilli (less if you aren't a chilli fan), 3 minced or very finely chopped anchovies, 1 teaspoon fresh thyme, 1/4 teaspoon ground black pepper,a couple of pinches of salt.

For the risoni......
You will need: 300g risoni (orso), 1 large diced brown onion, 2 cloves garlic, 1 tablespoon olive oil, 2 cups cooked pumpkin cut into small cubes (it should be slightly firm and not overcooked), 2 cups thinly sliced button mushrooms, 2 tablespoons dried porcini mushrooms, 1 cup chicken or vegetable stock, 2 tablespoons chopped continental parsley, 1 tablespoon salted butter, 1 tablespoon grated parmesan, salt and pepper to taste.

Method (lamb): Combine all of the ingredients to form a marinade. Place in a bowl with the lamb, mix well, cover and refrigerate for at least an hour. Overnight is even better.

Preheat the oven to 200C. Put the lamb in a baking dish and cook to your liking (20 minutes for rare, 30 minutes for medium) Loosely cover the lamb in foil and allow it to rest for 10mins before carving.

Method (risoni): Soak the porcini in warm water until soft. Reserve 1 tablespoon of the liquid. Drain porcini and set aside. Heat the olive oil in a pan and add the onion and garlic. Cook until the onion starts to turn transparent. Add the button mushrooms and the porcini and sautee for 1 minute. Add the pumpkin, stock and porcini liquid and allow to simmer until the liquid reduces by about half. Set aside.

Cook the risoni in salted boiling water until tender (around 8-10 mins) Drain thoroughly and add to the vegetable mixture along with the butter, parmesan and parsley. Combine well and taste for seasoning. Adjust seasoning as required. Serve with the carved rack of lamb.

Serves 4
*

Saturday, July 25, 2009

Ravishing Ruby

Who can resist the stunning ruby red of rhubarb? Today's dessert teams up rhubarb with strawberries, vanilla and a hint of rose water to create a gorgeous ruby coloured compote that is very versatile. I have teamed it with meringue, but you can use the compote in lots of ways - as a base for a beautiful rhubarb crumble, as a jam on scones or piklets, as a sauce on icecream, served with yoghurt for breakfast or folded through whipped cream to make an old fashioned rhubarb fool. To top it all off, the compote freezes well so you can make a batch and save some for later.

Rhubarb is usually cooked with water and sugar and then stewed, but I prefer to cook it in the oven without water. Rhubarb contains a high percentage of water to begin with and I find that the oven method gives you a much better result and avoids the rhubarb breaking down too much and turning too watery and thin. The oven method also gives a superior flavour and colour.

Things you might not know about rhubarb - Despite being used most commonly in desserts and jams, it is actually a vegetable. The word rhubarb comes from the Latin word "rhababarum" which means "root of the babarians." It originated in China and the earliest records date back to 2700BC, when it was cultivated for medicinal purposes. It was considered very precious and was traded along with opium.

About the leaves......Sometimes when you buy rhubarb, it will still have the leaves attatched. The leaves contain highly poisonous oxalic acid that you should never consume under any circumstances. When you dispose of them, make sure they are kept out of the reach of children or any pets that might get hold of them. If you are a gardener, you can use the leaves to make an environmentally friendly bug spray, by boiling the leaves in water and using the liquid. Just be sure to clean the pot very carefully afterwards and keep the liquid in a safe place, as you would any kind of poison.

You will notice that I didn't make the meringues for today's dessert, I used good quality plain store bought ones. Feel free to make your own, especially if you happen to have a lot of eggwhites that need to be used and a bit of time on your hands. Today, I had neither :)

You would know by now that I'm not a huge dessert fan, but this one? Divine.


Rhubarb and Stawberry Meringue Parfait


You will need: 8-10 stalks rhubarb sliced into pieces about 3cm long, 2 cups strawberries hulled and halved, 3/4 cup caster sugar, 1 vanilla bean, 1 teaspoon rose or orange blossom water (you will find these at middle eastern stores or continental delis), 1 large meringue per person, 300ml thick or double cream, 1 tablespoon blanched and lightly toasted almonds.

Method: Heat the oven to 200C. Lay a piece of baking paper in the bottom of a small baking dish. Split the vanilla bean in two and scrape out the seeds. Combine the rhubarb, sugar, vanilla (the bean as well as the seeds) and place in an even layer in the baking dish. Bake for 20mins.

Remove the rhubarb from the oven and add the strawberries and the rose or orange blossom water. Gently combine - you do not want to crush up the rhubarb too much. Return to the oven for another 8 mins. Remove from the oven and allow to cool. The rhubarb mixture is best served at room temperature, so if you are making it ahead, take it out of the fridge before serving.

To assemble the parfaits, first chop the meringues in 4. Put a spoon of the rhubarb mixture in the serving bowl/glass, then some meringue, then some cream. Repeat. Top with some toasted almonds and serve.

*

Double Deliciousness

Today's dish is really two - two tastes, two textures and two techniques. One of the wondrous things about Chinese cuisine is their understanding of the role of texture in our enjoyment of food. These two dishes could not be more different in taste and texture, but they both start with the same process. My suggestion is to make the first recipe, then use half of the chicken to make the second recipe and serve them together. They are such a beautiful contrast and eating them as part of the same meal is a real treat for your tastebuds.

The first dish originates from Hainan, an island in the South China Sea and the smallest province of China. If you have ever had the pleasure of visiting the food heaven that is Singapore, you would know this dish well. It is sold in hawker stalls and restaurants everywhere and is unofficially Singapore's national dish. It is usually served with richly flavoured rice and a bowl of fragrant chicken stock, spring onions and chilli. It is meltingly tender, super moist and succulent. If you are inspired to follow the Singaporean tradition, then save the cooking liquid as a basis for the stock to serve with your chicken.

The second dish uses the Hainan chicken as a base, but takes it a step further to transform it from soft,mellow and melting to crispy, zingy and aromatic. Be warned - it is extremely moreish!
One last word on today's recipe - Don't be daunted by the poaching technique if you have never poached a whole chicken before. It really is worth the tender loving care and the end result will give you chicken that is unbelieveably moist and perfectly cooked, I promise.


Hainanese Poached Chicken


You will need: 1 size 15-16 free range chicken, 6 spring onions, 3cm piece ginger, 1 teaspoon salt, 1 tablespoon sesame oil, boiling water (to cover), ice water (to cool)
To serve: soy, sliced spring onion, and chilli.

Method: Remove and discard any visible fat from the inside of the chicken and dry it well inside and out with a paper towel. Place the chicken breast down, in a large heavy based saucepan or casserole dish that also has a lid.

Slice the spring onion into large pieces (about 8cm long). Remove the skin from the ginger and slice into pieces. Add to the pot, along with 1 teaspoon salt. Cover the chicken with enough boiling water to just cover the chicken and bring it to the boil on medium heat.

Reduce the heat to low, put the lid on the chicken and simmer for 10 minutes. Remove from the heat and set aside for 45 minutes, covered. The chicken will continue to cook as it sits in the liquid.


When 45 mins has elapsed, carefully remove the chicken from the poaching liquid (you want to avoid breaking the skin if you can) and plunge the chicken into a bowl of ice water. Leave for 15 mins until the chicken is cold.

After 15 mins, gently remove the chicken and allow it to drain. Pat dry with a paper towel. Place the chicken on a plate and rub all over with sesame oil. Cover loosely and refrigerate until ready to serve.

When serving, top with sliced spring onion and chilli.

Crispy Fried Chicken with Aromatic Salt


You will need: 1 poached chicken cut into pieces (see the recipe above), 3/4 cup plain flour, 1 tablespoon salt, 1 teaspoon five spice powder, 1 teaspoon dried chilli flakes, 1 teaspoon finely ground Szechuan pepper, peanut or vegetable oil for frying. Sesame seeds and sliced spring onion to serve.

Method: In a small pan, gently roast the five spice, Szechuan pepper, chilli and salt for about 2 minutes, until fragrant. Set aside.

Dust the chicken pieces with the flour, shaking off the excess. Heat the oil and fry in batches until crisp and golden.

Arrange the chicken on a platter and sprinkle with the spiced salt, sesame seeds and spring onion to serve.

*

Monday, July 20, 2009

Fresh and Fruity

Pork and apples are a match made in heaven and I love apple sauce with roast pork, but I wasn't really up for cooking a roast today. Instead, I decided to take those flavours and add some freshness with the zest of lemons and the lovely herbal aromatic scent of fresh thyme. The result is today's dish - Pork schnitzel with a fresh lemon, thyme and sesame crust, served with sauteed apples. You can use any kind of apple, depending on your taste but I used the lovely crisp Braeburn variety for this recipe. They seem to have a nice balance of sweetness and tartness that really works with the pork. There are some really great quality apples around at the moment so you won't be starved for choice.

Pork schnitzel with thyme, sesame and lemon crust /with sauteed apples

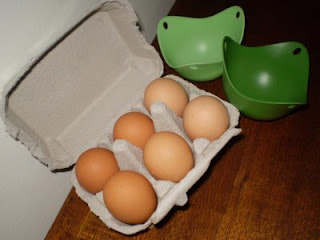
You will need: 1 pork schnitzel per person, 1/2 cup plain flour, 1 teaspoon paprika, 2 eggs lightly whisked, 2 cups fresh breadcrumbs, 1 tablespoon sesame seeds, Grated rind of 1 lemon, 2 teaspoons finely chopped fresh thyme (be sure to remove all the twiggy stalks and only use the softer, green shoots), 2 teaspoons finely chopped parsley, oil for frying, 2 apples cored and sliced, 1 tablespoon redcurrant jelly, 1 tablespoon lemon juice, 2 teaspoons butter, salt & pepper to taste.

Method: Combine the breadcrumbs, lemon rind, parsley, sesame seeds and thyme together. Season with some salt and pepper and set aside. In a plastic bag (or bowl) combine the plain flour and paprika and mix well.

Crumb your schnitzels - first dust with the flour, then coat in egg and finally the crumb mixture. Put the schnitzels on a plate, cover them and put them in the fridge to rest for 15mins. In the meantime, prepare your apples.

Melt the butter in a pan - add the apples, season with salt and pepper. Sautee the apples for a few minutes, until they start to colour slightly. Add the redcurrant jelly and mix well until it melts down and combines evenly. Add the lemon juice and let the apples cook for another minute until lightly coated with the syrup. Tastefor seasoning and adjust if required. Set aside. Remove the pork from the fridge and shallow fry until golden.

Serve with the sauteed apples and seasonal green vegetables.

*

Sunday, July 19, 2009

Cheeky Tart!!!

"The Queen of Hearts she made some tarts all on a summer's day;
The Knave of Hearts he stole the tarts and took them clean away"

Ok, so I'm not the Queen of Hearts and it isn't a summer's day (in fact it's bloody freezing!) but I have been baking tarts today. I headed into the kitchen this morning to make something to take to work for lunch this week and whilst I was waiting for that to cook, I decided to bake some tarts to use up some spare puff pastry that was taking up space in my freezer. I really didn't fancy the thought of leaving the house to go food shopping, so I hunted around in the pantry for inspiration, determined that there must be some kind of filling I had ingredients for. Well, turns out that I found a little more inspiration than I bargained for, and the result was six different kinds of tarts (although they all start with the same basic beginnings)

I was going for a rustic, free form style with these tarts - no pie tins or cutting out baking paper or blind baking or any of that kind of carry on! I love that every one is different and that they aren't perfect. You could eat them like a pastry with a cup of tea, or serve them as a dessert, warm with a dusting of icing sugar and some cream or a good quality icecream.

My six fillings were: almond and walnut , strawberry, fig, orange, apple and mixed berries. All I did was to place the various ingredients on the top of the tarts. None of the toppings were pre cooked. The figs and oranges are the glace kind (these came from the wonderful Pomona Fruits - best glace fruit ever! http://www.pomonafruits.com.au/ ) The apple and the strawberries were just sliced thinly raw, and the berries were just a handful of the frozen kind I had in the freezer. I sprinkled a little bit of castor sugar on the berries and the strawberries before putting them in the oven and when the tarts were cooked I brushed them all with maple syrup when they were still warm to give them a glaze.

I have given the basic tart recipe below, but go with any topping you fancy - I came up with six just based on what I had in the pantry today - the possibilities are endless. The filling is a simple almond based one that isn't overly sweet.

And here is today's tart selection - my recipe makes 16 tarts


You will need: 4 sheets puff pastry, 200g almond meal, 1 egg, 1/2 cup cater sugar, 100g butter, 1/3 cup maple syrup and whatever topping/s you have chosen.

Method: Melt the butter and combine with the almond meal, sugar and the egg. Set this aside. Cut the pastry into 4 rounds for each sheet (this will make 16 tarts) I used a small upturned rice bowl as a cutting guide.

Spoon the almond mixture onto the pastry and spread it out so it almost comes to the edge. Add your chosen topping. Fold/pinch the edges of the tarts the whole way around. Chill the tarts in the fridge for 15mins.

Bake in a moderate oven for 15-20 mins or until puffed and golden brown. When you take them out of the oven, brush them with maple syrup to form a light glaze.

*

Saturday, July 18, 2009

Middag! (that's Swedish for dinner)

Swedish meatballs (Kottbullar) are probably the best known dish in Swedish cuisine and are usually part of the traditional smorgasbord. They are a crowd pleasing entertaining dish or perfect for a hearty, warming supper and for good reason - they are so tasty (and who hasn't had a sneaky meatball stop at the cafe when bookshelf shopping at IKEA? Guilty as charged )

So, think "Sweden", put on your viking horns, head to the kitchen, crank up ABBA's Greatest Hits and get cooking! (OK, if you don't like ABBA, you can substitute Roxette - they are Swedish too)


Swedish Meatballs (Kottbullar)


You will need: 500g beef mince, 1 finely chopped brown onion, 2 tablespoons finely chopped celery, 1/2 cup fresh breadcrumbs, 1 egg, 2 tablespoons finely chopped gherkins or pickled cucumbers, 1 tablespoon chopped parsley, 1/3 teaspoon ground/grated nutmeg, 1 tablespoon olive oil, 1 tablespoon salted butter, 1 tablespoon plain flour, 500mls beef stock, 250ml cream, salt and pepper.

Method: Heat a splash of olive oil and half of the butter in a pan and cook the onion and celery until it begins to turn transparent. Set aside.

In a mixing bowl, combine the mince, breadcrumbs, egg, gherkins/cucumbers, parsley and nutmeg. Season well with salt and pepper. Add the cooked onion mixture and using damp hands mix thoroughly. Shape into small balls an put them on a tray. Chill them for about an hour in the fridge.

Heat the olive oil and remaining butter in a pan and gently cook the meatballs in batches until lightly brown. Remove them from the pan and set aside.

Add the flour to the pan and cook for about a minute. Remove from the heat and whisk in the stock. Return to the heat and gently simmer until the mixture starts to thicken. Add the cream and simmer for a couple of minutes.

Return the meatballs to the sauce and mix them through gently. Simmer for another couple of minutes. Serve with mash or crusty bread.

*

Thursday, July 16, 2009

Seductive Seafood - Barramundi, Prawn and Scallop Pie

Inspired by the chilly weather and MasterChef's pie challenge earlier in the week, I decided to whip up a lovely seafood pie for dinner tonight. The advantage of seafood is that it cooks so fast, so you can have it on the table in the shake of a lamb's (or should that be fish's) tail. I used Barramundi, Prawns and Scallops for this pie, but you could use just fish, or go the other way and add other seafood like mussels and clams. I decided to take the whole fish theme a bit further and used fish scales as the visual inspiration for the pastry crust. I cut out the puff pastry using an eggcup and just layered each circle, overlapping each other for a fish scale effect. If you can't be bothered cutting out "scales", just lay a pastry sheet right over the top, as you would a normal pie. I know that strictly speaking, your pie filling should really be cool before adding the pastry top, but I was in a hurry (MasterChef was starting in 10 minutes!) so I whacked the filling into the fridge to cool a bit before moving to the pastry step.

The filling of the pie is very flavoursome and suprisingly aromatic, through the addition of fennel, herbs, wine and Dijon mustard. Yum! I chose to make a large pie, but this would work beautifully as small, individual pies. So, seafood lovers, here we go......


Barramundi, Prawn and Scallop Pie


You will need: 2 sheets puff pastry, 200g scallops, 6 large prawns, 1 large barramundi fillet, 2 medium potatoes cooked and diced. (The potatoes should still be a little firm to touch and not too soft), Splash of olive oil, 1 brown onion finely chopped, 1 cup finely diced fennel, Half cup finely diced celery, 2 cloves chopped garlic, 1 cup white wine, 2 tablespoons each parsley and chives, 2 tablespoons salted butter, One and a half tablespoons plain flour, 3 cups milk, 3 teaspoons Dijon mustard, 1 tablespoon grated parmesan, 1 egg lightly beaten, salt and pepper to taste.


Method: Chop the barramundi into chunks and make sure there are no bones remaining in it. Set aside with the other seafood. Heat a pan and add a splash of olive oil. add the onion, fennel, garlic and celery and cook until starting to get transparent. Don't let it brown. Add the garlic and potatoes and cook for another minute. Add the seafood and then the wine, stirring gently. The wine should bubble up quite vigorously. As soon as the seafood looks half cooked, remove from the heat and set aside. This will happen fast, so watch the seafood and don't overcook it.


In a seperate pan, melt the butter, and when it starts to foam, add the plain flour. Stir it in well, to make a roux. I use a whisk for this - it means you can remove any lumps that might appear in the sauce quickly and easily. Let the roux cook for a minute or two (you want to cook the flour well, but be careful not to let it brown. If it does, start again!) Add half of the milk and whisk quickly and thoroughly. Keep whisking and gradually add the rest of the milk. Dont be insipid with your whisking - put your back into it - you don't want lumps!


Let the sauce cook for a few minutes, until it thickens and easily coats the back of a spoon. Stir in the mustard, salt and pepper to taste and the parmesan. Add the seafood mixture you set aside to the sauce, along with the chives and parsley. Stir it through gently and then pour into a pie dish or open casserole dish. Put it in the fridge to cool off while you organise the pastry. (You could make the pie to this step the day before if you wanted to, so the filling is completely cold, but I was impatient and did it all at once)


Using an egg cup as a cutter (or if you have a real cutter about that size, well, aren't you just the cheffy type!? - use that) cut out 2 sheets of circles that will make "scales". Lay the circles over the top of the pie filling, overlapping to resemble fish scales. Brush with the beaten egg and bake in a moderate oven for about 25 minutes or until golden brown.


Let the pie sit for 10 minutes before serving. If you can wait that long!


*

Wednesday, July 15, 2009

Great Culinary Moments in TV - Cracked Pepper???

One of my very favourite "Chaser" moments. And I must admit, I'm with Chris on this one. If I actually want cracked pepper, I'll bloody well ask for it!!!! Enjoy.

http://www.youtube.com/watch?v=jyFZbf6n2As

*

Monday, July 13, 2009

Go-Go-Gourmet Gadgets

When it comes to kitchen gadgets/machines, I believe that most of the time "less is more". I'm always wary of cramming my storage space with gadgets that may only be used once or twice a year, or that are designed to do only one thing. How many people have bulky popcorn machines, pancake,bread or fairy floss makers etc taking up cupboard space? A couple of years ago I did a ruthless cull of any kitchen equipment/cookware that was past it's prime or that I never really used, giving some away to friends and donating the rest to a charity shop. Not only did it free up my cupboard space but it also made me realise how little you actually need, even if you cook as much as I do. It make me think about generations of cooks before us who produced wonderful dishes with the most humble of kitchen tools. I'm not advocating that we all throw out our food processors or the tools that really make our cooking lives simpler, just that for me, having a hard look at what I owned and didn't actually use or need led me being more conscious and to consuming/purchasing less. Now, instead of being seduced by every cookware store I see I am a lot more pragmatic - Do I really need this? How much will I actually use it? Does it require lots of space/cleaning? Do I already have the tools to do the same job?

Don't rule out recycled cooking gear if you need to add to your tools - I have bought some great quality equipment over the last few years - vintage mixing bowls, serving platters, glassware, chopping boards, tablecloths and other goodies, all from secondhand stores or charity shops. Give everything an extra thorough clean and away you go. As well as saving you lots of money, you are also recycling and being more enviromentally responsible, which can only be a good thing.

Of course I do have my own favourite kitchen must-haves - good knives, my heavy mortar and pestle big and deep enough to hold a large batch of spice paste and to crush nuts/spices without half of them ending up on the floor or on the bench, my trusty hand blender, a microplane (one of my best purchases ever), stainless steel mixing bowls (that do double duty as a double boiler when placed over a pot of boiling water), decent sized chopping boards, my favourite pan which was a birthday gift from Michael last year(I use it almost every day) Obviously your must haves are going to depend on what you tend to cook - I don't have a lot of cake tins/baking stuff, because I rarely bake, but if you are always cooking cakes and biscuits, then that equipment is going to be a priority for you.

I do occasionally add to my cooking tools - I recently bought a grill pan (found at a discount cooking store reduced from $130 to $35!) I have already used it quite a lot, so it was a good purchase. I was also interested in trying the silicone poaching "pods" that I have seen popping up in cookware stores lately. My egg poaching skills have always been a bit hit and miss (invariably they fail when I have guests, don't you hate that??) so I bought myself a pair of poaching pods and I was really happy with the results......


Product: Silicone Poaching Pods
Price: Mine were $19.95 (a pair)
Where do I get them?: Specialist cookware stores


How they work: You simply oil the pods lightly (makes the eggs slip out very easily) and then break an egg into each of them. You place them in a pan of boiling water and put a lid on the pan. The eggs float on the water and poach perfectly. You slide the eggs out of the pods and voila! No more dodgy/broken/sodden poached eggs!
You'll love them if: Your track record with poaching eggs is as bad as mine!
Gourmet Goddess gadget rating: 9/10 - simple to use, easy to clean and very effective.

*

Sunday, July 12, 2009

Slow Food Sunday

For a while I have been thinking about cooking oxtail and reading a bit about different ways to go about it. I have a memory of eating a stunning oxtail stew in a pub years ago, when I was spending a winter weekend up in the Blue Mountains. I was blown away by the flavour and richness of the dish and the soft, melting texture of the meat. I have noticed a shift in recent years, away from the more expensive cuts of meat towards cuts that you would previously never see on any restaurant menu - lamb shanks in particular come to mind. Butchers used to practically give these away for dog food, now we seek them out because we know that if we treat them right, they are delicious and full of flavour. Oxtail is no exception.

I have never cooked oxtail before, so after doing a bit of research on how other cooks handle it, I came up with my own recipe and crossed my fingers. Happily, this is one cooking experiment that went very, very right. The key to this cut of meat is to cook it for a very long time - most recipes I found recommended between 2-6 hours. I went with 5 hours for my version. As each hour went by and I gave the oxtail a stir and a taste, I became more and more excited by the flavour that was developing. This dish is really worth the slow cooking time because the end result is to die for. It just needs you to give it a little attention from time to time and to stir the pot well, so that the sauce does not catch too much on the bottom. I started the dish in the morning just after breakfast and kept it just barely simmering on the stove through to the mid afternoon. It was a particularly chilly winter day today, so I was all about comfort - the beautiful rich aroma coming from the kitchen and the fact that I didn't even get out of my pajama pants for the entire day made me feel very cosy indeed. :)

So, here it is - Slow cooked oxtail stew. Aromatic, flavoursome and with juicy meat that just falls off the bone. I served it with parsnip and potato mash and some broad beans. Delicious.


Slow Cooked Oxtail Stew


You will need: 1kg oxtail (get the butcher to cut it into pieces about 4 cm long), 2 tablespoons plain flour, 1 teaspoon paprika, pepper and salt, olive oil, 1 cup white wine, 1 litre good quality beef stock, 1 tin crushed tomatoes (I used italian ones), 3 chopped cloves garlic, 6 sliced eschallots, 1 large chopped brown onion, 1 cup each of finely diced carrot, celery,fennel, 2 tablespoons finely chopped parsley stalks.

Method: Combine the flour, paprika and salt and pepper in a plastic bag and add the oxtail. Coat the oxtail pieces well in the flour and dust off any excess. Heat a generous splash of olive oil in a heavy based dish (if you are lucky enough to own an extra heavy cast iron/enamel dish, this would be ideal.) Brown the oxtail a few pieces at a time and then set them aside. Be careful not to let the flour in the pan burn - brown is ok, but not black.

Splash a few tablespoons of the white wine into the pan to deglaze, and give it a stir to lift any brown bits from the bottom of the dish. Add an extra tablespoon of olive oil and add the onion, eschallots, celery, carrot, fennel, garlic and parsley stalks. Cook the vegetables for a few minutes until the onion starts to look transperent.

Add the oxtail and stir through the vegetable mixture. Next, add the remaining wine and let it bubble for about a minute, to cook off the alcohol and to allow the meat to soak up the flavour. Now, add the stock and tomatoes, a generous seasoning of pepper and give it another good mix.

Bring to a very gentle simmer - the bubbles should barely break the surface - and cook covered for 3 hours and then then take the lid off and continue uncovered for another 2 hours. Give the dish a stir from time to time and make sure that the sauce is not catching on the bottom.

Serve with mash or polenta and winter vegetables.

*

Saturday, July 11, 2009

Spaghetti Vongole

My plan for dinner tonight was to cook some fish, but when I went down to my local fishmonger to choose something, I noticed that he had lovely fresh looking Vongole (Clams) in stock, so I decided to ditch the fish idea and to cook one of my all time favourite pasta dishes - Spaghetti Vongole. This dish is very fast to cook - pretty much as long as it takes to boil the pasta - and has a delicious flavour with few ingredients. I have eaten versions of Spaghetti Vongole that use cream in the sauce - I prefer to omit the cream and just use a little salted butter at the end. The dish is lighter and the butter and juices from the clams gives enough richness to the sauce for my taste. Of course, If you do enjoy something a bit richer, then by all means add some cream to your sauce.


This wonderful dish is not a cook ahead and reheat type of recipe - It is at it's best served right away, so have everyone at the table, ready to eat when you put the pasta on to boil. Even though it is very simple, I think this makes a really lovely dinner party dish if you are pressed for time. A few glasses of red wine, some crusty bread and a platter of fragrant and glistening Spaghetti Vongole and you have a perfect Italian meal that looks great.

Tonight's recipe serves two - buon appetito!!


Spaghetti Vongole


You will need: 500g Vongole (Clams) in the shell, A splash of olive oil, 2 cloves chopped garlic, 1 teaspoon sliced chilli (more if you like it a bit spicy) 1 cup white wine (tonight I used a Hunter Valley Semillon), 1 tablespoon salted butter (you can use more or less, whatever suits your taste), A big handful chopped Italian parsley, spaghetti, salt and pepper. Parmesan to serve.

Method: Put your pasta water on to boil, ensuring that you add a good pinch of salt. Once it comes to the boil, add your spaghetti. Keep an eye on the pasta and give it a stir now and then. You want it to be al dente - not overcooked.

Now to the sauce - add a generous splash of olive oil to a pan and add the chilli and garlic. Let it cook for a minute or two - you do not want it to brown. Pour in the wine to deglaze the pan. Let it come to a simmer. Add the clams and stir well. Put the lid on the pan and let the clams cook for about a minute. Be sure to disgard any that do not open.

Add the butter, then the drained, cooked pasta. Season well and stir through the parsley.
Serve right away with freshly grated parmesan.

*

Monday, July 6, 2009

Gourmet Goddess and Gordon!

On Friday we headed off to the Good Food and Wine Show for a fun, but exhausting day of food, wine and the fabulous Gordon Ramsay. Those who know me also know that I am a huge Gordon fan, so you can imagine how excited I was to not only see him cook live, but also to meet him in person. I felt like a teenage girl at a Justin Timberlake concert!! I also have a bit of a confession to make - I may have "accidentally" rested my hand on Mr Ramsay's buttocks for longer than was strictly appropriate. Wrong? Probably. Why? Because I could :) Gordon didn't seem to mind - He was absolutely charming, with a very cheeky sense of humour and more than a little touch of the ratbag about him. And he hardly swore at all ;)

Anyway, here I am with the wicked Mr Ramsay.....


And he even laughed at my jokes.....


And he autographed his latest book.......


As well as getting a bit of Gordon action, we also tasted a lot of different wines, cheeses, olive oils and other produce and came home laden with bags of tasty things that took our fancy. My favourite purchases of the day were some beautiful Australian made glace figs and oranges and an amazing balsamic vinegar with native Lemon Myrtle. I also bought some lovely cheeses (including a to die for marinated Persian feta) and a bottle of Verdelho from Hope Estate in the Hunter Valley. I'm not usually a fan of sweet or dessert wines, (or sweet anything really) but this one was gorgeous.

In other celeb spotting news, we also sighted Garry Meighan, chef and judge on Masterchef Australia and also my biggest chef crush, the feisty frenchman, Manu Feildel *swoon* - being that gorgeous and that bloody talented should be illegal.

If you missed the show this year, put it on your to do list for next year. Who knows, you might even get to squeeze Gordon Ramsay's bum in the process!

But it's all about the food. Really :)