Friday, January 2, 2015

A Summer Lunch with a Friend

Today we invited our friend Kim over for a New Year catch up over lunch. It's great to be on holidays and to have the luxury of a leisurely lunch during the week, along with a few glasses of wine and some good conversation. The weather is really warm right now, so I wanted a menu that kept me out of a hot kitchen, and that also took advantage of the beautiful Summer produce around at the moment. I managed to come up with a menu that delivered all that, as well as ensuring I didn't have to turn the stove on inside at all. Win!

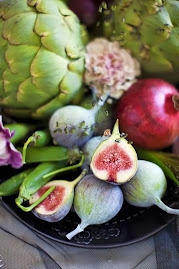
I thought I'd set the tone with some lovely bright flowers in my favorite vintage vase to pretty up the dining table a bit. Red and green is also kind of festive, don't you think?

Pretty, Pretty.

On New Year's Day I really felt like cooking a French style terrine (as you do!) so that made up our first course. I love a good terrine, and this one is my version, based on lots that I tasted when I was travelling in France. Every little cafe and restaurant seemed to have their own version (Terrine de Maison) and over the years I've developed my own. It is a mixture of pork and chicken, along with bacon, capers, pistachios, juniper berries and a touch of allspice. It is really delicious and better eaten the day after you make it. I've had a couple of requests for recipe, so I will share it with you at the end of this post. Here is what it looked like on the day I made it.


My Terrine de Maison


I served the terrine today with some crisp lettuce hearts, cornichons and some beautiful Bruny Island plum jelly that I brought back from my last trip to Tasmania. We also enjoyed it with slices of crusty French bread and lashings of fabulous Pepe Saya cultured butter. 


Plated Terrine 
with accompaniments

For the main course, I visited the fishmonger this morning and decided to see what they had that looked good, and I would base a dish around that. I found some super fresh, large local prawns and some really good looking line caught Blue Marlin steaks. I cooked them outside on the BBQ, along with some fresh asparagus and some zucchini flowers. I made a simple sauce with olive oil, lemon juice, cherry balsamic, chilli, capers, parsley, garlic chives and fresh oregano from my garden. I just drizzled the dressing over just before serving. I added some grilled lime on the side and some baby chervil herbs for a bit of freshness.


The Fish Course

The dessert was super simple. I bought 3 perfect white peaches that are now in season and really beautiful and fragrant, I always like creating dishes out of what is in season, and these are great right now. I blanched them in boiling water to remove the skins, chilled them and then served them drizzled with a sweet syrup made from palm sugar - and some fresh coconut cream and lemony tasting baby sorrel leaves. Easy - and a fresh and delicious end to a summer lunch. This is great dessert for people who can't eat dairy products. The coconut cream gives a velvety richness without any dairy at all. I notice that supermarkets are stocking it now, in the chiller section next to the sour cream and other dairy based creams. Have a look for it - it has a lighter, fresher taste than the tinned coconut cream you buy to make curries with.


White Peach
With palm sugar, coconut cream and baby sorrel


We had a lovely few hours eating and chatting and drinking wine and everyone enjoyed the menu I had put together. Apart from the terrine, which was made the day before, it was a very low stress menu for a hot Summer day.

As requested, below is the recipe for my terrine. You can cook it in a traditional ceramic terrine (the rectangular dish that gives the dish its name) or a metal loaf tin, if you don't have a terrine. You will also need something to place on top of the terrine while it is cooking, to compress it. I use a small rectangular ceramic dish that works fine.


Gourmet Goddess Terrine de Maison

500g Pork Mince
500g Chicken Mince
250g Finely Chopped Bacon
15-20 Slices Prosciutto
1 Large Finely Chopped White Onion
2 Cloves Garlic
1/2 Teaspoon Allspice
6 Crushed Juniper Berries
1 Teaspoon Finely Chopped Rosemary (Don't use dried Rosemary for this recipe)
1 Tablespoon Wholegrain Mustard
1 Tablespoon Small Capers 
2 Teaspoons Salt
1 Teaspoon Ground Black Pepper
1 Egg
1 1/2 Cups Breadcrumbs
3 Pinches Cayenne Pepper
1 Tablespoon Butter
1 Tablespoon Olive Oil
Olive Oil Spray

Method:

Preheat the oven to 170C. Cut a piece of baking paper to line the bottom of your terrine dish or tin. Spray the tin with olive oil. 

Carefully line the bottom and side of the tin with a layer of prosciutto. Set aside.

In a pan, heat the tablespoon of butter and olive olive oil. Add the onions and garlic and cook until transparent. Don't have the heat too high - you don't want the onions or garlic to brown. 

In a large mixing bowl, add the cooked onion and all of the other ingredients. Using clean hands, thoroughly mix the ingredients until very, very well combined.

Fill the terrine with the mixture, taking care that it is packed in evenly. When you have finished, add a weight to the top of the terrine. I use a small rectangular ceramic dish to do this. You want the terrine to be compressed during cooking, which results in a nice, even terrine when you go to cut it later. Cover the whole dish with foil.

Cook in the over for 1 hour 20 minutes. When you remove it from the oven, take off the foil and carefully drain any excess cooking juices that you may find at the bottom of the terrine.

Allow the terrine to cool in the dish for about 30 minutes, before turning it out on a plate and putting it in the fridge to chill. You can eat it once it's cold, but I recommend waiting 24 hours, as the flavours develop really nicely given a little bit of time.

Serve with crusty bread, any kind of pickle of fruit jelly and some crisp lettuce leaves. It's also great in crusty rolls for a picnic.

Serves 8 People


*******

Sunday, November 16, 2014

Insanely Good-For-You Bliss Balls

This year, I have been on a bit of a mission to cut out as much processed food from our household's diet as possible. I always thought we were pretty good with avoiding processed food but when I really looked at what we were eating, I found quite a few nasties in there. There are additives and truck loads of processed sugar and salt in so many of our pantry staples it makes your head spin. I decided to get rid of the worst offenders and dramatically increase our consumption of whole foods. So hello leafy greens, fresh herbs, vegetables with every meal, seeds, nuts and eggs! I've also ramped up my garden activity and I'm growing a lot more of our own vegetables and herbs. After all, it's pretty easy to grow a few basics and you get the bonus of knowing exactly where it came from and that it's super fresh. I absolutely love spending time in the garden, so I don't really need an excuse to get out there and get my hands dirty growing food for us.

Today's recipe that I'd like to share with you is a gorgeous sweet, chocolatey treat that contains no processed sugar, wheat or dairy and is really quick and easy to make - my chia seed and cacao bliss balls. I came up with this recipe when I was trying to find a sweet mid afternoon treat that wasn't full of processed rubbish, but would still provide a delicious chocolate hit. I noticed a lot of health food stores and cafes had started selling different versions of these and figured I would have a go at making my own. How hard can it be? Well the answer is, not hard at all!


Chia Seed and Cacao Bliss Balls

You will find most of the ingredients for this recipe at your local supermarket or grocer, however you may need to head to the health food store for the raw cacao powder/nibs. Remember that cacao powder is not the same as cocoa powder (which is often full of sugar), it is a less processed product with a lot more nutritional value too, including heaps of antioxidants. When I make a batch of bliss balls, I wrap each one individually and pop them in the freezer. It means that they last a lot longer and you aren't as tempted to scoff the whole lot in one go! They don't get super hard when frozen, so you can grab one out of the freezer and you don't have to wait for them to defrost either.

I hope you enjoy my chia seed and cacao bliss balls. These little treats pack a big nutritional punch, will keep you going through the afternoon and taste delicious. Perfect to have with your afternoon cuppa. In fact, I'm going to put the kettle on right now.....


You will need: 300g fresh dates, 1 heaped tablespoon raw cacao powder, 1 heaped tablespoon cacao nibs, 1 cup chia seeds, 1 cup dessicated coconut, 1/2 cup pepita seeds, Extra coconut to coat the balls.

Method: Remove the seeds from the dates and place them in a food processor. Add the cacao powder, 1 cup coconut. Process until all combined.

Put the date mixture in a bowl with the cacao nibs, chia seeds, pepita seeds and mix well with your hands until well combined.

Shape into small bite sized balls, roll in the extra coconut.

Makes 12-15 bliss balls. Keep in the fridge - also suitable for freezing.

******


Monday, September 1, 2014

Just to let you know.....


The Gourmet Goddess
is juggling a whole lot of things at the moment!
 
  
But don't fret -
there will be more gorgeous GG content
coming your way very soon!
 
GG XXX


Wednesday, July 2, 2014

Winter Truffles

On our recent trip to Tasmania, I was so excited to see fresh truffles for sale at the farmer’s market. I absolutely love them, and being such a rare (and expensive!) treat, it isn’t very often that you see them available for the average shopper to purchase as a raw ingredient. A friend recently asked me what truffles taste like – hmmm... hard to pin down, as they have a really unique flavour and aroma, and if you asked 50 people you would probably get 50 different answers. My personal description would be - earthy, pungent, a bit mushroomy with the undertones of Autumn leaves and Patchouli. They can be a bit of an acquired taste, but that dark, rich character really appeals to me. If truffles were a subculture, I reckon they would be Goths - dark, brooding and mysterious!

A truffle is actually the fruit body of an underground fungus called Ascomycete, which grows in a symbiotic relationship around the root systems of trees, most commonly oaks. They are harvested by special truffle dogs that are trained for this purpose. The truffle seller I spoke to at the market told me that his truffle dogs are so well trained, that they can smell whether or not the truffles are mature and ready to harvest, and will leave the ones that aren’t ready to dig up. Clever dogs!
Australia’s very first black truffles were grown near Deloraine in Northern Tasmania in 1999. This is where the truffles at the market came from. The area is ideally suited to a longer, colder growing season – which means truffles with a stronger, sweeter aroma than those grown in warmer climates. This makes Tasmanian truffles much sought after for their taste and quality.

Fresh Tasmanian Black Truffles

Once harvested, truffles should be eaten within about 10 days. Being a living organism, once taken away from their source of nourishment, they start to break down. A truffle will lose about 3% of their weight a day, once harvested. They should be stored in the fridge, wrapped loosely in paper towel, in a glass jar with a lid. This will prevent the whole fridge and everything in it being overcome with truffle!

Now let’s talk cost. The current market price for truffles is $2000 a kilo. Yep. $2000 smackeroos. That was the going price of the black beauties I found at the market. But as the truffle farmer reminded me, you would normally only serve around 6-8 grams per person. Well.....when you put it that way.....  And yes, I succumbed. We bought 50g worth. I used the excuse that it was a treat because we were on holidays.
That night I made a classic Italian truffle pasta dish. Simple and heavenly. Just spaghetti cooked al dente, good butter, finely shaved truffle, a little Parmesan and salt and pepper. So decadent, so aromatic - downright sexy! I used half of the truffles we bought, and took the other half home with us to enjoy a week later.

Tasmanian Black Truffle Pasta

The truffle season in Tasmania goes from June to September, so now is the perfect time to enjoy them if you have the opportunity to. And yes, they really are all that.

The black truffles we bought were from Truffles of Tasmania. I notice that they do sell them online, so if you are dying to experience the Tasmanian truffle season without leaving your kitchen, you can get more information here: http://www.trufflesoftasmania.com.au/
A word about truffle oil Oh boy. Where do I begin? The first thing to say is that the vast majority of "truffle oil" that you see for sale hasn't ever been anywhere near a real truffle. Sorry folks, but that's the reality. It's frequently just synthetically made from a compound called Dithiapentane, mixed together with some olive oil and flogged off to unknowing punters.  At first sniff, it's kind of like the smell of truffles, but the taste? Well, it aint' nothing like the real thing. Frankly, I find it cloying and absolutely vile - I really don't know why people still insist on ruining perfectly good ingredients with the hideous stuff.

Having said that, you can buy truffle oil that is legit - that is, oil infused with actual truffles. It tastes very different to the awful fake stuff that currently floods the market, and used judiciously can actually enhance rather than trash the right dish. Read the labels and ask questions - if the ingredient list mentions "truffle flavour" or "truffle essence" then it is fake. For Australian Gourmet Goddess readers, I do know that the truffle oil from the Simon Johnson label uses the real thing (the oil is infused with French truffles). I'm sure there are others - so do your research and buyer beware. 

*********

Monday, June 30, 2014

Seafood Chowder

We have just returned from a gorgeous week long winter escape to Tasmania - just the thing to bring a bit of joy to what is often mid year blah-ness. I was lucky enough to win return flights to Hobart courtesy of Destination Tasmania, so the trip was an unexpected and much welcomed surprise. We had already decided there would be no trips for us this year, as we saving to buy a house over there, but it seems that the Goddess had other ideas and so off we went!

Tasmania in winter is just beautiful - cold? well yes.... we actually got snowed on as we stood on the banks of an alpine lake taking in the pristine beauty of it. Little snowflakes fluttering down on a face numbing wind. Breathtaking - literally! But with the harsh winter, there is also a lovely cosy feel too - the smell of wood smoke and open fires, everyone rugged up against the cold. And of course, plenty of seasonal comfort food - which is the inspiration for today's recipe.

Filled with fresh seafood and flavoured with leeks and eschallots, my seafood chowder will more than warm the cockles of your heart - especially when served with warm crusty bread on a cold winter night. I used fish, scallops and prawns for my version, but you can use any seafood really. It is also beautiful with the addition of mussels and clams. For a budget friendly version, you can use just fish and it will still be delicious.

As well as my chowder recipe, I also wanted to share a new addition to my kitchen. I have been searching for an old copper kettle for ages, and was thrilled to find one in Hobart. Being an antique, it has a few bumps and mends on it - but no holes, which is the important part! I think it is just beautiful and has heaps of character. It's going to be a pleasure to use. I love the thought of using something that has a history - I wish my new kettle could talk and tell me where it's been and whose households it has been a part of. Here it is, pre- polish.

My Antique Copper Kettle


Now back to the chowder - it is best eaten freshly made and is not suitable to freeze. But it is so delicious you're unlikely to have any leftovers. Serve it will warm crusty bread and lashings of butter. Roaring winter fire optional.


Seafood Chowder


You will need: 400g firm white fish cut into cubes, 6 large shelled and de-veined prawns, 6 scallops, 1 large potato, 1 small carrot, 1 leek- white part only, 4-6 eschallots, 1 clove finely chopped garlic, 2 cups fish or vegetable stock, 2 cups milk, 3 tablespoons butter, 1 tablespoon olive oil, 2 tablespoons plain flour, 2 pinches cayenne pepper, 2 teaspoons chopped fresh parsley, a little extra olive oil, salt and pepper to taste.

Method: Peel and finely dice the carrot and potato. Set aside.

Finely slice the leek and eschallots. In a saucepan, heat 1 tablespoon of butter and 1 tablespoon of olive oil. Cook the leeks and eschallots on a medium heat for about 5 minutes, until very soft. Do not let them brown. Add the garlic, carrot and potato, season with salt and pepper and cook for another 5 minutes. Remove the vegetables from the pot and set aside.

Cut your prawns and scallops in half and season them with salt and pepper. Heat a little extra olive oil in the pan and cook them quickly on a high heat. The idea is to sear them and give them a little colour - they do not have to be cooked right through, as they will continue to cook in the chowder later. Remove them from the pan and set aside.

Now add 2 tablespoons of butter to the pan. Once bubbling gently, add the plain flour. With a wire whisk, combine the flour and butter thoroughly. It is important to use a whisk and not a spoon, as this will stop any lumps forming. Cook the butter/flour mixture for a few minutes on a medium heat.

Remove from the heat and whisk in the stock, combining well. Now return to the heat. Add the cayenne and milk and whisk it through. The mixture will start to thicken slightly. Add the vegetables back into the pot. Simmer gently for 10 minutes. If the chowder is too thick, add a little extra milk.

Add the fish and stir gently through. Allow to cook for about 2 minutes before adding the prawns, scallops and 1 teaspoon of chopped parsley. Taste for seasoning and add salt and pepper if required.

Spoon into bowls, top with the remaining parsley and serve with warm crusty bread. Serves 4 people.

******