Monday, February 27, 2012

Good things...Small packages

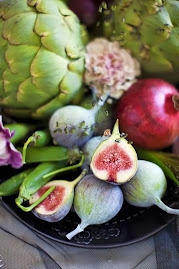
Out grabbing a few pre weekend groceries on Friday, I noticed a tray of gorgeous red figs at the greengrocer and thought it would be nice to use them in a dish this week. When I bought them I wasn't 100% sure what I was going to do with them, but then I was unpacking the shopping and I noticed I had some boned quail breasts in the freezer that I should probably think about using. Figs go beautifully with game, so it seemed logical to pair them up in a dish.

Quail is a game bird renowned for the delicacy of its taste. It may be very small, but it has delicious flavour in abundance. It is a particularly versatile game meat, suiting a wide variety of cuisines. It is simple to cook, which is great if you like the idea of game, but are daunted by cooking a duck or a turkey. There are many different breeds of quail - the variety I have used in this recipe was sourced from Game Farm, who breeds and supplies Japanese Quail grown the lush pastures of the Upper Hunter Valley in northern NSW. I've always been happy with the quality of their products (I have used their duck and turkey on many occasions) and they are quite easy to find these days. The Game Farm website will tell you where your nearest stockist can be found if you have no luck finding their quail.

If you are a bit squeamish about the idea of preparing quail, today's recipe is great, as it uses quail breast that is already off the bone. The flavour is not too strong and it is easy to eat - no small fiddly bones to deal with. This would be a good dish to try if you have never eaten quail before. All very managable. I actually love quail cooked in the Asian style - on the bone and super crispy, so you can actually eat the caramelised crunchy smaller bones - but I know that isn't everyone's cup of tea. I promise today's recipe is a much more straightforward affair. It would make a beautiful dinner party entree or a light lunch or dinner. If you absolutely can't face the idea of quail, you could perhaps substitute the quail for sliced chicken thigh. Sure, it isn't exactly the same dish, but the flavours would still work.

I have used beautiful fresh sorrel from my garden as one of the salad components of this dish. Sorrel is used commonly in French cuisine - particularly in sauces and soups - but it is delicious as a salad green. It has a fresh, almost grassy character that works beautifully with the sweetness of the figs. Sorrel is very easy to grow and a great addition to your herb garden. Always use the very young leaves if you are eating it as salad, as the mature leaves are strong and more suited to soups or other dishes.


Aromatic quail breast salad
with sorrel and figs


You will need: 350g quail breasts (skin on, off the bone),10 juniper berries, 1 teaspoon fennel seed, 1 mignonette lettuce, 1 cup sorrel leaves, 4 fresh ripe figs (each one sliced into 6 peices), 1/2 red onion sliced very finely, 1 lebanese cucumber deseeded and sliced.

For the dressing: 1 clove minced garlic,2 tablespoons walnut or hazelnut oil, 2 tablespoons sherry vinegar, 2 tablespoons maple syrup, 1 tablespoon lemon juice, pinch of cayenne pepper, 2 teaspoons warm water, salt and pepper.

Method: Crush the juniper berries and fennel seed (or chop them roughly) and place in a bowl with the olive oil and the quail breasts. Season generously with salt and pepper and combine well. Cover and put in the fridge to infuse for at least an hour - overnight is even better if you have time.

To make the dressing, whisk together the garlic, sherry vinegar, maple syrup, lemon juice, cayenne and warm water. Season with salt and pepper to taste - adjust amounts to your taste if required. You may want more lemon, or a touch more maple syrup. Just taste and adjust as you go.

Assemble the salad ingredients on your serving plates/platter.

Wipe the quail breasts with a paper towel to remove any large peices of juniper of fennel. Heat an oiled grill or frypan and cook the quail skin side down until crisp and browned. Turn over and allow to cook for another minute. The quail will cook quickly, so watch that you do not overcook it - don't forget that it will continue to cook when you are resting it.

Remove the quail from the pan and allow to rest for 5 minutes.

Arrange the quail over your slad ingredients and drizzle over some of the dressing. Serve right away. Serves 4.

******


Sunday, February 19, 2012

Making the Connection

We have been enjoying the beautiful chemical free, sustainable produce from Food Connect over the last few weeks. These guys source produce direct from the farmers and it is picked only a day or so before it is delivered to you. The food is all local and seasonal, so you are not only getting the best quality, you are also getting the best nutrition and ensuring that the farmers are paid a fair price for their product. Everybody wins. We have been really impressed by the quality of the fruit and vegetables we have been receiving - and it has been so inspiring to plan menus around what we get in our box each week.

There is something very special about actually knowing the farmers who are growing our food via regular newsletters and updates on the Food Connect website. You know their stories, what they are up to that week, even what they look like! The farmers receive between 40 and 45 cents in the dollar for their produce - to give you an idea, the big supermarkets like Coles and Woolworths can pay their producers as little as 5 cents in the dollar, while they pocket the profits. I know where I would rather my money went....

One of the goals of Food Connect is also to minimise how far the food travels, both to ensure quality and to aim for a lower carbon footprint. On average, the furthest any of the food we have received so far has travelled is between 50 and 80 kilometers.

I wholeheartedly recommend that you check out their website and see if they operate where you live. As well as fruit and veges, they also do a range of dry goods, bakery items and fresh free range eggs that you can also order as part of your delivery. They operate in Queensland as well as New South Wales and you will find all the info about them here: http://sydney.foodconnect.com.au/

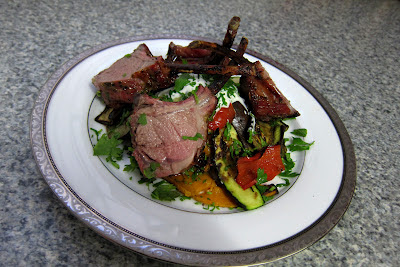
This week when our Food Connect box arrived I saw we had some lovely fresh eggplant, pumpkin and zucchini, so this became the basis for a yummy Summery BBQ meal with a bit of a mediterranean flavour. I added fresh herbs from our garden, a rack of lamb and a tangy Tzatziki sauce to create today's recipe. It is very easy to make, and the fresh flavours are wonderful - a great way to showcase those super fresh, chemical free vegetables.


Herbed BBQ Lamb
with char grilled vegetables and Tzatziki


You will need: 1 frenched rack of lamb (I used an 8 point/cutlet rack), 1 cup continental parsley, handful each of fresh oregano and basil, 2 large cloves garlic, salt & pepper, squeeze of lemon, 2 tablespoons extra virgin olive oil.

For the vegetables: 1 red capsicum seeded and sliced into thick strips, 1 eggplant cut into strips, 2 zucchini cut into strips, 6 slices pumpkin cut into strips. (the strips should be about 1cm thick) olive oil, salt.

For the Tzatziki:1 cup thick Greek style yoghurt, 1 large clove garlic, 1/2 cup finely diced continental cucumber, 1 teaspoon fresh chopped continental parsley, pinch cayenne pepper, squeeze of lemon, 1 teaspoon finely chopped fresh mint, salt and pepper.

Method: Combine the parsley, basil, oregano, garlic, lemon, olive oil, salt and pepper and either blend in a good processor or pound in a mortar and pestle until it makes a paste/marinade. Brush all over the lamb rack and allow it to marinate for an hour or so (overnight would be fine too)

Brush all of the veges with a little olive oil and season well. Set Aside.

Combine the tzatziki ingredients, mix well and refrigerate until needed.

Before cooking the lamb, remove it from the fridge about 40mins before cooking it. For best results, meat should not be too cold when you place it on the heat. Taking it out a little before you are ready to cook it will result in a more succulent and tender result.

Heat a Weber or covered BBQ. Cook the lamb for about 30 minutes, basting with any extra marinade as you go. Remove the lamb and allow it to rest while you cook the vegetables.

Add the vegetables to the BBQ and cook until lightly charred and tender.

To serve, pile a serving plate with the veges and drizzle with tzatziki. Carve the lamb and arrange on top of the veges.

******

Sunday, February 12, 2012

Rustic Coconut Banana Bread

As most of you know, I'm not really into baking that much. It is quite an exact science and I'm much happier creating dishes on the fly, tasting as I go and not slavishly measuring every ingredient. I made an exception this weekend when I realised that we had forgotten to eat the bananas that had been sitting in the fruit bowl since the beginning of the week. We had a handful of very ripe bananas that were crying out to be put in some kind of recipe asap. I decided to make banana bread with a couple of my own twists. Having never attempted banana bread in my life, I took a basic recipe and swapped all white flour for a mixture of white and wholemeal flour, as well as adding a little nutmeg and good quality vanilla.

I realised that I also had a pack of threaded, dessicated coconut in the cupboard (originally purchased with the intention of making coconut prawns that have not, as yet eventuated) so I thought I would add the coconut to the banana bread and see how it turned out. I was happy with the result - a home style banana bread that has a rustic, dense texture due to the wholemeal flour. If you wanted a lighter style bread, you could replace the wholemeal component with all white flour. My banana bread is not the light, highly processed style that you will find in cafes, however it has a great robust flavour that is really lovely toasted and served with some salted butter.


Just out of the oven


 The recipe below makes a small sized loaf - if you are using a larger sized loaf pan (similar to the sized loaf you would need to make the banana bread you see in cafes) then do what I did and double the amounts. I actually started with the amounts listed below, but when I looked at the large loaf pan I had chosen, I realised that I would need twice the amount to fill it. If you are using a standard loaf pan, the quantities below should be just right. Remember too that a bigger loaf will mean longer cooking time.

The coconut and banana combination works really well, both in terms of taste and texture. The bread is very moist, with a slightly crunchy outside crust and a sweet coconut aroma that smells just beautiful. I'm certainly not a baker, but I was happy with my first attempt at banana bread.


Coconut Banana Bread


You will need: 1 cup plain white flour, 1 cup wholemeal plain flour, 2/3 cup caster sugar, 1 1/2 teaspoon baking powder, 1 cup dessicated or threaded coconut, 2 large eggs, 1 teaspoon vanilla extract,3-4 ripe bananas, a few pinches of freshly grated nutmeg.

Method: Preheat the oven to 160C. Grease a loaf tin (or spray it with cooking spray) and line the base of the loaf pan with baking paper.

Mash the bananas well and add the vanilla, nutmeg and the eggs.

In a separate bowl, sift the flours and baking powder. Add the sugar and the coconut and combine well.

Add the wet mixture to the dry mixture and mix thoroughly. Pour the mixture into your prepared loaf pan.

Bake for about 60 minutes - the cooking time is going to vary depending on your oven, the sized pan and your ingredients (size of eggs, moisture in the bananas etc) The loaf is cooked when you insert a skewer in the centre and it comes out clean. Your loaf may take a little more or a little less time - just keep an eye on it and do the skewer test.

Remove the pan from the oven and allow it to cool for 10-15 minutes before turning it out on a wire rack to cool.

Serve as is, or toasted with butter.


******

Sunday, February 5, 2012

Pumpkin and Ricotta Ravioli

I really love pasta and have been known to make my own, but over the years I have learned a great standby if you want to make your own tortellini or ravioli quickly. I always keep a pack or two of the Chinese Gow Gee wrappers in the freezer so that I can make a batch of tortellini if the mood takes me. All the hard work is done, and all you need to do is think about what kind of delicious filling you want to put into them. You can buy Gow Gee wrappers at any Asian supermarket and they are very cheap. If you have never tried this cheat's way of doing filled pasta, give it a go.

Last Monday, as it was "No Meat Monday", I decided to make a vegetarian tortellini, using pumpkin and some ricotta cheese that I had in the fridge. It was an easy dish to do after work and it tasted just lovely. Instead of a traditional style sauce, I simply sauteed some young zucchini (in season right now) and added this to some chopped ripe heirloom tomatoes, a few herbs and some good olive oil. I really loved eating the tortellini with this sauce that wasn't really a sauce. It was fresh and tasty, and you could taste all the different tomato varieties with each bite.It is a great way to enjoy pasta in Summer, that tastes lighter than a full throttle, simmered sauce.

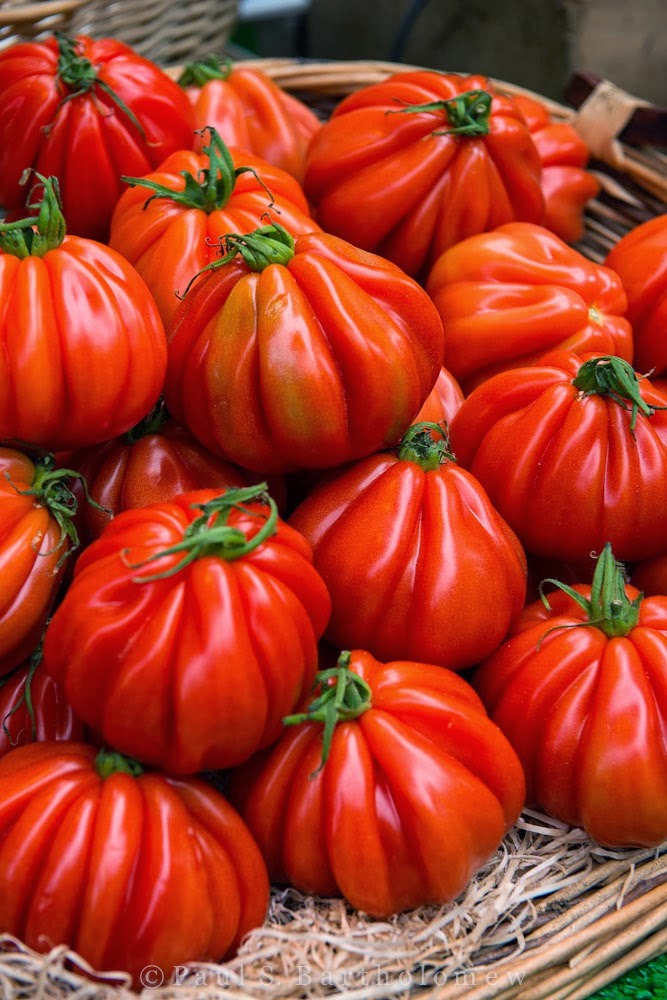
I have noticed that heirloom tomatoes are becoming more available, so next time you are at the greengrocer, check out these different varieties. As well as having different tastes, you will find them in all sorts of colours, which adds a great visual impact to your dishes. My tomatoes were red, orange, green and purple-ish, yellow and even dark cherry coloured. Just beautiful.


3 Steps to making the tortellini


As with making any filled pasta, it is a good idea to make sure that your filling is cold, otherwise the pasta will soften and possibly fall apart as you make them. The cold mixture is much easier to work with, so let your pumpkin cool down before making your filling. Even better, cook it the day before.

When using Gow Gee wrappers, your tortellini may also be a little more delicate than commercially made filled pasta. Just be aware of this and treat them with a little more TLC when you are draining them. It is a good idea to place them individually on the plate with tongs, instead of using a serving spoon, just to make sure you don't burst them.

Hope you all enjoy this beautiful no meat option. We will definitely be adding it our vegetarian repertoire.


Pumpkin and Ricotta Ravioli
with heirloom tomatoes and summer zucchini

 
You will need: 1 packet Gow Gee Wrappers, 1 egg, 1 cup cooked mashed pumpkin, 1 cup ricotta cheese, 1/2 cup grated parmesan cheese, pinch of nutmeg, 1 clove minced/crushed garlic,salt and pepper.


For the sauce: 2 small zucchini finely diced ,1 clove finely chopped garlic, 1 cup finely diced tomatoes (I used a variety of heirloom tomatoes). 1 tablespoon chopped continental parsley, 1 tablespoon finely chopped basil, olive oil, salt and pepper. Parmesan for the top of the dish (shaved or grated)

Method: Combine the ricotta, pumpkin,parmesan cheese, nutmeg, garlic, salt and pepper in a bowl. Mix well. Taste for seasoning and adjust if required.

Whisk the egg in a bowl with a tablespoon of water.

To make the tortellini, spoon some of the pumpkin mixture into the middle of the gow gee wrapper. Do not use too much mixture or the tortellini may burst during cooking. Brush one side of the wrapper with the egg mixture.

Fold the Gow Gee wrapper in half and press down firmly, ensuring you squeeze any air pockets out of the tortellini in the process. Bring the two corners together and fasten them, by squeezing them firmly so they stick together - add a little of the egg mixture to use as "glue" if you need to.

Put the tortellini on a clean dry tea towel in one layer, until you are ready to cook them.

To make the sauce, heat a splash of olive oil in a pan. Add the zucchini and garlic and cook gently until just cooked (it should still be a little bit firm)

Combine the still warm, cooked zucchini in a bowl with the tomatoes, parsley, basil, a drizzle of olive oil and salt and pepper.

Bring a large pot of salted water to the boil - cook the tortellini until they float to the top of the pot- this won't take very long, just a minute or two. Gently drain the tortellini and place on serving plates. Spoon over the sauce and drizzle a bit of extra olive oil over them if you like. Top with parmesan and serve right away.

Serves 2-4

******