Showing posts with label Beef. Show all posts

Saturday, January 12, 2013

Rockin' Ribs

A hot Sydney Saturday night, a new BBQ, a recent trip to the butcher and the inclination for something simple and tasty was the inspiration for today's recipe. It's been really hot this week, so the idea of not being stuck in the kitchen and doing some cooking outside was especially appealing. Yesterday we went out and bought a new BBQ. The process of finding one has taken a while, as we wanted something that would suit our needs but also not take up too much space. So many of them these days are bloody gigantic!! After much online research and household discussion we decided on the highly rated and very snazzy looking Ziegler and Brown Twin Grill. And yes, I had to choose the fire engine red model, couldn't help myself. Have to say we are really happy with it so far - I predict I'll be cooking with it all week as I experiment with different cooking modes and ingredients.

There was a selection of meat to choose from tonight, as this week we visited our meat supplier Grant at Feather and Bone - and had restocked the freezer in preparation for returning to work next week. Regular readers will have heard me talk about Feather and Bone before - a local company that supplies sustainably raised meat with guaranteed provenance. With a focus on supporting small producers, a commitment to the whole journey their food makes, from paddock to plate and their philosophy of sustainability, they are the pick of the crop as far I'm concerned if you choose to eat meat. I won't pretend that they are a cheap option - their meat is not produced on a large scale and you do pay a fair bit more for their products. We decided however, that we would rather pay more, get top quality food that has been ethically produced but have it less often in order to work it into our household budget.

If you live in Sydney and are interested in what Feather and Bone do, or you want to source their products, then the details for their website is at the bottom of this post. Oh, and by the way, this is not a paid endorsement - I'm just a regular customer who thinks highly of them and their excellent produce. To give you an idea of the sort of quality we are talking about, they supply meat to some of the best restaurants in the city - including Rockpool, Billy Kwong, Universal and Red Lantern among others.

So, what was for dinner tonight? Well, we had bought some gorgeous dry aged Gundooee beef ribs from the folks at Feather and Bone and thought that they would be perfect on the new BBQ. I made a delicious, smoky, sticky sauce - given a bit of a fresh kick with lime, chilli and a splash of tequila. I didn't bother putting the ribs on a plate - just served them on a huge chopping board in the middle of the table with BBQ'd corn on the cob, pickled red chillies and some extra lime. We ate the whole lot with our hands - messy, fun and delicious!


Tequila Lime Beef Ribs
served with BBQ corn and pickled chillies

A handy hint when cooking ribs (or anything else for that matter) where you are using a sauce that contains sugar - in this case, in the form of honey - is to pretty much cook the meat first, then glaze it. This will stop the sauce from burning quickly and your meat being undercooked in the middle. You want that lovely sticky sauce packed with flavour - but not cremated within an inch of it's life!

This simple recipe would work just as well with pork ribs or chicken wings, so crank up the barbie and give it a try. And remember, plates and cutlery are optional!

Tequila Lime Beef Ribs
You will need: 1kg Beef ribs, 1/2 cup BBQ Sauce, 1/4 cup Tequila, 4 minced or finely chopped garlic cloves, 1 tablespoon sweet paprika, 1/2 teaspoon black pepper, 1/4 teaspoon salt, Juice of one fresh lime, 1 teaspoon smoked paprika, 2 teaspoons hot chilli sauce (or less, if you don't like spice)
3 tablespoons honey. Extra lime, pickled chillies to serve. Extra salt and pepper.

Method: If the ribs are particularly large, cut them into smaller pieces so they are easy to eat with your hands. To make the sauce, combine the BBQ sauce, garlic, lime, chilli sauce, both kinds of paprika, pepper, lime juice, Tequila and honey in a small bowl.

Heat the BBQ to a medium heat. Season the ribs with salt and pepper and cook for about 10 minutes until they start to brown. If your BBQ has a lid, keep the lid down for most of this time.

Once the ribs are pretty much cooked, start to baste them with the sauce and cook for about another 10 minutes. Turn them and continue to baste from time to time. When cooked, remove the ribs to a plate and cover with foil. let them rest for about 10 minutes before serving.

Serve with extra lime and pickled chillies. Serves 2-4 people.

Note: You could easily cook these in a conventional oven if you wish - I would do them for about 25-30 minutes on about 200C. 

For more info on Feather and Bone check out their website:  www.featherandbone.com.au


******

Friday, October 5, 2012

Scoping something new - Kaya

Last week I scored an invite to try out Kaya - a new Izakaya Japanese restaurant/bar thanks to my talented graphic designer husband who created the artwork and logo for this new Oxford Street restaurant. The owners invited us as a thank you for the work that Andrew had done for them, and also to road test some of their dishes. Izakaya refers to a Japanese drinking establishment that also serves food. In Japan these types of eateries are most often frequented by people after work , serving drinks and food that is designed to be shared. Sort of a Japanese take on  the Spanish tapas concept.

Kaya has a large open kitchen, which lets you get close to the cooking action - something I always love. The small room had a nice intimate vibe, with lots of wood, textured walls and a warm, soft  yellow lighting arrangement that feels a million miles away from the tired, trash fest that is Oxford Street these days.

The Dining Room @ Kaya

We kicked off things with a Rhubarba - a delicious sake and vodka based rhubarb cocktail which was one of the nicest cocktails I've had.  The really fabulous flavour comes from a house made roasted rhubarb puree which makes you wish they served the stuff in a jug instead of a glass!

Being a sharing menu, we got to sample about 10 different dishes over the course of the evening and I will be sharing some of the highlights with you. We started with a serve of the ultimate Japanese comfort food, Okonomiyaki. Until now, I have only ever eaten the octopus version of this - which I adore, but this one was made with pork which worked really beautifully. I love the very savoury nature of Okonomiyaki, and this one was full of flavour. The traditional topping of sticky sauce and shaved bonito is an addictive combination.


Pork Okonomiyaki

For something with a lighter, fresher taste you can't go past the Sake steamed clams. The clams were plump and moist and cooked just right, and the delicious sauce had us wanting to lick the plate. The only down side to this dish was that there was nothing to mop up the rest of the sauce with so a lot of it was wasted.


Steamed Clams with Sake

A fried cuttlefish dish, with a punchy kick of chilli and salt was the perfect thing to accompany a second cocktail. A moreish, Kaya take on salt and pepper squid.


Fried Cuttlefish with Chilli and Salt


A super fresh, simple plate of sashimi followed, served with shredded daikon radish, wasabi and seaweed. The fish was succulent and clean tasting and beautifully prepared.


Kaya Sashimi

Kaya's version of Chicken Karaage - Japanese style fried chicken - was one of the dishes of the night, and the one that I think is destined to be one of their most popular. Super crispy, perfectly seasoned and moist and delicious in the centre, this chicken is seriously good. Served simply with Japanese mayo, it is a winner. One of the great things about it was the complete lack of oiliness in the chicken, even though it had been fried. Just so pleasant to eat. I think next time we visit we will be ordering a plate each!


Chicken Karaage


Pork belly is always a favourite, and Yakitori with pork belly, radish and spring onion was full of flavour and so, so moist it just fell off the skewer. I felt that the pork belly was just a tad too fatty, although it gets full marks for flavour. The pork had that great charcoal grill taste that you want in Yakitori.


Pork Yakitori

My favourite seafood is scallops, so I couldn't go past these dressed and roasted scallops on the shell. The scallops were plump and moist and cooked beautifully. So many places overcook them, and these were treated right. I would have liked a little more sauce, but apart from that - yum!


Roasted Scallops on the Shell


A hearty dish of grain fed beef on the rib, served with spinach satisfies the biggest carnivore. The dish is listed on the menu as being for two - it is huge, so we happily divided it between four. The meat is slow cooked, meltingly tender and the flavour was amazing.


Grain Fed Beef Rib
with Spinach


I really enjoyed my first excursion to Kaya. The thing that really stood out for me was that every dish possessed flavour in abundance. When you are tasting a number of dishes and only eating a few bites of each, it is important that you get the whole flavour and texture experience. It is not like eating a full plate of the same thing and tasting the dish "developing" as you work your way through it. First impressions count here. That is a rule I always apply when making canapes or any kind of smaller, shared dish - amp up everything flavour wise because your guests are potentially only getting one bite to experience it. Make it a good bite.

I got a chance to chat with some of the staff and found the service very good. Dishes also arrive quite fast. I was told that that the menu would have new items on an almost daily basis, depending on what produce was available and at it's best that day. A great  philospohy to have, and a way to keep things interesting for regular diners.

I think Kaya is a great addition to the Oxford Street strip, and we agreed that we would definitely head back there to try the other items on the menu - need to get some more of that Chicken Karaage and those divine Rhubarba cocktails!


Kaya Sydney
96 Oxford Street Darlinghurst
Ph:8354 0057
http://www.kayasydney.com/

Sunday, September 16, 2012

Spring Lunch with Friends

Today I had the great pleasure of catching up with Miko, an old friend from Japan who I met when she came to my school as an exchange student when we were seventeen years old. Yes, that's twenty seven years ago folks -  a hell of a long time in anyone's language!  Well, through the magic of social media we found each other last year and when she announced she would be coming to Australia for a short holiday, we couldn't pass up the chance to get together. My first thought was to take Miko and her husband Nao out to lunch somewhere by the harbour, but she has always been such a great fan and supporter of Gourmet Goddess, that I thought I would cook for her instead.

I wanted to showcase some really excellent Australian produce, but with the lovely Spring weather, I also wanted the menu to be a bit of a celebration of the season. We were blessed with a beautiful warm Spring day, so location wise we ended up alternating between the back garden and the dining room. It soon became apparent that we all shared a love of food, and there were lots of conversations about cooking and ingredients and the produce from our respective countries. Definitely culinary cultural exchange. Drinks wise, we enjoyed a bottle of Penfolds Eden Valley Traminer which we bought back from our trip to South Australia last year, along with a few glasses of Gekkeikan Sake - just so that both countries were represented of course!

We started our lunch with an entree of handmade crab tortellini, served with a delicious light lemon, chive and butter sauce. I used herbs fresh from my garden and good quality salted Danish butter for the base of the sauce. I wanted to keep it really simple, so that the silky texture of the pasta and the great fresh crab flavour could shine through. I originally considered doing a larger version of this dish as the second dish on the menu, but decided to make Australian beef the focus of the main course.


 Crab Tortellini
with Lemon Chive Butter Sauce
 

I know that beef is extremely expensive in Japan, so I wanted to treat Miko and Nao to a really good peice of grass fed, aged, top quality Australian meat that they would not have the chance to eat at home. We made a special trip to the wonderful Victor Churchill  http://www.victorchurchill.com/  for some top notch beef fillet to serve our guests. I cooked the beef nice and rare, in one large fillet piece - searing it first in a hot pan, then transferring it to the oven for about 15 minutes, resting it for ten minutes and then slicing it into four thick steaks. I find cooking the beef like this keeps it super moist, especially if you are using a fillet piece. The meat was ridiculously tender and so flavoursome.

I served the beef in a very simple French style, with a crisp on the outside, soft in the centre potato galette, some gorgeous new Spring asparagus and a rich mushroom sauce, made with Swiss Brown, Porcini and White Button mushrooms. Instead of pouring the sauce over the beef, I served it seperately to allow people to put the sauce where they wanted to put it, and to also give the dish a really clean presentation. The beef was a huge hit with our guests.


Rare Grass Fed Beef
with Potato Galette, Three Mushroom Sauce and Spring Asparagus


For dessert, I decided on a semifreddo, but with a bit of a twist - using a yoghurt and cream base instead of the standard cream and egg yolk base. The result was a velvety, slightly tangy semifreddo which I made up in a flexible silicone muffin pan to make moulded individual serves. I flavoured the mixture with some beautiful golden Hunter Valley honey which we bought at a roadside farm stall on a weekend away recently. Really fragrant and beautiful, with just the right amount of sweetness for the cream and yoghurt.

I teamed the semifreddo with an almond and pistachio praline (I made a batch of this a few weeks ago and had a nice big jar full, ready to use) and some sweet Queensland pineapple, which I caramelised with brown sugar in a hot pan. I served the final dessert with edible flowers from the garden to go with the whole Spring theme.


Honey Yoghurt Semifreddo
with Almond and Pistachio Praline and Caramelised Pineapple


I really enjoyed putting this Spring lunch together and sharing it with our lovely visitors from Tokyo. Imagine my delight when Miko presented me with a parting gift of good quality Wasabi and a supply of Bonito flakes she had brought all the way from Japan for me. What a fabulous gift! I see a whole lot more Japanese inspired dishes in my future. We are planning on getting to Japan in our travels eventually, and it will be fantastic to have Miko and Nao to show us where all the good food and Sake is! It was fantastic to catch up after 27 years - and sharing a meal together was the perfect way to do it.

******

Sunday, August 19, 2012

A Weekend Food Diary

This weekend I had an old friend from overseas staying with us, and because we wanted some quality catch up time, our plan was to stay pretty close to home, cooking, enjoying a few glasses of wine and taking the rare opportunity to spend time together. I thought that I would share what we have been enjoying over the last few days, all cooked at home with the exception of a Sunday morning brunch trip to nearby Addison Road Markets in Marrickville, where we ate a very eclectic breakfast and picked up a few fresh ingredients to bring home on the way. All of the dishes were quite simple and easy to put together, but they were big on flavour. Looking back on the weekend, we have certainly enjoyed a diverse menu!

Friday:
My weekend food diary begins with a Japanese inspired Friday night dinner. A selection of shared dishes, served on some of the lovely Japanese ceramics we brought back from our recent trip. We began with crispy calamari and a creamy wasabi mayonnaise, and a dish of pickled radish, fennel and carrot for a tangy, crunchy contrast.

Crispy Calamari with Wasabi Mayonnaise
Radish, Fennel and Carrot Pickle

Next, a sticky, chilli coated stir fried tofu and snake bean dish, made extra delicious by the addition of dried shaved bonito. I love the very savoury dimension that dried bonito always adds to a dish - the ultimate seasoning I think! I used a medium firm tofu for this dish - it is quite forgiving as far as being handled goes and retains it's shape really well.

Chilli Tofu with Snakebeans and Bonito

For the final component of our meal, I took a beautiful smallish piece of beef fillet and coated it with a crushed mixture of fragrant black, white and red peppercorns. I seared it in a pan with a little oil, then transferred it to the oven for about 15 minutes to continue cooking. After resting it for another 15 minutes, I sliced it very thinly and served it drizzled with a simple teriaki sauce and topped it with sesame seeds. The texture of the meat was soft, moist and buttery - so tender you could pull it apart with your fingers. Washed down with a few glasses of Sake, our Japanese inspired dinner was a lovely way to kick off the weekend.


Fillet of Beef Teryaki with Sesame

Saturday:
It was a lovely sunny Saturday, so for lunch we decided to cook outside. We headed off to the fishmonger and bought some locally caught octopus as well as some fresh Australian prawns, which we brushed with a simple and very quickly thrown together olive oil, paprika and garlic marinade. We cooked the whole lot over coals in the back yard, and ate our seafood with crusty bread and a salad of mixed leaves which we drizzled with a small amount of fruity olive oil and some cherry balsamic. So simple, but a lovely lunch.


BBQ Prawns and Octopus with Mixed Leaf Salad

Now, there are unfortunately no pics of what we ate for dinner Saturday night - I got a bit trigger happy with delete function on my camera - so you will just have to imagine the twice cooked pork belly, served with a dollop of creamy mash and new seasons zucchini flowers, which I stuffed with a little feta cheese, parmesan and sorrel picked fresh from the garden. Rich, tasty and very delicious. I always get very excited when I start to see zucchini flowers appearing at the greengrocer - it means spring is on the way, and it is the perfect time to enjoy these delicate, beautiful vegetables.


Zucchini Flowers

Sunday:
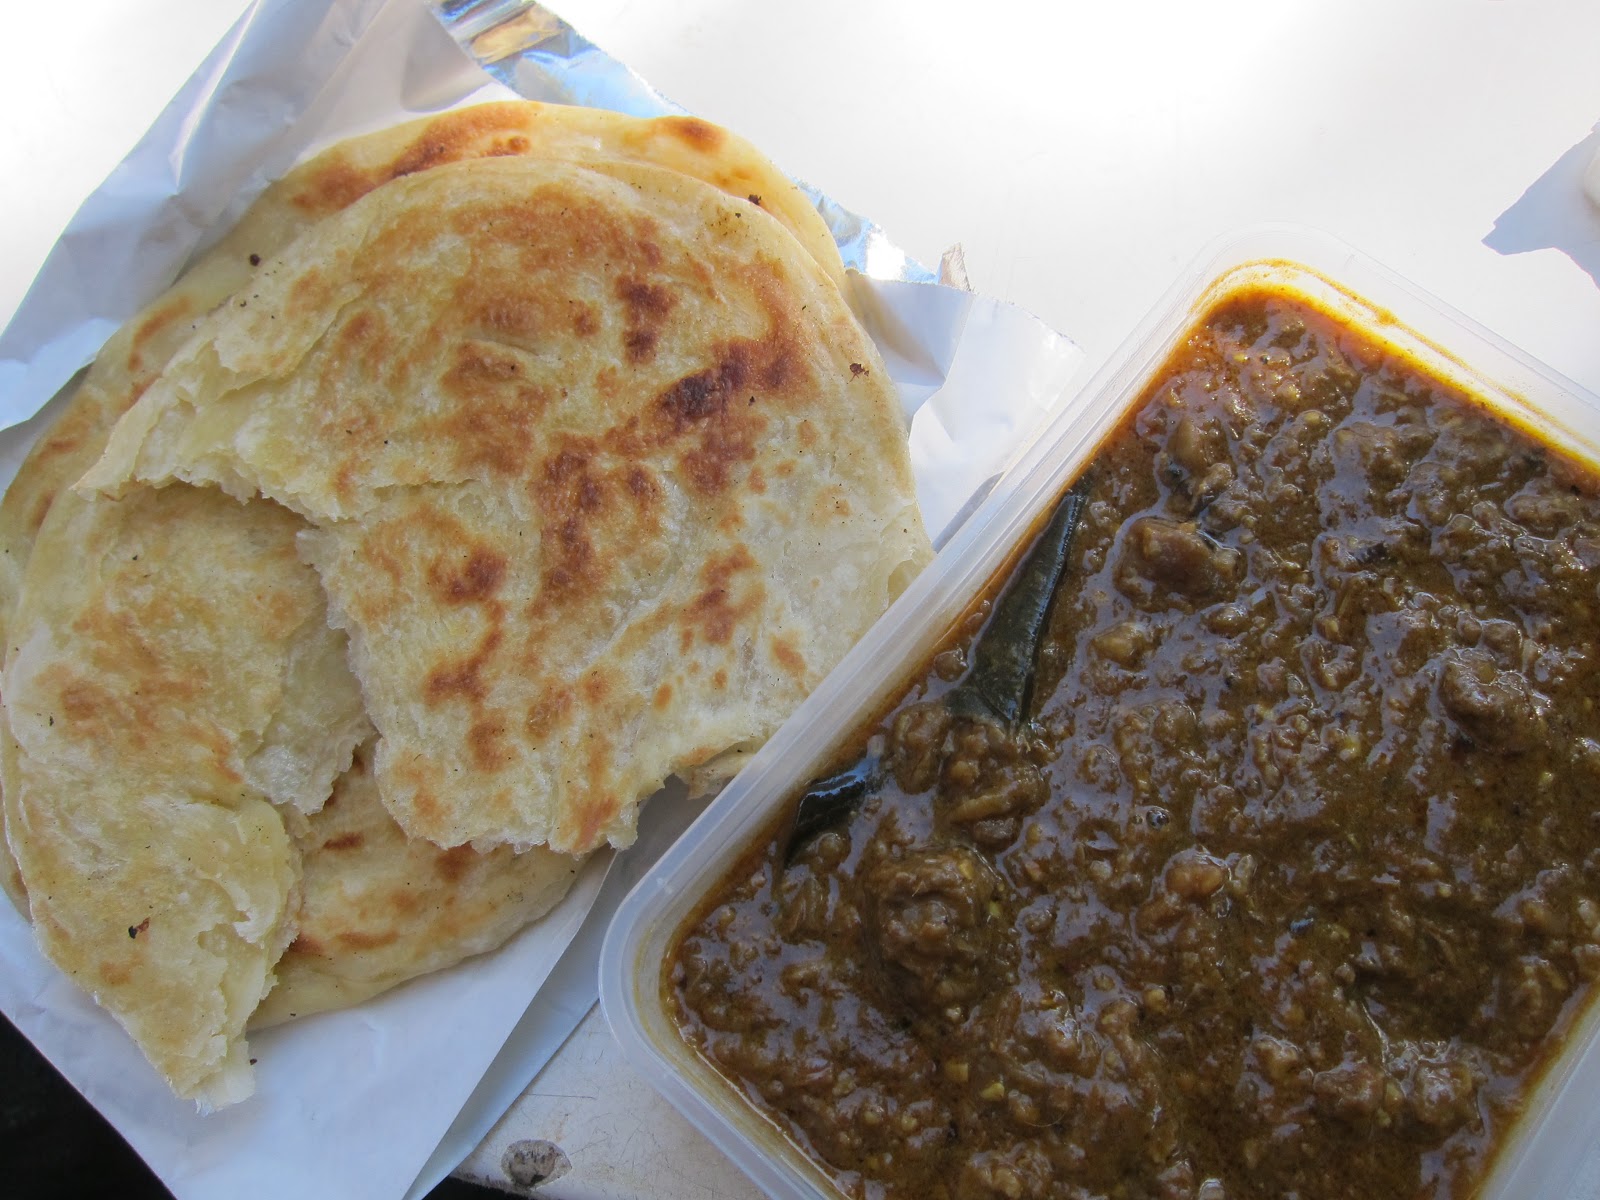
Sunday morning dawned bright and sunny - perfect for being out and about - so we headed off to Addison Road Market in Marrickville to do a little bit of produce shopping and to find our breakfast. Unable to make up our minds on what to choose, we ended up trying a selection of dishes. Of course we can't visit the market without tasting the delicious hawker style roti - this time served with a rich and flavoursome lamb curry sauce. Surely this has to be one of the best breakfasts on the planet - one of my all time favourites anyway!


Roti with Lamb Curry Sauce

Delicious rustic style corn fritters were next, served with crispy bacon, homemade tomato relish, a pile of fresh herbs and a dollop of creamy aoli - yummo!


Corn Fritters
with Bacon, Homemade Tomato Relish and Aoili

In a nod to yum cha, we also shared a plate of freshly steamed dumplings - prawn and vegetables wrapped in a sticky rice wrapper, a BBQ pork bun and plenty of hot chilli sauce. I love the clean taste of a steamed dumpling, teamed with that eye watering chilli kick - certainly enough to wake you up on a Sunday morning!


BBQ Pork Bun and Steamed Dumplings


Wandering around the market, I picked up a few produce items, including organic, picked-that-morning broccolini, freshly baked ciabatta bread, crisp red radishes, pumpkin, King Edward potatoes, yellow heirloom carrots, a rack of organic lamb (from a local producer who was trying his product at the market for the first time) and some super soft and rich flavoured white rind cheese.


From Addison Road Market -
Organic vegebtables, Lamb, Ciabatta and Soft White Rind Cheese
When we arrived home from the market, we were definitely too full to eat lunch, so we had a glass of wine sitting in garden instead. I did however make a start on Sunday night dinner. I had gotten my hands on some ox cheek from our local butcher, which I was keen to slowly braise, hoping to bring out some of the amazing rich flavour that this cut of meat can deliver. It's funny, I see this ingredient on menus quite regularly, but until this week had not seen the raw product for sale at the butcher. When I saw it, I grabbed a couple of kilos right away.

Ox cheek requires very long, slow cooking - and we certainly weren't going anywhere - so it was a great time to make this hearty, comforting dish. I cooked it super simply - just seasoned and seared the meat, cooked a pile of onions, chopped carrot, parsley stalk and garlic in a little good quality olive oil and topped the whole lot with some plain beef stock before putting it in the oven for 5 hours at 120C. The resulting meat was buttery and melt in your mouth, with a dark, rich gravy. I think the secret to getting a really rich sauce is using lots of onions - I used sweet Spanish onions, which broke down during the cooking process to give a rich, caramelised flavour and body to the sauce.


Slow Braised Ox Cheek
with King Edward Potato Mash and Buttered Peas

I served the Ox cheek with a creamy mash made from the King Edward potatoes I bought at the market, and buttered peas. Nothing fancy, but hearty and full of flavour. Because the meat is very rich, we only needed small portions, so the leftover meat will be frozen, to be topped with golden puff pastry sometime in the future and reinvented as a delicious pie. A great way to have something special after work that can be thrown together quickly - all the hard work is pretty much done. I was really pleased with my first attempt at Ox cheek and will definitely keep my eyes open for it at the butcher. It wasn't expensive either - although I'm wondering if it will go the way of lamb shanks - something that butchers would almost give away a few years ago, and that now commands a top price due to a sudden fashion for that particular cut of meat. Time will tell.

So, that was the weekend in food.

And then.....
Next weekend we are heading up to my lovely in laws on the Central Coast for a Sunday family lunch, and have decided to make a weekend of it - driving up on Saturday via the Hunter Valley Region. The plan is to explore and enjoy some of the culinary delights of the area on Saturday, spend the night at The Crowne Plaza Hunter Valley and then drive across to the coast Sunday morning. The last time we were there, we discovered a farm that sold the most incredible tasting non homogenised milk, and we are taking an esky this time, so that we can stock up. We also purchased some gorgeous quality free range eggs (most turned out to have double yolks) from the same farmer, so we will be sure to pay him a visit again. Will have to do some research this week on what else we might want to check out - I hear there are cheese producers and all kinds of other food delights in the area, so there will be no shortage of things to do. Will be sure to pack my camera and my notebook, so I can share the highlights with you all.

Have a delicious week!


Sunday, April 22, 2012

Autumnal Inspiration

I just love this time of the year when you feel everything changing, as we  transition into winter. I am a cold weather person and I thrive in Autumn and Winter. The colder weather seems to spark my creativity a lot more and it is always a very productive time for me. This is particularly true of what I choose to cook and eat. With all of the summer produce disappearing and the cold weather ingredients beginning to be available, I am inspired with new possibilities when I visit the greengrocer.

This week I decided to roast some beef for our Saturday night dinner, but thought I would forget about the basic roasted vegetables and look at some seasonal flavours and accompaniments for it. To start with, I flavoured the beef with celery, paprika and juniper, giving the beef a lovely aroma and a delicious flavour and warmth. As always, I cooked the meat on the Weber, over the coals, but you can of course use a conventional oven if you want to.

We received a bunch of beetroot, organic carrots and some gorgeous kipfler potatoes in our fruit and vegetable box this week, so I used those as side dishes, along with some baked seasonal witlof. Witlof is also known as Belgian endive or chicory. Admittedly it is not going to be to everyone's taste, with it's bitter character, but I found that it worked really well with the sweetness of the beetroot that I baked with plenty of red onions, garlic, honey and balsamic.

The result was a delicious succulent roast with a real Autumn flavour. I made a jug of gravy with the resting juices from the beef and served this along with some horseradish on the side.

A note about the beef - as with all meat, you need to give it sufficient resting time to ensure maximum flavour and tenderness. I have found this to be particularly true of topside beef, which was what I used for this recipe. Don't be tempted to rush this step. There are two different schools of thought when it comes to whether or not you cover the meat with foil while it is resting. I have been reading a very funny Twitter exchange online recently between Anthony Bourdain and others about this subject - I strongly stand in Bourdain's camp and believe in not covering the meat. It continues to cook after you remove it from the heat anyway, so covering it with foil will just keep more heat in and therefore extend the cooking process even further. This means that meat that was cooked to perfection when you pulled it out of the oven can end up badly overcooked and as tough as old boots when you come to serve it. Those worried about the meat getting cold as it is resting need not be - as long as you put it somewhere relatively warm, it will be fine.

So everyone, check out your greengrocer or farmer's market, see what is coming in to season and give your cooking a transitional seasonal makeover. Also check out my continuously updated list of what is in season on the right hand side of this web page. Our Saturday night roast certainly took on an Autumnal twist as a result of some seasonal inspiration - what seasonal ingredients will you explore this week?


Juniper Roasted Beef
with Autumn vegetables
and caramelised balsamic beetroot


You will need: 1kg piece roasting beef (I used topside), 10 juniper berries, 2 teaspoons celery salt, 2 teaspoons sweet paprika, 1 tablespoon olive oil, 2 large carrots, 2 whole witlof, 6-8 kipfler potatoes, 4 whole beetroot, 1 large red onion, 3 cloves garlic, salt and pepper, 1 tablespoon grated mozzarella cheese, 1 tablespoon fresh parsley, 1 tablespoon honey, 1 tablespoon balsamic vinegar, a little extra olive oil.

Method: Preheat the oven to 220C. Place the whole beetroot in boiling water and allow to simmer for about 10 minutes. Drain and run them under cold water. Now remove the skins - they should come right off easily with your hands. Cut the beetroot into quarters. Slice the red onion into thick pieces and place in a small ovenproof dish with the beetroot. Roughly chop the garlic and add to the dish, along with the honey, balsamic, 1 tablespoon olive oil and plenty of salt and pepper. Bake the beetroot, turning a few times for around 30 minutes.

While the beetroot is cooking, prepare the meat. Crush the juniper berries and combine with the celery salt, paprika, pepper and a tablespoon of olive oil. Mix well and rub into the meat. Allow to infuse for at least 15 minutes. Bring the meat to room temperature before cooking it. Taking it right out of the fridge and straight into the oven/BBQ will result in tough, dry meat.

Place the meat into the preheated oven (or use the Weber like I did) and bake with the potatoes for 20-25 minutes (rare) 30 mins (medium) 40 minutes (Well done) Allow the meat to rest uncovered for 20 minutes before slicing and serving.

While the meat is cooking, cut the witlof into quarters and the carrots into long thick batons. Place in a shallow baking dish with salt, pepper and a drizzle of olive oil. Place in the oven and bake for 20 minutes. After 20 minutes, sprinkle the cheese over the witlof and return to the oven until the cheese is just melted.

Slice the beef into thick slices, assemble the dish and top with a little fresh parsley to serve.

Serves 2-4


******


Sunday, October 16, 2011

Beautiful Beef

Last weekend we visited the fabulous Feather and Bone Providores to check out their butcher shop, located in a warehouse in the back streets of Rozelle. They specialise in sustainably grown meat with the focus on guaranteeing provenance - that is, knowing exactly where and how the meat is produced. All products are sourced locally, and because they have such close relationships with the producers, they can not only tell you where the meat was raised, what it was fed, the sustainabilty practices of the farm that it came from, but even which paddock it lived in!

Because they deal with small producers, supply often fluctuates, sometimes they will only get small amounts of a product, so they issue a newsletter to customers every week telling them what is in stock for the next 7 days - you can't get more seasonal than that! They supply meat and game, poultry, eggs and a range artisan products such as handmade sausages, pates and terrines. Most of their business is based online and they deliver all over Sydney, but you can also arrange to pick up your order from their butchery in Rozelle. To find out more go to  http://www.featherandbone.com.au/

We came away with some pork and fennel sausages, lovely Wagyu rump steaks, a free range chicken and a large piece of Dexter Beef rump from the mid north coast of New South Wales.

The Dexter breed originates from Ireland and is one of the smallest European breeds of cattle. They produce beautiful quality milk and beef. Once quite rare, some cattle farmers in Australia have started breeding them very sucessfully, especially in New South Wales and Tasmania. I was curious to see what the meat tasted like, as I had heard about how great it was, but had never seen it for sale anywhere until now.

I chose to cook the beef in one piece, over the coals on the BBQ. I just don't think you can beat cooking over coals for flavour. I seasoned the meat well with Murray River pink salt and plently of pepper, and made sure the beef was at room temerature before cooking it. Never cook meat straight from the fridge - the muscle fibres in the meat contract quickly when they hit the heat and the result is tough meat. Second rule of course is to always rest your meat before carving it. I rested the roast for about 20 minutes.


Roasted Dexter Beef


I decided against a traditional roast beef dinner and instead went for something with a bit of a French influence, choosing to serve the Dexter beef roast with a luscious potato galette (my recipe below is based on Julia Child's) and a fresh parsley and caper sauce.


Potato Galette

The beef had a fantastic flavour - quite lean but with a delicious crust on the outside, created by rubbing the thin layer of fat with the salt, and the effect of cooking over the coals.The accompaniments were a perfect addition to an outstanding piece of beef - and a perfect seasonal Spring menu. I will definitely be buying Dexter beef again, for it's wonderful flavour.


Roasted Dexter Beef
With potato galette and parsley and caper Sauce

Cooking the meat was very basic, so I haven't included cooking instructions - however I have included the recipes for both of today's side dishes - they would be lovely with any kind of meat, including poultry or even fish. As Julia would say - Bon Appetit!


Parsley and Caper Sauce

You will need: 1 large bunch continental parsley chopped, 1 clove crushed garlic, 1 tablespoon capers, 2 spring onions sliced finely, 1/4 teaspoon cayenne pepper, 4 anchovies chopped finely, 1 tablespoon white balsamic vinegar, 2 tablespoons warm water, 1 teaspoon sugar, 1/3 cup extra virgin olive oil, salt and pepper to season.

Method: Combine all of the ingredients in a food processor until well blended. Taste for seasoning and add more salt and pepper as needed. Cover with gladwrap until ready to serve. This can be made a few hours ahead and stored in the fridge.

Potato Galette

You will need: About 1 kg washed, peeled whole potatoes, 2 teaspoons fresh rosemary chopped finely, 2 cloves crushed garlic, 1 tablespoon salted butter, 2 tablespoons olive oil, salt and pepper.

Method: Melt the butter and combine in a small bowl with the olive oil, rosemary and garlic. Set aside.

Preheat the oven to 200C.

Slice the potatoes very thinly (a mandolin or slicing attachment of the food processor is great for this)

Place the potatoes in a layer in a springform cake tin, or a round pie tin. Brush with the butter mixture and season with salt and pepper. Continue building up layers until you have used all of the potato.

Cover the dish with foil and bake for 1 hour. Remove the foil and continue to bake for a further 30 minutes, until the top is crispy and golden.

Allow the dish to rest for about 10 minutes before cutting into wedge shaped slices and serving.

******

Tuesday, August 16, 2011

How now luscious cow!

A few weeks ago, I was lucky enough to attend a butchery class run by artisan butchers Victor Churchill, as part of the Sydney Good Food and Wine Show. As well as learning to break down a lamb (yep, I’m now a whizz with a boning knife!) I was fascinated to learn about the different techniques for raising cattle, the importance of knowing where your meat comes from, sustainable farming, the processing and ageing of meat and the difference between a good quality product and a bad one. I walked away knowing a whole lot more than when I walked in and with a burning desire to build on that knowledge. I am planning to attend a more detailed butchery course in the near future – I fear I may have missed my calling!


After benefiting from the incredible wealth of knowledge from the Victor Churchill butchers, on the weekend we decided to pay the shop a visit and to treat ourselves to the crème de la crème of beef – premium Wagyu. From the minute you step into the shop you know you are in for something special. Here are people who care passionately about what they sell and who present it with the upmost respect and so much style. The shop and everything in it is a beauty to behold. Visit the shop at 132 Queen Street Woollahra, NSW or have a virtual visit online at  http://www.victorchurchill.com/


Australia has gone Wagyu crazy in the last few years and the market is flooded with all sorts of product claiming to be Wagyu. If you intend to purchase Wagyu, you want to ensure that you are getting the real deal. In Australia, beef can be sold as Wagyu with only 50% Wagyu genetics – and unfortunately most of what you will see labeled as Wagyu at the local butcher will fall into this inferior catergory. Good quality premium Wagyu must actually contain 100% full blood Wagyu genetics. The breed originates from Japan and is highly prized for the intense marbling of fat, making it melt in the mouth tender and giving it a sublime flavour. Wagyu actually means "Japanese Beef".


Wherever you purchase your Wagyu, ask the seller about the origin of the meat and ensure that what you are buying is actually proper Wagyu. Expect to pay in the vicinity of $185 a kilo for the authentic premium article. If your butcher can’t verify that it is 100% full blood, or can’t tell you where it’s come from, my advice is to forget it and cook something else for dinner!


Wagyu is graded according to the amount of marbling in the meat. Here in Australia, it is rated on a scale of 1-10 (in Japan the scale goes from 1-12) We chose 600 day dry aged, grain fed, scotch fillet cuts with a rating of 9+, so we are talking premium product here.


Blackmore's Wagyu 
600 Day Grain Fed, Dry aged Scotch Fillets


The Wagyu we chose came from the Victorian farm of the Blackmore family – at the forefront of Australia’s leading premium quality beef. The Blackmores have been farming award winning purebred Wagyu for over 20 years. Their Wagyu boasts 100% full blood Wagyu genetics and are not diluted with any other breed, making it a very high quality product. We were blown away by the standard of the meat - it was, quite simply, the best beef I have ever eaten. If I could hug the whole Blackmore family and their entire herd, I would!

For more information on Blackmore's Wagyu, their history and sustainably grown beef, check out their website. http://www.blackmorewagyu.com.au/


What 9+ grade marbling looks like


So, how did I cook our precious Wagyu? Originally we had planned to cook it over coals on the BBQ, however we were advised against this due to the very high grade of the meat and the 9+ rating of the marbling. The concern was that as the fat throughout the meat melted, it would drip onto the coals and cause the flames to flare up too much, burning the meat.


For this reason I cooked it on a grill pan on the stove, sprinkling a little sea salt into the dry pan and then cooking the meat for 3 minutes each side. I then transferred the meat to a 200C oven for a few minutes and then rested the meat for 5 minutes before serving. Because of the superb quality of the meat, I did not add a jus or sauce, preferring to enjoy the Wagyu unadulterated. On the side, we had simply steamed fresh beans and creamy mash – made super special by the addition of beautiful French butter and Tetsuya’s Truffle Salt. To - die - for. (You can buy Tetsuya's Truffle Salt at some gourmet stores or on Tetsuya's website)


Cooked to perfection
with creamy mashed truffle potatoes and green beans


Good quality Wagyu is extremely rich, so it is recommended that you serve about 250 -300g per person maximum. Although we purchased two steaks, we cooked one large scotch fillet between us and then cut it in half at serving time – it was more than enough for two. The flavour is very sweet and buttery, so I would avoid any kind of buttery sauce with it. If you must serve a sauce with it, lean towards something with a touch of acid (lemon, vinegar) to balance out the richness. Me? I think that the meat speaks for itself.

There is no doubt that good Wagyu is expensive, but I would rather savour one sublime serving of this every month or so, that eat any meat at all for the rest of the time. It's really that good.

******

Friday, April 8, 2011

Exotic and Aromatic

Okra is one of those ingredients that doesn't seem to pop up on Australian menus very often. Lots of people seem a bit nervous about how to prepare this exotic looking vegetable, however it is eaten all over the world. You will find it in all kinds of cuisines - particularly in Africa, South America and the Carribean. Okra is actually related to the hibiscus flower, growing in particularly well in in hot climates. I really love the slightly herbaceous flavour and the soft, yeilding texture of the okra pods and they really soak up any spice or flavouring that you cook with them.

One of my favourite ways to serve okra is with a heavily aromatic mixture of spices and minced beef. The dish packs a huge flavour punch and is beautiful served with nutty brown rice. Now is the perfect time to cook okra, as it is in season and easy to find. Choose pods that are bright green and firm - smaller pods will be more tender than the larger ones, so I tend to go for the smaller size.

The generous use of spices in this dish marry so beautifully with the okra, and the result is a delicious exotic but super easy dish to prepare. If you have never tried okra before, this could be a nice introduction.....


Aromatic Beef with Okra


You will need: 300g minced beef, about 10 pieces of okra, 1 red onion, 1/2 red capsicum, 1 medium zucchini, 2 tablespoons vinegar, 1 cup beef stock, 3 cloves garlic finely chopped, 1 red chilli finely chopped, 1 tin diced tomatoes (choose a good quality Italian brand), a handful of fresh dill, 2 teaspoons cumin powder, 2 teaspoons coriander powder, 2 teaspoons sweet paprika, 1/4 teaspoon cinnamon powder, olive oil, salt and pepper to taste.

Method: Slice the okra diagonally, so that each piece becomes two pieces. In a bowl, combine the okra with the vinegar and a few pinces of salt. Mix it through well with your hands and then set the okra aside.

Chop the red onion, zucchini and capsicum into small cubes. Heat a splash of olive oil in a pan and add the onion. Cook on a moderate heat until it begins to soften. Add the cumin, coriander, cinnamon, paprika, chilli and garlic and cook for a couple of minutes until the aroma starts to release.

Add the minced beef and cook very thoroughly until it is browned. Drain the vinegar from the okra. Add the okra, zucchini and capsicum to the pan, combine and cook for another few minutes. Finally, add the tomatoes and the beef stock. Simmer for about 20 minutes, until almost all of the liquid is absorbed. Check for seasoning and add salt and pepper if needed. Also feel free to ramp up the chilli for an extra spicy version.

Just before serving, stir through the fresh dill. Serve with rice (I prefer brown rice for this, it has a great nutty flavour)

******

Thursday, July 8, 2010

Comfort food - old school style

It has been rather chilly here in Sydney and nothing is nicer in the cold weather than a really hearty, old fashioned soup. My original plan was to make a soup based on vegetables, barley and ham hocks - but when I went to the butcher they had run out of ham hocks (everyone else in the neighbourhood must have had a hankering for soup making too) The lovely butcher suggested he cut me some pieces of osso bucco as an alternative and that it would work really well with the barley.

Well, the lesson here ladies and gentlemen, is listen to the butcher. He was dead right, and this soup turned out beautifully. Absolutely bursting with flavour, full of delicious nutty tasting barley and lots of veges. Not only was it tasty, warming and satisfying - it was also super healthy. I cooked the soup for around 3 hours, so it isn't one to whip up after work or when you are in a hurry. It does however, freeze beautifully, so do a big batch on the weekend and freeze it in portions to have whenever you fancy.

I love the addition of silverbeet to this soup - please note that we are talking silverbeet here (the big tall dark green leaved stuff with the white stalks. Also known as Chard) not English spinach. English spinach is far too delicate for this super robust dish. If you really hate silverbeet, then just leave it out - but I love my greens and I think it really adds extra flavour and texture to this soup. I also prefer the soup to be quite thick, but add more stock or water if you prefer it a bit lighter. I was so happy with the addittion of the osso bucco to this soup I will be doing it this way from now on. Try it and see if you agree....


Beef and barley soup

You will need: 2 medium carrots, 1 parsnip, 1 leek (use only the white part), 2 brown onions, 3 or 4 stalks of celery, 1 bunch silverbeet, 2 medium potatoes, 3 pieces of beef osso bucco (with the bone still attached of course! You want that precious marrow), 1 cup dried barley, 2 litres beef stock (I just used the commercial kind from the supermarket, but if you have homemade stock, then use it), 3 cloves garlic, 2 bay leaves, 2 tablespoons olive oil, 1 bunch fresh continental parsley, a couple of pinches of cayenne pepper, salt and pepper to taste.

Method: Wash the carrots, parsnip and potatoes thoroughly. Leaving the skins on, (more flavour and more vitamins!) dice them into pieces 1-2 cm in size. If you want super chunky soup, then by all means cut them bigger. Now cut your celery into pieces, around the same size as your other veges. Set your veges aside.

Cut the really thick white stalks from the silverbeet and then slice the green part - you can cut it quite thickly as it will shrink a lot once you cook it. Set the silverbeet aside. Slice the leeks, dice your onions and finely chop the garlic.

Heat the olive oil in a large soup pot. Add the onions, leek and garlic and cook them on a medium heat until they are soft and slightly transparent. Add the carrot, parsnip, potato, celery, bay leaves, cayenne pepper and  season with a generous pinch of salt. Cook the veges for about 10 mins, stirring regularly so they do not stick to the bottom of the pot. Add the osso bucco and cook for another 5 minutes.

Add the beef stock and top the pot up with water so that it only leaves about 3 fingers width of space between the liquid level and the top of the pot. Cover the pot until it comes to the boil and then turn it down to a very gentle simmer. Allow to simmer like this, stirring occasionally for about 2 hours.

After 2 hours, add the barley and stir it in well. Simmer for a further 45 minutes and then add the silverbeet. Let the soup cook for another 15 mins or so. If it gets too thick, just add some hot water. Taste for seasoning and add salt and pepper as required.

By this stage most of the meat - if not all - should have fallen off the bones. Remove the meat and bones and chop any larger pieces of the meat into smallish pieces. If there is still marrow in the bones, then remove it and chop it up too. Return all of the meat (minus the bones) to the pot.

Just before serving, chop up the fresh parsley and fold it through the soup, keeping a little in reserve to put on the top. Serve with crusty bread.

******

Sunday, January 24, 2010

The Spice Girls

Tonight's recipe is the result of another request from friends, who asked for a spicy beef salad that they could enjoy with the steamy hot weather we have been experiencing here in Sydney over the last few days. There is a very good reason that the hottest countries consume lots of chilli and their request made complete culinary sense given the season and the weather. So, Susan and Mary-Lou, spice girls that you are - this one is for you :)

This dish is very easy to throw together and it is also very versatile. Feel free to use spring onion instead of red onion, add sliced butter lettuce, a handful of bean sprouts or some snow peas if the mood takes you. If you want something a bit more substantial, then include some cooked rice noodles or vermicelli. Add bucketloads of chilli or just a touch and adjust the dressing to just how you like it - the measurements I have given are a starting point. I personally think this dish really works best with a decent amount of heat to it, but that's just me - I never feel I'm having a proper chilli experience unless I'm getting a bit of a sweat on :)

The key to this dish is to use super fresh ingredients - particularly the herbs. And please, if you don't have fresh limes, use fresh lemon. Don't be tempted by that hideous faux "lime juice" in the garish green bottles that you can buy on supermarket shelves. It is the work of Satan. Resist at all costs!!! I used topside steak for the recipe today, but if you are feeling a bit posh, then you can use fillet or another more premium cut. I personally think rump or topside is just fine though. It has a lot of flavour and as long as it is rested, it is succulent and tender. I cooked the meat in my grill pan, but of course if you have a BBQ, then it is perfect cooked that way. Actually, if I had a BBQ, that would be my preferred cooking method.

Okay, enough chit chat - here is tonight's dinner.....


Spicy Beef Salad


You will need:
For the salad: 500g rump or topside steak, 1 large lebanese cucumber deseeded and sliced, 1/2 finely sliced red onion, 1 small red capsicum or large bullhorn chilli deseeded and sliced, handful of cherry tomatoes sliced , handful of mint torn into pieces, bunch of coriander chopped roughly.

For the marinade: 1 tablespoon oyster sauce, 1 teaspoon sesame oil, 1/2 tablepoon fish sauce (nam pla), 1 tablespoon palm sugar, pepper.

For the dressing: 3 tablespoons fish sauce (nam pla), Juice of 1 lime, 1 clove crushed garlic, 1 tablespoon palm sugar, 1-3 chopped red chillies ( I used 3 - I like it spicy)

To serve: 1 tablespoon roasted unsalted peanuts crushed roughly, wedges of lime

Method: Combine the marinade ingredients and add the meat. Season generously with pepper. Cover and allow to marinate for at least 30mins (Overnight is even better)

Whisk together the dressing ingredients. Taste for seasoning and add more chilli, pepper or sugar if required. Set aside.

Heat a grill pan until hot and cook the steak in one piece for about 3 minutes each side. I like my meat fairly rare, but if you prefer your meat a little more done, then allow another few minutes. Remove the meat from the pan and allow if to rest in a warm place for 10 minutes.

While the meat is resting, assemble the cucumber, capsicum, tomato, coriander, red onion and mint on a serving platter or individual plates.

Slice the steak into reasonably thick slices, being sure to cut across the grain. This will make for a much more tender result. Toss the meat through the salad ingredients and drizzle with the dressing. Serve topped with peanuts, a wedge of lime - and if you are a chilli masochist, extra chilli.

Serves 2-4 people

*****

Sunday, August 16, 2009

Hawker Heaven

I learned to make today's dish on one of my cooking trips to Singapore, where I ate it at one of the many Hawker stalls you will find throughout the city. I got chatting to the man who ran the stall after complimenting him on how much I enjoyed his dish - a fragrant curry of beef and pineapple. (Ok, it was so good I contemplated licking the plate!) Like many of the stalls, it had been run by generations of the one family - his father and his father before him. They specialised in 3 or 4 dishes and it had been this way for many years - family recipes that were passed down and perfected. I loved his curry - it had a lovely complexity of flavours with a perfect balance of hot, sweet, sour and salt. The meat was meltingly tender and the pineapple added a contrasting freshness to the earthiness of the spices.

Like every local I met in Singapore, he was full of passion for food and eager to talk about it. I took notes as we talked about the spices he used, how he prepared them and how he put the dish together and the next day I headed to the market to buy spices and ingredients to try my hand at my own version of the dish. (If you are ever in Singapore, head to Tekka Market in Little India for a jaw dropping array of produce, spices, meat and seafood) I don't flatter myself by thinking for a moment I would replicate what I ate at that stall exactly, but I figured I had a starting point and I would go from there. I was really delighted with the resulting dish and it is a real crowd pleaser when I serve it to friends. And every time I make it I still think of that Hawker stall in Singapore :)

You will probably not find ingredients such as Belacan (shrimp paste) and Candlenuts at your regular supermarket, you will need to head to an Asian grocer/supermarket. They will be really easy to get there as they are staples in many Asian cuisines. And finally, don't be daunted by the fact that you need to make the extra effort to get the proper ingredients or the fact that you are making the spice paste from scratch - it is really easy and the result is a really authentic tasting dish that you will make again and again. The little bit of extra effort is worth it, I swear!

Beef and Pineapple Hawker Curry


A note about the ingredients:
Belacan (shrimp paste) - smells awful, tastes amazing. This dense paste adds a wonderful richness to curries and I promise that the smell will disappear as it cooks. It is usually sold in blocks or in screw topped containers. I go the container option as it is less messy and keeps the aroma under wraps when it is stored. It lasts for a long time and a small amount goes a long way. Once you use it, it will become a regular addition to any curry you make.

Candlenuts - These oily nuts look a lot like Macadamias and are grated and used in Asian cooking as a thickening agent. Despite their resemblance to Macadamias, do not eat them raw. The oils in them will make you sick unless they are cooked.

Palm Sugar - This can be sold in 1 large block, or in packs of small ones. It ranges from a light golden colour to a dense dark brown. I prefer to use the kind that is darker in colour and I have found that the varieties from Indonesia have a superior flavour. A lot of palm sugar also comes from Thailand and whilst this is completely fine to use, I really recommend the Indonesian product if you can get it. Just check the label to find out where it is from. And one last hint - If your palm sugar is very hard, grating it will make it easier to handle.

You will need:
(For the spice paste) 8 long dried red chillies soaked for 15 mins in water, 3 fresh red chillies, 8 eschallots, 3 cloves garlic, 3cm piece ginger, 2cm piece galangal (it tends to be pretty hard, so instead of chopping it, I recommend grating it finely), 1 tablespoon coriander seeds, 1/2 tablespoon cumin seed, 8 whole cloves, 1 teaspoon white peppercorns, 1 teaspoon black peppercorns, 1/3 cup warm water.

(For the curry) 1 kg diced beef shin (gravy beef), 1/2 fresh pineapple - core and skin removed and cut into chunks the same size as the beef, 2 tablespoons vegetable oil, 2 teaspoons shrimp paste (Belacan), 3 diced tomatoes, 400ml coconut milk (I use the light version - it still gives the rich flavour without the humungous amount of fat that is usually contained in coconut milk), 1 tablespoon fish sauce (Nam Pla), 2 tablespoons grated palm sugar, 3 grated candlenuts, 1 cup water, 1 bunch fresh coriander roughly chopped.

Method: First, make your spice paste. In a dry pan, add the peppercorns, coriander seed, cumin seed and the cloves. Toast them gently until they begin to darken slightly and release their fragrance. Be very careful not to burn them - if you do, start again. If they are burnt you will end up with a bitter and unpalatable dish.

In the food processor, put the roughly chopped ginger, eschallots, roughly chopped fresh and dried chillies, chopped garlic, grated galangal, toasted spices and the warm water. Blend for a minute or two until it forms a paste. It will not be super dense or ultra smooth like commercial spice pastes - this is normal. (You can also use a mortar and pestle for this step if you have the time and upper body strength!)

Heat the vegetable oil in a heavy based pot (I use my cast iron/enamel casserole dish for this). Add the spice paste and cook it gently until it starts to darken slightly. Add the shrimp paste and cook for another minute. Add the beef and combine with the spice mixture. Allow the beef to cook for a few mintues.

Add the tomatoes, palm sugar, fish sauce and half of the coconut milk. Mix well and simmer for a minute or two. Add the rest of the coconut milk, pineapple and the water. Simmer on a very low heat for 1 hour, stirring occasionally.

After one hour, add the grated candlenuts. Stir thoroughly and cook for another hour. When the meat is super tender and you are ready to serve, stir through the fresh coriander.

Serve with rice or noodles.

*

Monday, August 3, 2009

Steakhouse!

I was craving red meat tonight and decided on a good old fashioned steak. I was going to keep it all pretty basic but in the end I decided to make a lovely rich mushroom and port sauce to jazz it up a little bit. This sauce would go well with chicken, as well as red meat - It is pretty rich, so a little goes a long way. This recipe will serve four people. Oh, and if you don't happen to have any port on hand, you could use brandy or red wine.

Steaks with Port Mushroom Sauce

You will need: 1 steak per person, 2 cups sliced mushrooms, 2 teaspoons olive oil, 1 teaspoon butter, 6 finely sliced eschallots, 1 clove crushed garlic, 1 cup beef stock, 100ml cream, 1/4 cup port, 2 teaspoons Worchestershire sauce, pepper and salt to taste.

Method: Cook the steaks to your liking. Cover loosely with foil and let them rest in a warm place.

Heat the butter and olive oil in a pan and cook the eschallots on a medium heat until softened. Add the mushrooms and garlic and season with pepper. (Don't use salt at this point - the stock tends to be quite salty and will probably be enough. You can always add some at the end if you need to.) Sautee the mushrooms for a few minutes until cooked.

Add the port and mix well. The port will bubble up and evaporate the alcohol. Cook for 1 minute and then add the stock and Worchestershire sauce. Allow to simmer for another minute and then add the cream. Simmer on a high heat until it reduces and thickens. Taste for seasoning and adjust if required. Serve over the steaks.

*

Saturday, July 18, 2009

Middag! (that's Swedish for dinner)

Swedish meatballs (Kottbullar) are probably the best known dish in Swedish cuisine and are usually part of the traditional smorgasbord. They are a crowd pleasing entertaining dish or perfect for a hearty, warming supper and for good reason - they are so tasty (and who hasn't had a sneaky meatball stop at the cafe when bookshelf shopping at IKEA? Guilty as charged )

So, think "Sweden", put on your viking horns, head to the kitchen, crank up ABBA's Greatest Hits and get cooking! (OK, if you don't like ABBA, you can substitute Roxette - they are Swedish too)


Swedish Meatballs (Kottbullar)


You will need: 500g beef mince, 1 finely chopped brown onion, 2 tablespoons finely chopped celery, 1/2 cup fresh breadcrumbs, 1 egg, 2 tablespoons finely chopped gherkins or pickled cucumbers, 1 tablespoon chopped parsley, 1/3 teaspoon ground/grated nutmeg, 1 tablespoon olive oil, 1 tablespoon salted butter, 1 tablespoon plain flour, 500mls beef stock, 250ml cream, salt and pepper.

Method: Heat a splash of olive oil and half of the butter in a pan and cook the onion and celery until it begins to turn transparent. Set aside.

In a mixing bowl, combine the mince, breadcrumbs, egg, gherkins/cucumbers, parsley and nutmeg. Season well with salt and pepper. Add the cooked onion mixture and using damp hands mix thoroughly. Shape into small balls an put them on a tray. Chill them for about an hour in the fridge.

Heat the olive oil and remaining butter in a pan and gently cook the meatballs in batches until lightly brown. Remove them from the pan and set aside.

Add the flour to the pan and cook for about a minute. Remove from the heat and whisk in the stock. Return to the heat and gently simmer until the mixture starts to thicken. Add the cream and simmer for a couple of minutes.

Return the meatballs to the sauce and mix them through gently. Simmer for another couple of minutes. Serve with mash or crusty bread.

*

Sunday, July 12, 2009

Slow Food Sunday

For a while I have been thinking about cooking oxtail and reading a bit about different ways to go about it. I have a memory of eating a stunning oxtail stew in a pub years ago, when I was spending a winter weekend up in the Blue Mountains. I was blown away by the flavour and richness of the dish and the soft, melting texture of the meat. I have noticed a shift in recent years, away from the more expensive cuts of meat towards cuts that you would previously never see on any restaurant menu - lamb shanks in particular come to mind. Butchers used to practically give these away for dog food, now we seek them out because we know that if we treat them right, they are delicious and full of flavour. Oxtail is no exception.

I have never cooked oxtail before, so after doing a bit of research on how other cooks handle it, I came up with my own recipe and crossed my fingers. Happily, this is one cooking experiment that went very, very right. The key to this cut of meat is to cook it for a very long time - most recipes I found recommended between 2-6 hours. I went with 5 hours for my version. As each hour went by and I gave the oxtail a stir and a taste, I became more and more excited by the flavour that was developing. This dish is really worth the slow cooking time because the end result is to die for. It just needs you to give it a little attention from time to time and to stir the pot well, so that the sauce does not catch too much on the bottom. I started the dish in the morning just after breakfast and kept it just barely simmering on the stove through to the mid afternoon. It was a particularly chilly winter day today, so I was all about comfort - the beautiful rich aroma coming from the kitchen and the fact that I didn't even get out of my pajama pants for the entire day made me feel very cosy indeed. :)

So, here it is - Slow cooked oxtail stew. Aromatic, flavoursome and with juicy meat that just falls off the bone. I served it with parsnip and potato mash and some broad beans. Delicious.


Slow Cooked Oxtail Stew


You will need: 1kg oxtail (get the butcher to cut it into pieces about 4 cm long), 2 tablespoons plain flour, 1 teaspoon paprika, pepper and salt, olive oil, 1 cup white wine, 1 litre good quality beef stock, 1 tin crushed tomatoes (I used italian ones), 3 chopped cloves garlic, 6 sliced eschallots, 1 large chopped brown onion, 1 cup each of finely diced carrot, celery,fennel, 2 tablespoons finely chopped parsley stalks.

Method: Combine the flour, paprika and salt and pepper in a plastic bag and add the oxtail. Coat the oxtail pieces well in the flour and dust off any excess. Heat a generous splash of olive oil in a heavy based dish (if you are lucky enough to own an extra heavy cast iron/enamel dish, this would be ideal.) Brown the oxtail a few pieces at a time and then set them aside. Be careful not to let the flour in the pan burn - brown is ok, but not black.

Splash a few tablespoons of the white wine into the pan to deglaze, and give it a stir to lift any brown bits from the bottom of the dish. Add an extra tablespoon of olive oil and add the onion, eschallots, celery, carrot, fennel, garlic and parsley stalks. Cook the vegetables for a few minutes until the onion starts to look transperent.

Add the oxtail and stir through the vegetable mixture. Next, add the remaining wine and let it bubble for about a minute, to cook off the alcohol and to allow the meat to soak up the flavour. Now, add the stock and tomatoes, a generous seasoning of pepper and give it another good mix.

Bring to a very gentle simmer - the bubbles should barely break the surface - and cook covered for 3 hours and then then take the lid off and continue uncovered for another 2 hours. Give the dish a stir from time to time and make sure that the sauce is not catching on the bottom.

Serve with mash or polenta and winter vegetables.

*

Tuesday, June 30, 2009

A Fabulous Fillet...

Tonight's dinner is a roast beef fillet with a tasty, Italian inspired stuffing. Instead of the usual roasted vegetables, I chose a selection of vegetables which I cooked on my fabulous new grill pan whilst the meat was resting. I served the meat and vegetables without any sauces or gravy, just with the pan juices poured over the top. The dish was suprisingly light and the flavours vibrantand fresh.
I love a traditional roast with all the trimmings, but this is a great option for something a bit different that also cooks really fast. You can do the whole dish in under 45mins. Please note that the stuffing ingredients only make a cup and a half of stuffing, so it you use a bigger piece of meat, you may have to double the amounts. The stuffing also works beautifully with chicken if you aren't a red meat eater.
Gourmet Goddess handy cooking hint: After I sear the meat*, I wrap it in baking paper, tie it with string and then put it in the oven. You don't have to do this, but I find that it keeps the meat ultra moist, particulary when the piece of meat is quite small and has the potential to dry out easily.
So, here it is - a beef fillet with an Italian flavour......
Fillet of Beef
with mushroom and parmesan stuffing

You will need: 500g of whole beef fillet, 1 cup fresh breadcrumbs, 1 egg, 1 crushed clove garlic, 1 cup sliced mushrooms, 1 tablespoon continental parsley, 1/3 cup finely sliced spring onion, 1/2 teaspoon lemon rind, 2 tablespoons grated parmesan, salt and pepper, olive oil. An assortment of vegetables, sliced for grilling/pan frying. (I used green beans, mushrooms, asparagus, cherry tomatoes)
Method: Cook the mushrooms, spring onion and garlic in a splash of olive oil for about 5 minutes on a medium heat. Combine the mushroom mixture with breadcrumbs, egg, parsley, lemon rind, parmesan. Season well and mix thoroughly.

Carefully cut a pocket in the beef fillet, starting at one end, being careful not to cut the meat right through. Use your fingers to to enlarge the pocket further and then fill the fillet with the stuffing mixture. Be sure that it is packed in firmly and evenly. Rub the outside of the beef all over with olive oil and set aside.

Heat a frypan until very hot, and sear the meat on all sides until it is brown.* Transfer meat to a hot oven and cook for a further 15-20mins, depending on how well cooked you like your meat.

(I put mine in for 15 mins) Remove the meat from the oven, cover loosely and rest for 10-15 minutes.

While the meat is resting, coat the veges in olive oil and season with salt and pepper. Grill or pan cook the vegetables until cooked (I like them a bit firm and not cooked too much, but it's up to you) Drizzle any juices from the meat pan and the veges over the beef fillet. Serves 2-4
****