Showing posts with label Vanilla. Show all posts

Sunday, July 7, 2013

Apple, Rhubarb and Pecan Muffins

A very good Sunday morning to all of you Gourmet Goddess peeps! Today I thought I would share a simple recipe for something that I baked last weekend, that turned out to be rather lovely. I decided to make a batch of muffins for brunch, and as I wasn't very motivated to get out of my track suit pants and go to the shops, it had to involve ingredients I already had on hand. I checked out the fruit bowl, the fridge and the pantry and came up with a combination of Pink Lady apples, a few stalks of rhubarb and a couple of handfuls of pecan nuts.

The result was these tasty, rustic fruit packed muffins.


Apple, Rhubarb and Pecan Muffins

The pecans add a wonderful textural element to these beauties - I chose to leave the skin on the apples for the same reason. The skins also have lots of fibre so they are better for you as well. The muffins aren't overly sweet and you can really taste the natural flavours of the fruit coming through, without this being overwhelmed by too much sugar. To add some warmth and spice, I included some cinnamon, allspice and nutmeg to the mixture, as well as a touch of vanilla. These ingredients add flavour without the sugar - feel free to add more than I state in the recipe if you want your muffins extra aromatic and spicy.

I would be inclined to use whatever you have in your fruit bowl as a basis for these muffins - any combination of apples, pears or even plums would work well. I adore rhubarb, but if you aren't keen on it, you could substitute chopped strawberries if you wanted to. Don't have pecans on hand? Chopped almonds, walnuts or hazelnuts would be great too.

Eat these muffins warm with good butter. Oh, and they would freeze well too.

Have a lovely Sunday!

You will need:
3 apples (I used Pink Lady variety), 3 or 4 stalks rhubarb, 2 cups self raising flour, 1/2 cup sugar, 1 free range egg, 1 cup milk, 1 teaspoon vanilla extract, 1/4 cup vegetable oil (I used rice bran oil),
1 cup chopped pecans, 1/4 teaspoon allspice, 1/4 teaspoon cinnamon, 2 pinches nutmeg.

Method:
Wash and trim the rhubarb and ensure no leaves are left on. Chop the stalks into small pieces. Core and chop the apples into small pieces (I leave the skin on). Spread the apple and rhubarb onto a lined baking tray and cook for 20 minutes in a preheated oven at 200C. Remove and allow to cool.

Whisk together the milk, oil, vanilla and egg. Set aside about a tablespoon of the pecans to sprinkle on the tops of the muffins once in the pan. In another bowl, combine the flour, sugar, remaining pecans, allspice, nutmeg and cinnamon.

Add the fruit to the flour mixture, then pour in the wet mixture. Combine gently until just mixed together. Do not over mix, or your muffins will be tough and flat. Spoon into a large muffin pan. Sprinkle the remaining pecans over the tops of the muffins.

Bake in a preheated oven at 180C for about 20-25 minutes. Allow to cool in the pan before turning out the muffins. Makes 10 large sized muffins.

******

Saturday, April 13, 2013

Autumn Fruit Pudding

I love Autumn. The weather is cooling down (especially the nights), the days are crisp and clear and the season brings a whole new batch of fresh produce. The Summer fruit and vegetables are starting to disappear and the Autumn harvest begins. Today's recipe is inspired by that change of season, using a range of delicious Autumn fruits to create a comforting, warming and flavour filled pudding - just perfect for the cooler weather.

This pudding is comprised of aromatic roasted fruits, given a extra punch with vanilla and a touch of lime - and a light vanilla cake top that is just delicious served warm with something creamy like ice cream or custard. I made mine in one pan, but you could easily make individual serves if that takes your fancy. The recipe is very adaptable. Use whatever fruits you can find wherever you are. In my case, I had some wonderful organic nectarines, black plums, a punnet of strawberries and a big bunch of rhubarb. This combination not only made for a beautiful flavour, but a fantastic ruby coloured result.


Gorgeous Autumn Fruit
- about to go into the oven
 
 
I thought the dessert had an old fashioned vibe about it, so I served the Autumn Fruit Pudding on some gorgeous vintage English china that I picked up last Christmas holidays at a secondhand store in Nowra, NSW. (If you are ever in that part of the world, look up "The Everything Store" - full of all kinds of treasures!) The china really caught my eye with it's beautiful peacock coloured pattern. The set comprised of a large serving bowl and six smaller dessert bowls and was made by Keeling & Company in Staffordshire, England. They produced a range of striking brightly coloured china called Losol Ware from 1886 to 1936. I did a bit of online research and found that my china is the "Rushton" design pattern and circa 1912. 
 
Although this china is over 100 years old, it gets plenty of outings. I have taken to using the bigger bowl as a salad dish. I absolutely hate the idea of having beautiful things locked up in a cupboard and not used. That whole notion is just so stupid and precious. These items were made to be used, so that's just what I do! I do draw the line though, at putting them in the dishwasher - I wash and dry these by hand due to the fine gold edging around the rim of the bowls. I don't think they would fare well being machine washed under extreme heat. Every time I eat off these beautiful dishes, I ponder who may have owned them before, and what kinds of food was served on them. I wonder who brought them here from England, and how they have survived 100 years without a chip or crack. Amazing. Makes me enjoy this Autumn Fruit Pudding even more.


Autumn Fruit Pudding


You will need:
For the filling: 1 bunch rhubarb, 1 punnet strawberries, 4 nectarines, 4-6 plums, 1 vanilla bean, 2 tablespoons brown sugar, juice of 1 lime, 1 vanilla pod

For the pudding top: 125g butter, 1/2 cup caster sugar, 2 teaspoons vanilla extract, 1 1/2 cups self raising flour, 1/3 cup milk, 2 eggs, 2 tablespoons icing sugar (to dust on the top)

Method: Remove and discard the leaves from the rhubarb and chop the rhubarb stalks into pieces about 3cm long. Cut the stalks from the strawberries and remove the stones from the plums and nectarines. Leave the strawberries whole but chop the plums and nectarines into large chunks. Split the vanilla pod down the middle, scrape out the seeds with a knife.

Preheat the oven to 200C. Combine the fruit, lime juice and brown sugar and vanilla beans (including the pod) and bake on a tray or shallow baking dish for 25 minutes, stirring through once, about halfway through cooking. Set the fruit aside to cool.

To make the pudding top, Cream together the butter, sugar and vanilla until pale and fluffy. Add the eggs one at a time and beat together until all combined. Now add half of the flour and half of the milk until well mixed. Add the remaining milk and flour and combine thoroughly.

Preheat the oven to 160C. In a heatproof dish, spoon the fruit mixture. Remove the vanilla pod.  Now pour the pudding mixture over the top and bake for around 45 minutes until lightly golden. Allow to cool for 10 minutes before dusting with icing sugar.

Serve warm with cream, yogurt, custard or ice cream.

 
******

Sunday, March 17, 2013

Berry Nut Tart

I always love entertaining and catching up with friends and this weekend I got to hang out with my good friend Yvette who has been living and working in Cambodia for the last 2 years. As well as being excited to see her after so long, I was also very excited to meet her lovely Cambodian husband Vanda for the first time. It was Yvette and Vanda's first anniversary and they chose to celebrate it by sharing their vows in our back garden, with Andrew and I as witnesses and my celebrant mother in law Kate and father in law Peter in attendance. Celebratory champagne and lunch followed of course!

I decided on a quite simple family style lunch. Yvette had previously commented on the fact that in Cambodia, there isn't the option to indulge her craving for roasted lamb, so I thought this was the obvious choice for lunch. I deboned and butterflied out a leg of Cooma lamb and allowed it to marinate overnight with plenty of garlic, paprika, olive oil, lemon and orange rind, a squeeze of orange juice, rosemary from the garden, sea salt, cayenne pepper and a few crushed up anchovies. I then char grilled the lamb on the BBQ, and served it with crispy golden potatoes, plenty of seasonal vegetables, gravy and a native Pepperberry and Pinot Noir jelly that I brought back from our trip to Tasmania. The Pinot and Pepperberry was a really tasty accompaniment to the grilled lamb as an alternative to mint jelly.

For dessert, I wanted something that I could do ahead. When having lunch or dinner guests, I try to include at least one course that can be made - or at least mostly prepared - the day before. It makes things so much easier. There is nothing worse than feeling rushed and stressed when your guests arrive. I mean, entertaining is supposed to be fun right? My second criteria for the dessert dish was that it also had to be pretty much dairy free. I chose a French style homemade almond tart that showed off the delicious berries that are in season right now. I had a handful of macadamia nuts in the cupboard too, so I used those as part of the topping, for a buttery tasting, golden crunch. Normally I would serve a tart like this with creme anglaise or ice cream, but I chose a dairy free sorbet instead from Cow and Moon, a local artisan gelato shop that make delicious, award winning frozen treats. I chose a blackberry and blueberry sorbet that was lovely and tangy against the sweetness of the tart.


Berry Nut Tart


This tart could easily be adapted for all kinds of other seasonal fruit. I think that peach or nectarine would be lovely in place of the berries - or you could go really classic and use apples or pears. This recipe would also work well as smaller, individual tarts.


Tart served with Blackberry & Blueberry Sorbet
from Cow & Moon artisan gelato @ Enmore


You will need: 150g soft butter (I used salted butter), 120g caster sugar, 2 teaspoon vanilla extract, 1 tablespoon cornflour, 200g almond meal, 3 eggs, 1/2 cup roughly chopped macadamias, 1 punnet fresh blueberries, 1 punnet fresh raspberries, 1 to 1 1/2 sheets sweet shortcrust pastry (the amount will depend on the size of you tart tin)

Method: Preheat the oven to 180C. Grease and line a tart tin with baking paper. I use a metal tart tin with a removable base - I think they give a good result and it is much easier to get the tart out of the tin.

Line the tart tin with the pastry and then place another sheet of baking paper on the top. Fill with baking beads (or if you don't have them, use dry beans or lentils) Blind bake the pastry in the oven for 15 minutes. Remove and allow to cool.

To make the filling, beat together the softened butter, sugar and vanilla until light and fluffy. Add the cornflour and half of the almond meal and beat together thoroughly. Add the eggs one at a time, beating as you go. Finally, add the last of the almond meal and beat until all combined.

Spread about half of the raspberries and blueberries across the empty tart shell. Pour the filling mixture into the tart and spread out evenly. Press the remaining berries into the mixture.

Sprinkle the macadamias over the tart and bake at 180C for around 30-40 minutes, or until lightly golden. Allow to cool for 20 minutes uncovered before slicing and serving. Can be served either warm or cold.

 
******


Thursday, June 14, 2012

Baking Bliss

This week has been rather exciting in the Gourmet Goddess kitchen, as we took delivery of a new fan forced oven to replace the evil, contankerous old beast that I have been cooking with since we moved into our house almost two years ago. I have to admit I was pretty happy to see the demise of the old one, which had a penchant for cremating the bottom of whatever you put in it, whilst leaving the top of everything unpalatably raw. I don't really bake much at the best of times, but the crappy oven really didn't make me want to change that situation!

Well, I am very happy to report that the new oven is a whole other world - one where things cook as they are meant to and your pastry ends up golden and puffed (and cooked evenly!) just like it should. Hell, I may even be tempted to bake a cake - or Goddess forbid - a meringue! Watch this space.

So, my first oven baking experiment was a couple of simple apple, almond and nashi pear tarts. The golden tarts are given a lovely sweetness and glossy finish by an easy maple syrup glaze.

You could actually use any kind of fruit for these - apricots, peaches or nectarines when in season would be gorgeous - cherries, berries or quinces would work a treat too. I used apples and nashi pears because they happened to be in the fruit bowl at the time. Whatever fruit you decide to use,  the result is a delicious, easy to make tart that looks lovely too. This style of tart reminded me a lot of the apple galettes that you would always see in the patisseries around Paris. I confess I enjoyed a slice of mine with a nice big milky Cafe au Lait, and a generous serve of nostaligia -  imagining I was back, sitting in a cafe in St Germain on my honeymoon watching the world go by. Food is always so evocative of past memories and this one really did that for me.

Maple Glazed Apple and Nashi Pear Tarts


You will need: 2 sheets ready rolled puff pastry, 2-3 apples or nashi pears (I used some of both), 1 1/2 cups almond meal, 1 teaspoon vanilla extract, 2 tablespoons brown sugar, 2 tablespoons warm water, 30g melted salted butter, 1/3 cup maple syrup, 1 beaten egg.

Method: Preheat the oven to 200C.

Peel and core the apples/nashi pears, cut them in half and slice them thinly. In a bowl, combine the almond meal, vanilla, brown sugar, melted butter and warm water. Mix well to make an easily spreadable paste. Add a little more warm water if the mixture is a little too firm.

Take the two sheets of pastry and cut them in half, lengthways. You should now have four lengths of pastry of equal size. Take two of the pastry sheets and cut a border into them, about 2 cm wide, removing the pastry in the middle. You will be left with two "frames"made of pastry.

Brush the other two peices of whole pastry with a little of the egg. Carefully lay one of the "frames" onto each of the pastry peices. Press the edges down gently. Now evenly spread half of the almond mixture onto each of the tarts, smoothing it up to the edge of the border you have created.

Take the sliced apple/nashi pears and carefully arrange the slices, so that they slightly overlap, until you have covered the tarts. Brush the edges of the pastry with a little bit of the egg wash.

Bake the tarts for 15-20 minutes until they are lightly golden. Remove them from the oven and using half of the mixture, brush the top of the tarts with the maple syrup. Return to the oven for another 5-10 minutes until they turn a deeper golden colour.

Remove the tarts from the oven, and while they are still warm, brush the remaining maple syrup over them.
Serve warm or cold. Makes two medium sized tarts.

******

Sunday, February 12, 2012

Rustic Coconut Banana Bread

As most of you know, I'm not really into baking that much. It is quite an exact science and I'm much happier creating dishes on the fly, tasting as I go and not slavishly measuring every ingredient. I made an exception this weekend when I realised that we had forgotten to eat the bananas that had been sitting in the fruit bowl since the beginning of the week. We had a handful of very ripe bananas that were crying out to be put in some kind of recipe asap. I decided to make banana bread with a couple of my own twists. Having never attempted banana bread in my life, I took a basic recipe and swapped all white flour for a mixture of white and wholemeal flour, as well as adding a little nutmeg and good quality vanilla.

I realised that I also had a pack of threaded, dessicated coconut in the cupboard (originally purchased with the intention of making coconut prawns that have not, as yet eventuated) so I thought I would add the coconut to the banana bread and see how it turned out. I was happy with the result - a home style banana bread that has a rustic, dense texture due to the wholemeal flour. If you wanted a lighter style bread, you could replace the wholemeal component with all white flour. My banana bread is not the light, highly processed style that you will find in cafes, however it has a great robust flavour that is really lovely toasted and served with some salted butter.


Just out of the oven


 The recipe below makes a small sized loaf - if you are using a larger sized loaf pan (similar to the sized loaf you would need to make the banana bread you see in cafes) then do what I did and double the amounts. I actually started with the amounts listed below, but when I looked at the large loaf pan I had chosen, I realised that I would need twice the amount to fill it. If you are using a standard loaf pan, the quantities below should be just right. Remember too that a bigger loaf will mean longer cooking time.

The coconut and banana combination works really well, both in terms of taste and texture. The bread is very moist, with a slightly crunchy outside crust and a sweet coconut aroma that smells just beautiful. I'm certainly not a baker, but I was happy with my first attempt at banana bread.


Coconut Banana Bread


You will need: 1 cup plain white flour, 1 cup wholemeal plain flour, 2/3 cup caster sugar, 1 1/2 teaspoon baking powder, 1 cup dessicated or threaded coconut, 2 large eggs, 1 teaspoon vanilla extract,3-4 ripe bananas, a few pinches of freshly grated nutmeg.

Method: Preheat the oven to 160C. Grease a loaf tin (or spray it with cooking spray) and line the base of the loaf pan with baking paper.

Mash the bananas well and add the vanilla, nutmeg and the eggs.

In a separate bowl, sift the flours and baking powder. Add the sugar and the coconut and combine well.

Add the wet mixture to the dry mixture and mix thoroughly. Pour the mixture into your prepared loaf pan.

Bake for about 60 minutes - the cooking time is going to vary depending on your oven, the sized pan and your ingredients (size of eggs, moisture in the bananas etc) The loaf is cooked when you insert a skewer in the centre and it comes out clean. Your loaf may take a little more or a little less time - just keep an eye on it and do the skewer test.

Remove the pan from the oven and allow it to cool for 10-15 minutes before turning it out on a wire rack to cool.

Serve as is, or toasted with butter.


******

Thursday, June 3, 2010

Paris Cooking School

Hi everyone - well this weary traveller is back from a month away, still a bit jetlagged and adjusting to having to get up for work every morning and be back in the real world again. I had a fantastic time away, and over the next few weeks you will be seeing and hearing a little of some of the food experiences I had in my travels. I have returned home with a whole swag of inspiration and ideas for dishes, as well as some new skills (I now know how to butcher a whole rabbit!) and some great kitchen hints and techniques. My trip took me to London, Inverness, Glasgow, Edinburgh and Paris - all very different places with different produce and different food traditions. But I thought I would begin with an account of my cooking school experience in Paris.

Starting the day with a cafe au lait before heading to cooking school

I woke really early on my second day in Paris very excited that I was heading for cooking school that morning. Students had all been instructed to meet outside the Jules Joffrin train station where we would meet our instructor, Chef Pino Ficara. We would then walk to the nearby market to purchase our fresh ingredients and then up the hill to the school itself for class.

Our first market stop was a fromagerie (cheese shop) where Pino gave us a lesson in the various kinds of cheesemaking techniques which had us all spellbound. Cheesemaking is such a scientific and magical process and many recipies and ways of working have been around for literally hundreds, if not thousands of years. I learned about how the fromageries were set up, in order to have the cheese at it's best, and also to prevent the stinky cheeses from cross contaminating the more delicate ones- a lot of the cheeses are not refrigerated and virtually all of the cheese is made with raw milk. In Australia, it is illegal to sell raw milk products (an exception was only recently made that allowed 2 kinds of Roquefort to be imported, but our laws are ridiculously antiquated) so I was so excited at the prospect of having a raw milk cheese fest.


A tiny sample of the huge selection of cheeses I came across in the fromagerie


And a fest it was. I tasted no less than 15 kinds of cheese (there must have been a couple of hundred in the shop) - all hand made - some made by monks, some aged in caves, some preserved in straw, cheese soaked in wine or basted in beer, cheese from cow milk, sheep milk and goat milk, bright yellow hard cheese and creamy milky white cheese, cheese that tasted of clean air and pure milk, cheese that was sticky and deliciously foetid, cheese covered in ash or studded with wild herbs and lavender,tangy and crumbly cheese, velvety white goat cheese so delicious it made your eyes roll back in your head! The shop itself was so beautifully set up. The aproned staff expertly cut and lovingly wrapped our selections and we headed to our next stop - the charcuterie (butcher)


Some of the poultry and game on sale at the charcuterie

If you are squeamish about raw meat or you are only used to buying your meat wrapped in sanitised plastic packets, then you might have been a bit freaked out on entering the butcher shop. Much of the meat such as poultry and games is sold in one piece, with head, feet/ claws all still attatched. Not only are these used for stock, but they also allow you to ensure that the meat is fresh. The selection available was so exciting - including pheasant, squab pigeon,quail, duck, about 7 or 8 varieties of chicken, venison, rabbits and hares. I love game and particularly rabbit so I was thrilled when it was decided that we would cook rabbit that day. We bought two whole rabbits (skinned, but with the head and all left on, as well as the liver - we had plans for that) which were wrapped up by the butcher in brown paper and string and we headed down the street to the fishmonger.


Oysters and fresh live crustaceans for sale at the local fishmonger


The selection of fish, and particularly shellfish was spectacular - so many varieties of oysters! (they are never pre opened, they are sold closed or you can get the fishmonger to shuck them for you), mussels and clams, periwinkles, live crabs of all kinds, langoustines, prawns and lobsters - also smoked fish, snails and fresh kelp. The first thing that strikes you is that the fish doesn't smell fishy - it is SO fresh that it just smells like seawater. Everything looked so superb - we chose two large silvery bream that we planned on turning into a starter for our menu.


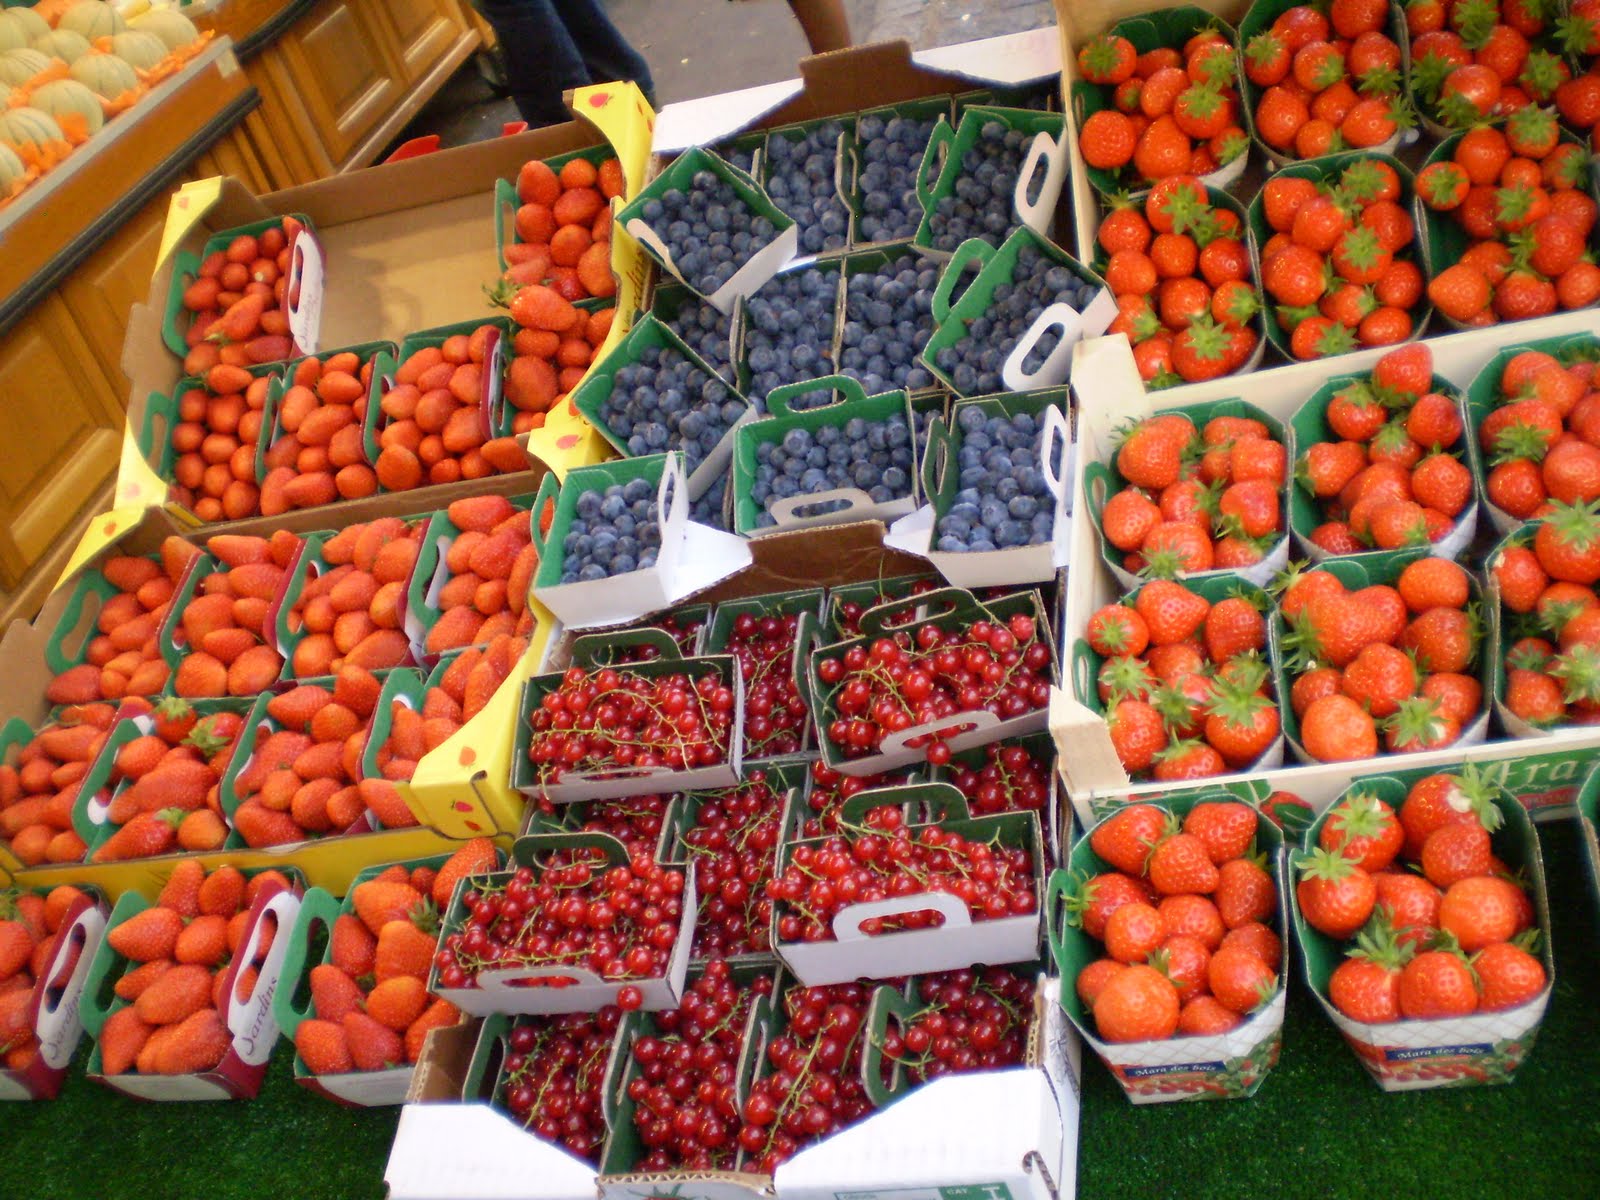
Delicious berries, destined for our kitchen


Pretty fresh radishes and onions at the greengrocer


Next stop, the vegetable market- a riot of brightly coloured reds, greens,oranges. Tight bunches of scarlet radishes, bundles of emerald green and creamy white asparagus, all kinds of herbs displayed in large wicker baskets big enough to put your washing in - and the berries! That luscious aroma of fresh strawberries again, cherries, melons... Everything looked so abundant and beautiful. We decided on what we wanted to serve with our dishes and came away with bunches of sweet smelling herbs, celery root (celeriac), wild asparagus (which I had never seen - delicate, with thin stalks and small pretty tapered ends), endive (witlof), fresh carrots, eschallots, garlic, a punnet or two of ruby coloured raspberries and some sweet smelling strawberries.


Gorgeous fresh artichokes for sale


Final stop on the way back to school was an artisan bread maker (who Chef said is quite mad and obsessed with perfection - but makes the best bread in Paris - using a centuries old woodfired oven, grinding his own flour with a stone grinder and keeping his sourdough culture literally locked in the basment because he is scared someone will steal it!) The bread! Oh.....the bread! The best I have ever eaten in my life. We chose bagettes, walnut bread, and a fruity rye loaf that we planned to serve with our cheeses. We munched on still warm bagettes happily as we walked up the hill to school in the sunshine.


Fresh bread from the artisan bakery - baked 4 times a day


The class was amazing and I learned so much - so many great tips and techniques as well as learning more about the actual chemistry of what happens to ingredients when you combine them or treat them in a particular way. It was also SO much fun. I learned to make proper creme patissiere (the beautiful custard that goes into choux puffs or tarts, and also butchered my first whole rabbit, which was like conducting surgery. In Australia they never have the feet or head left on!) I was in culinary heaven as we put our menu together - a starter of oven roasted bream filllets baked on a thick bed of fresh herbs and served with creamed celeriac, the main course of braised rabbit with sauteed endive, wild asparagus, carrots and eschallot confit and a dessert of a strawberry and raspberry tart, with an almond pastry base and vanilla creme patissiere. We also enjoyed a superb cheese platter between main course and dessert and lots of lovely french wine to wash it all down with. An unforgettable experience.

Here is what I cooked that day:


A starter of herb baked bream, celeriac puree and mache

Braised saddle of rabbit with wild asparagus, confit eschallots and witlof

Fresh fruit tart with almond pastry and creme patissiere


Because it doesn't get dark until 10pm, I decided to jump on a boat after class and cruise the Seine, enjoying the warm weather and that beautiful golden evening sunshine that turns everything buttery yellow. I cruised past the palaces, the tower, the Louvre - along the embankments where people were enjoying a glass of wine or lying on the grass. I felt so lucky to be there and to have had such a wonderful day. When I eventually made it back to Montmartre, I decided that I would have a picnic on my balcony for dinner, (I had eaten a lot during the day so I didn't want a big restaurant dinner) so I simply bought a small bagette (warm from the oven - they bake 4 times a day here!) ,a small piece of succulent cooked duck (in Paris butchers sometimes sell meat they cook on the premises), some raspberries and a little pot of creme freche to dip them in and ate them on my very Parisian wrought iron Juliet balcony overlooking the street as the sun went down. What a great day.


Chef Pino Ficara and I in the Montmartre kitchen

I have fallen completely and utterly in love with Paris - can you blame me??? I am already planning an extended return trip in 2011. In the meantime, I plan to hone my new skills and appreciation for French food in my own kitchen. Bon appetit!

*****


Thursday, March 25, 2010

A lovely fig tart for Autumn....

You will remember that I purchased half a dozen lovely organic red figs at the Addison Road market on the weekend, so I decided to use those as the centerpiece for a quick and easy tart. I had to bake something for a work morning tea and I wanted something I could throw together easily - This tart fits the bill perfectly.

I am also in the process of trying to use up various bits and pieces in the freezer and pantry - something I do each season. It is always good to have a good pantry clear out at  least a few times a year and it is a good excuse to create ways to use up bits and pieces that you might have leftover from other culinary ventures.

I discovered I had some almond meal (just a handful), some hazelnuts and some walnuts so I ground them all together and used those on the base of the tart. Other random leftover ingredients were a couple of sheets of puff pastry in the freezer and some maple syrup in the cupboard. These also helped to create this dish. This tart is of the rustic, freeform variety - I didn't fuss around with it or attempt to make it particulary perfect or pretty. You can if you want to. You could also do individual ones. This tart can be served warm or cold and would be nice with a little double cream as a dessert. This is a great way to enjoy the beautiful new season's figs that have started to appear in the greengrocer, welcoming in Autumn.

Walnut, almond & hazelnut tart with organic red figs.

You will need: 1 sheet pre packaged puff pastry, 6 figs sliced, 1 cup maple syrup, 3 tablespoons butter, 1/2 cup each of ground hazelnuts and walnuts, 2 tablespoons almond meal, 1 teaspoon vanilla extract, 2 Tablespoons caster sugar, 1/4 teaspoon grated nutmeg, 1 egg lightly beaten.

Method: Preheat the oven to about 220C.

Melt the butter and combine well with the nuts, vanilla, sugar and nutmeg.

Lay the pastry sheet on a baking tray (I use baking paper on the tray - no washing up!) and spread the nut mixture over the pastry, leaving about 2cm free around the edges of the pastry.

Lay the sliced figs over the nut mixture. Fold up the edges of the pastry and pinch around the edges so that it sticks together and stays put. Bake the tart until golden.

When you remove it from the oven, brush with the maple syrup when it is still warm.

*****

Saturday, July 25, 2009

Ravishing Ruby

Who can resist the stunning ruby red of rhubarb? Today's dessert teams up rhubarb with strawberries, vanilla and a hint of rose water to create a gorgeous ruby coloured compote that is very versatile. I have teamed it with meringue, but you can use the compote in lots of ways - as a base for a beautiful rhubarb crumble, as a jam on scones or piklets, as a sauce on icecream, served with yoghurt for breakfast or folded through whipped cream to make an old fashioned rhubarb fool. To top it all off, the compote freezes well so you can make a batch and save some for later.

Rhubarb is usually cooked with water and sugar and then stewed, but I prefer to cook it in the oven without water. Rhubarb contains a high percentage of water to begin with and I find that the oven method gives you a much better result and avoids the rhubarb breaking down too much and turning too watery and thin. The oven method also gives a superior flavour and colour.

Things you might not know about rhubarb - Despite being used most commonly in desserts and jams, it is actually a vegetable. The word rhubarb comes from the Latin word "rhababarum" which means "root of the babarians." It originated in China and the earliest records date back to 2700BC, when it was cultivated for medicinal purposes. It was considered very precious and was traded along with opium.

About the leaves......Sometimes when you buy rhubarb, it will still have the leaves attatched. The leaves contain highly poisonous oxalic acid that you should never consume under any circumstances. When you dispose of them, make sure they are kept out of the reach of children or any pets that might get hold of them. If you are a gardener, you can use the leaves to make an environmentally friendly bug spray, by boiling the leaves in water and using the liquid. Just be sure to clean the pot very carefully afterwards and keep the liquid in a safe place, as you would any kind of poison.

You will notice that I didn't make the meringues for today's dessert, I used good quality plain store bought ones. Feel free to make your own, especially if you happen to have a lot of eggwhites that need to be used and a bit of time on your hands. Today, I had neither :)

You would know by now that I'm not a huge dessert fan, but this one? Divine.


Rhubarb and Stawberry Meringue Parfait


You will need: 8-10 stalks rhubarb sliced into pieces about 3cm long, 2 cups strawberries hulled and halved, 3/4 cup caster sugar, 1 vanilla bean, 1 teaspoon rose or orange blossom water (you will find these at middle eastern stores or continental delis), 1 large meringue per person, 300ml thick or double cream, 1 tablespoon blanched and lightly toasted almonds.

Method: Heat the oven to 200C. Lay a piece of baking paper in the bottom of a small baking dish. Split the vanilla bean in two and scrape out the seeds. Combine the rhubarb, sugar, vanilla (the bean as well as the seeds) and place in an even layer in the baking dish. Bake for 20mins.

Remove the rhubarb from the oven and add the strawberries and the rose or orange blossom water. Gently combine - you do not want to crush up the rhubarb too much. Return to the oven for another 8 mins. Remove from the oven and allow to cool. The rhubarb mixture is best served at room temperature, so if you are making it ahead, take it out of the fridge before serving.

To assemble the parfaits, first chop the meringues in 4. Put a spoon of the rhubarb mixture in the serving bowl/glass, then some meringue, then some cream. Repeat. Top with some toasted almonds and serve.

*