Showing posts with label Zucchini. Show all posts

Friday, January 2, 2015

A Summer Lunch with a Friend

Today we invited our friend Kim over for a New Year catch up over lunch. It's great to be on holidays and to have the luxury of a leisurely lunch during the week, along with a few glasses of wine and some good conversation. The weather is really warm right now, so I wanted a menu that kept me out of a hot kitchen, and that also took advantage of the beautiful Summer produce around at the moment. I managed to come up with a menu that delivered all that, as well as ensuring I didn't have to turn the stove on inside at all. Win!

I thought I'd set the tone with some lovely bright flowers in my favorite vintage vase to pretty up the dining table a bit. Red and green is also kind of festive, don't you think?

Pretty, Pretty.

On New Year's Day I really felt like cooking a French style terrine (as you do!) so that made up our first course. I love a good terrine, and this one is my version, based on lots that I tasted when I was travelling in France. Every little cafe and restaurant seemed to have their own version (Terrine de Maison) and over the years I've developed my own. It is a mixture of pork and chicken, along with bacon, capers, pistachios, juniper berries and a touch of allspice. It is really delicious and better eaten the day after you make it. I've had a couple of requests for recipe, so I will share it with you at the end of this post. Here is what it looked like on the day I made it.


My Terrine de Maison


I served the terrine today with some crisp lettuce hearts, cornichons and some beautiful Bruny Island plum jelly that I brought back from my last trip to Tasmania. We also enjoyed it with slices of crusty French bread and lashings of fabulous Pepe Saya cultured butter. 


Plated Terrine 
with accompaniments

For the main course, I visited the fishmonger this morning and decided to see what they had that looked good, and I would base a dish around that. I found some super fresh, large local prawns and some really good looking line caught Blue Marlin steaks. I cooked them outside on the BBQ, along with some fresh asparagus and some zucchini flowers. I made a simple sauce with olive oil, lemon juice, cherry balsamic, chilli, capers, parsley, garlic chives and fresh oregano from my garden. I just drizzled the dressing over just before serving. I added some grilled lime on the side and some baby chervil herbs for a bit of freshness.


The Fish Course

The dessert was super simple. I bought 3 perfect white peaches that are now in season and really beautiful and fragrant, I always like creating dishes out of what is in season, and these are great right now. I blanched them in boiling water to remove the skins, chilled them and then served them drizzled with a sweet syrup made from palm sugar - and some fresh coconut cream and lemony tasting baby sorrel leaves. Easy - and a fresh and delicious end to a summer lunch. This is great dessert for people who can't eat dairy products. The coconut cream gives a velvety richness without any dairy at all. I notice that supermarkets are stocking it now, in the chiller section next to the sour cream and other dairy based creams. Have a look for it - it has a lighter, fresher taste than the tinned coconut cream you buy to make curries with.


White Peach
With palm sugar, coconut cream and baby sorrel


We had a lovely few hours eating and chatting and drinking wine and everyone enjoyed the menu I had put together. Apart from the terrine, which was made the day before, it was a very low stress menu for a hot Summer day.

As requested, below is the recipe for my terrine. You can cook it in a traditional ceramic terrine (the rectangular dish that gives the dish its name) or a metal loaf tin, if you don't have a terrine. You will also need something to place on top of the terrine while it is cooking, to compress it. I use a small rectangular ceramic dish that works fine.


Gourmet Goddess Terrine de Maison

500g Pork Mince
500g Chicken Mince
250g Finely Chopped Bacon
15-20 Slices Prosciutto
1 Large Finely Chopped White Onion
2 Cloves Garlic
1/2 Teaspoon Allspice
6 Crushed Juniper Berries
1 Teaspoon Finely Chopped Rosemary (Don't use dried Rosemary for this recipe)
1 Tablespoon Wholegrain Mustard
1 Tablespoon Small Capers 
2 Teaspoons Salt
1 Teaspoon Ground Black Pepper
1 Egg
1 1/2 Cups Breadcrumbs
3 Pinches Cayenne Pepper
1 Tablespoon Butter
1 Tablespoon Olive Oil
Olive Oil Spray

Method:

Preheat the oven to 170C. Cut a piece of baking paper to line the bottom of your terrine dish or tin. Spray the tin with olive oil. 

Carefully line the bottom and side of the tin with a layer of prosciutto. Set aside.

In a pan, heat the tablespoon of butter and olive olive oil. Add the onions and garlic and cook until transparent. Don't have the heat too high - you don't want the onions or garlic to brown. 

In a large mixing bowl, add the cooked onion and all of the other ingredients. Using clean hands, thoroughly mix the ingredients until very, very well combined.

Fill the terrine with the mixture, taking care that it is packed in evenly. When you have finished, add a weight to the top of the terrine. I use a small rectangular ceramic dish to do this. You want the terrine to be compressed during cooking, which results in a nice, even terrine when you go to cut it later. Cover the whole dish with foil.

Cook in the over for 1 hour 20 minutes. When you remove it from the oven, take off the foil and carefully drain any excess cooking juices that you may find at the bottom of the terrine.

Allow the terrine to cool in the dish for about 30 minutes, before turning it out on a plate and putting it in the fridge to chill. You can eat it once it's cold, but I recommend waiting 24 hours, as the flavours develop really nicely given a little bit of time.

Serve with crusty bread, any kind of pickle of fruit jelly and some crisp lettuce leaves. It's also great in crusty rolls for a picnic.

Serves 8 People


*******

Tuesday, July 2, 2013

A Rainyday Sunday Lunch

Last Sunday we had friends over for lunch and I thought I'd share what was on the menu. Inspired by a pumpkin and beetroot salad I had the night we dined at Smolt in Hobart, I did my own take on this, but with the addition of sliced crispy skinned duck breast. I had two Burrawong Gaian duck breasts in the freezer which I wanted to use - and this was just the right amount for a starter for four. If you find Burrawong duck or chicken for sale where you are, grab it. They are brilliant quality and are also the only producer of meat chickens and ducks in Australia to be certified as True Free Range by Humane Choice.

I roasted some fresh beetroot and pumpkin (in separate pans, or the beetroot will stain everything), added some roasted sweet onion, mixed salad leaves and thinly sliced duck breast, which was cooked gently, skin down in a pan to gently render the fat and crisp the skin. I then transferred the duck to a moderate oven for 10 minutes or so to finish cooking, and rested the meat thoroughly before slicing. A few months ago I bought a bottle of locally made blackberry vinegar when we were down in Canberra, so this was the basis for the dressing. I also added some fruity extra virgin olive oil, wild bush honey from Tasmania, garlic, a little salt and pepper and a pinch of cayenne. The berry vinegar worked a treat with the rich duck meat. The salad was delicious served with freshly baked bread and good butter.

Using duck breast in a salad is a great way to serve duck if you are unsure about cooking this game meat. Cooking the whole bird can be a bit tricky - but mastering the duck breast is a whole lot easier. It also works out to be quite economical if you use it the way I did.  Two smallish duck breasts are more than enough to serve four adults as an entrĂ©e. Whatever you serve with it, a dressing or sauce with a bit of acidity works best with this, or any other game meat for that matter. It cuts through the richness and highlights the natural sweetness of the meat.


Duck, Pumpkin & Beetroot Salad 
With Blackberry Vinegar and Honey Dressing
 
It was cold and raining outside, so for the main course I went for ultra comfort food - pork belly, creamy mash and parmesan roasted zucchini and beans, served with a rich horseradish gravy. To cook the pork, I rubbed it with salt, fennel seed, some crushed native lemon myrtle and pepper berries and laid it on a bed of roughly chopped onion, celery, garlic and Granny Smith apples. Once the meat was cooked and resting on a plate, I used a spoon to smash up the now very soft apples and onions left in the pan to form what I decided to call "apple smash". Presto! Your own chunky apple sauce and you didn't have to do a thing.
 
 
Pork Belly -
Served with Parmesan Baked Zucchini, Green Beans, Garlic Mash,
Horseradish Gravy and "Apple Smash"

A roast is a really good low maintenance option when you are having lunch or dinner guests. I've yet to find a meat eater who doesn't love  a roast dinner and vegetarians are easily accommodated too, if you choose the best seasonal vegetables to roast. To make things a bit more interesting, I try to serve a sauce or accompaniment that is a little bit different - like doing polenta instead of potatoes, or tossing the roasted veges in a dressing and some fresh herbs to make a tasty vegetable salad. It's a good idea to check out the greengrocer and see what vegetables are in season where you are and base your menu around those. It's a great excuse to try a vegetable you haven't had before or maybe take an old favourite and serve it in a different way.

I didn't serve a dessert on this occasion, as I felt that the dishes were pretty substantial. It ended up being a good call, as we were all more than satisfied after the main course. I had enough leftover pork to use the next day for a super fast Monday night dinner. I chopped the pork up into smaller pieces and added it to rice, spring onions, peas, mushrooms and a quickly made chopped up omelette to make pork fried rice. Delicious and ready in 10 minutes. Gotta love leftovers!

******


Tuesday, January 29, 2013

Simple Summer Seafood

In Summer, I really lean towards dishes that are light, healthy and full of the gorgeous Summer produce - but also ones that don't keep you trapped in a hot kitchen too long. If a dish can be cooked outside on the BBQ, then all the better! Today's dish ticks all those boxes. I put this together after seeing some beautiful Blue Eye Cod at the fishmonger, and wanting to do something lighter and healthier than fried fish and chips.

Blue Eye Cod (also called Blue Eye Trevally) is one of my favorite fish to eat. The firm white flesh has a lovely mild flavour and a beautiful meaty texture that means it won't be likely to fall apart when you are cooking it. Although it can handle marinades and more robust sauces, I like to cook it very simply, so that the fish is not overwhelmed and you don't miss out on that delicious taste.

In today's dish, I teamed some simply cooked Blue Eye Cod with a selection of seasonal grilled vegetables and a light and fresh lemon and caper dressing. The result is a delicious, healthy and good looking dish that you could happily serve at a dinner party or as a delicious mid week dinner. Because it requires very little preparation, it is a perfect choice if you are in a hurry or want something to serve that won't keep you from your guests too long.

You could easily adapt this dish for vegans or vegetarians - leave out the fish, do extra veges (maybe some grilled tofu?) and serve with the lovely lemon and caper dressing. For those who don't like seafood, some free range chicken thighs, seasoned and grilled would work well too.


Grilled Blue Eye Cod
with grilled vegetables and lemon caper dressing

You will need:
1 or 2 pieces fish per person, olive oil for grilling, 2 medium zucchini, 1 medium eggplant, 1 bunch asparagus, about 300g peeled pumpkin, salt.

For the sauce: 1 tablespoon extra virgin olive oil, Juice of 1 lemon, tablespoon chopped continental parsley, 2 teaspoons very finely minced or chopped garlic, 1 tablespoon honey, 1/2 tablespoon baby capers, salt and pepper, 1/4 teaspoon cayenne pepper.

Method:
First, make the sauce by whisking together all of the sauce ingredients well, until they emulsify and thicken slightly.

Slice the zucchini, pumpkin and eggplant into thin 1cm slices. Cut the woody ends off the asparagus. Check the fish for bones - if there are any, pin bone the pieces by using tweezers to carefully remove each one.

Heat a grill pan or BBQ until very hot and cook the vegetables until tender, brushing with a small amount of olive oil and seasoning with a little salt. Once all the veges are cooked, put them aside.

Brush the fish with olive oil and season with salt and pepper. Cook the fish for 2-4 minutes each side, or until cooked (timing on this will depend on the thickness of your fish fillets)

Assemble the vegetables on your serving plate/plates. Add the fish to the top of the vegetables and drizzle with the caper dressing. Serve right away.

******


Thursday, January 24, 2013

Zucchini and Haloumi Fritters

Ok, tonight it's something fast, simple and vegetarian with a Greek flavour. These haloumi and zucchini fritters make a lovely light lunch or a nice side dish for grilled or BBQ'd meat or seafood. I served mine with some simply marinated lamb cutlets, drizzled with olive oil, lemon and plenty of pepper. There were plenty left over for a fresh tasting lunch the next day. I was thinking that these would also be really nice finger foods - just make them bite sized instead of the meal sized ones pictured here.

I love salty flavours and gorgeous Cypriot haloumi cheese really gives you that - so much so that you should be really careful not to add any extra salt to your mixture, or the dish will be overwhelmed. The fritters will be salty already because of the very strong haloumi and have a lovely aroma and taste, from the spring onion, garlic, fresh parsley and mint added to the batter.

You can whip a batch of these in no time, so what are you waiting for?


Zucchini and Haloumi Fritters
with Garlic Yoghurt

You will need: 
For the fritters: 2 medium zucchini, 250g (1 small packet) Haloumi cheese, 2 teaspoons finely chopped mint, 2 tablespoons chopped continental parsley, 1/2 cup finely chopped spring onion, 2 eggs, 2 heaped tablespoons plain flour, 1 clove minced or very finely chopped garlic, 2 pinches cayenne pepper, olive oil for frying.

For the sauce: 1 cup continental style thick plain yoghurt, 2 teaspoons finely minced or pureed garlic, pinch of salt, pepper to taste.


Method:
First, make the sauce - simply combine all the sauce ingredients, cover and refrigerate until ready to serve.

Grate the zucchini, place in a bowl and allow to sit for 5 minutes. Squeeze out as much of the moisture as you can. Grate the haloumi.

Combine the haloumi, zucchini, mint, parsley, spring onion,eggs, flour, garlic and cayenne and mix well. Heat a non stick fry pan with a little olive oil and cook the mixture a tablespoon at a time for about 5 minutes each side. Use a spoon to gently shape the patties. The mixture will be quite soft - this is normal, and the fritters will firm up a little as they cook and then again as they cool.

Drain on paper towels. Serve warm or cold with the garlic yoghurt. Makes about a dozen medium sized fritters.

******


Tuesday, December 4, 2012

Summer on a Plate

Today's dish was inspired by some of the delicious green Summer vegetables that have just come in to season and are really fabulous right now - asparagus, green beans, peas and zucchini. This salad would work plated up individually as a light entree or lunch - or on a generous sharing platter as a change from your usual repertoire of Summer salads, to go with grilled meat or seafood. It would also be a beautiful vegetarian option for a BBQ or the Christmas dinner table. It is really easy to put together and tastes as good as it looks.

This salad has a great balance of flavours and textures - the crisp, light texture of the vegetables, the rich creaminess of the goat cheese, the tang of the simple chive vinaigrette dressing and the delightful freshness of the mint. Just perfect for a Summer menu.

I really adore Chevre (soft, creamy style goat cheese) but if you wanted to use the firmer aged goat cheese this would work just as well. I do think though that the younger, creamier style has a freshness that works particularly well with the lightness of the vegetables and the aromatics of the mint leaves. Of course if you detest goat cheese, feta would be a fine substitute.

We are heading to the South Coast for Christmas this year and this salad will definitely be on the menu while we are away. The vegetables will be easy to cook on the BBQ and it will be perfect as a light lunch by itself, or as an accompaniment to some fresh local seafood or a char grilled piece of lamb. It would also be great as a topping on some thickly cut, rustic sourdough toast.

I love the transition of the seasons when all the new produce starts to appear - out with the old and in with the new. It's easy to get in a bit of a rut - cooking the same stuff, but these new season ingredients always inspire me to try something new. To see what else is in season right now, check out the list on the right hand side of this page and get some inspiration too. In the meantime, here is my "Summer on a plate" salad to get you going.


Asparagus, Zucchini and Green Bean Salad
With Mint and Goat's Cheese


You will need:
For the salad - 1 bunch asparagus, 1 finely sliced spring onion, 2 smallish green zucchini, a generous handful or two of green beans, 1 cup fresh or frozen peas, About 60g Chevre (goat cheese), a handful of fresh mint leaves, a splash of olive oil, salt and pepper.

For the dressing - 2 tablespoons good quality olive oil, 1 tablespoon Sherry Vinegar, 2 teaspoons honey,  2 teaspoons finely chopped chives, 1 clove minced or super finely cut garlic (I do mine on a Microplane), salt and pepper. 

Method: First, make the dressing. Simply combine all of the ingredients and whisk together thoroughly until all combined. Put aside while you prepare the salad.

Bring a pot of salted water to the boil and cook the beans for about a minute until they start to soften. Drain them and run them under cold water to stop the cooking process. Set aside.

Cook the peas until tender (I just do these in the microwave - quick and easy) Set aside to cool.

Cut the woody, hard ends off the asparagus and then chop the asparagus in half. Slice the zucchini in diagonal slices.

Heat a grill or fry pan and add a small splash of olive oil and cook the the zucchini and asparagus in batches, seasoning with salt and pepper as you go. They should just colour up a little and not be overcooked. You want them to retain a little firmness. Set aside.

Chop or crumble the goat cheese.

Assemble the asparagus, zucchini, onion, beans, mint and peas on a serving dish, then add the goat cheese. Drizzle over the dressing, top with a few extra mint leaves and serve.

******


Sunday, August 19, 2012

A Weekend Food Diary

This weekend I had an old friend from overseas staying with us, and because we wanted some quality catch up time, our plan was to stay pretty close to home, cooking, enjoying a few glasses of wine and taking the rare opportunity to spend time together. I thought that I would share what we have been enjoying over the last few days, all cooked at home with the exception of a Sunday morning brunch trip to nearby Addison Road Markets in Marrickville, where we ate a very eclectic breakfast and picked up a few fresh ingredients to bring home on the way. All of the dishes were quite simple and easy to put together, but they were big on flavour. Looking back on the weekend, we have certainly enjoyed a diverse menu!

Friday:
My weekend food diary begins with a Japanese inspired Friday night dinner. A selection of shared dishes, served on some of the lovely Japanese ceramics we brought back from our recent trip. We began with crispy calamari and a creamy wasabi mayonnaise, and a dish of pickled radish, fennel and carrot for a tangy, crunchy contrast.

Crispy Calamari with Wasabi Mayonnaise
Radish, Fennel and Carrot Pickle

Next, a sticky, chilli coated stir fried tofu and snake bean dish, made extra delicious by the addition of dried shaved bonito. I love the very savoury dimension that dried bonito always adds to a dish - the ultimate seasoning I think! I used a medium firm tofu for this dish - it is quite forgiving as far as being handled goes and retains it's shape really well.

Chilli Tofu with Snakebeans and Bonito

For the final component of our meal, I took a beautiful smallish piece of beef fillet and coated it with a crushed mixture of fragrant black, white and red peppercorns. I seared it in a pan with a little oil, then transferred it to the oven for about 15 minutes to continue cooking. After resting it for another 15 minutes, I sliced it very thinly and served it drizzled with a simple teriaki sauce and topped it with sesame seeds. The texture of the meat was soft, moist and buttery - so tender you could pull it apart with your fingers. Washed down with a few glasses of Sake, our Japanese inspired dinner was a lovely way to kick off the weekend.


Fillet of Beef Teryaki with Sesame

Saturday:
It was a lovely sunny Saturday, so for lunch we decided to cook outside. We headed off to the fishmonger and bought some locally caught octopus as well as some fresh Australian prawns, which we brushed with a simple and very quickly thrown together olive oil, paprika and garlic marinade. We cooked the whole lot over coals in the back yard, and ate our seafood with crusty bread and a salad of mixed leaves which we drizzled with a small amount of fruity olive oil and some cherry balsamic. So simple, but a lovely lunch.


BBQ Prawns and Octopus with Mixed Leaf Salad

Now, there are unfortunately no pics of what we ate for dinner Saturday night - I got a bit trigger happy with delete function on my camera - so you will just have to imagine the twice cooked pork belly, served with a dollop of creamy mash and new seasons zucchini flowers, which I stuffed with a little feta cheese, parmesan and sorrel picked fresh from the garden. Rich, tasty and very delicious. I always get very excited when I start to see zucchini flowers appearing at the greengrocer - it means spring is on the way, and it is the perfect time to enjoy these delicate, beautiful vegetables.


Zucchini Flowers

Sunday:
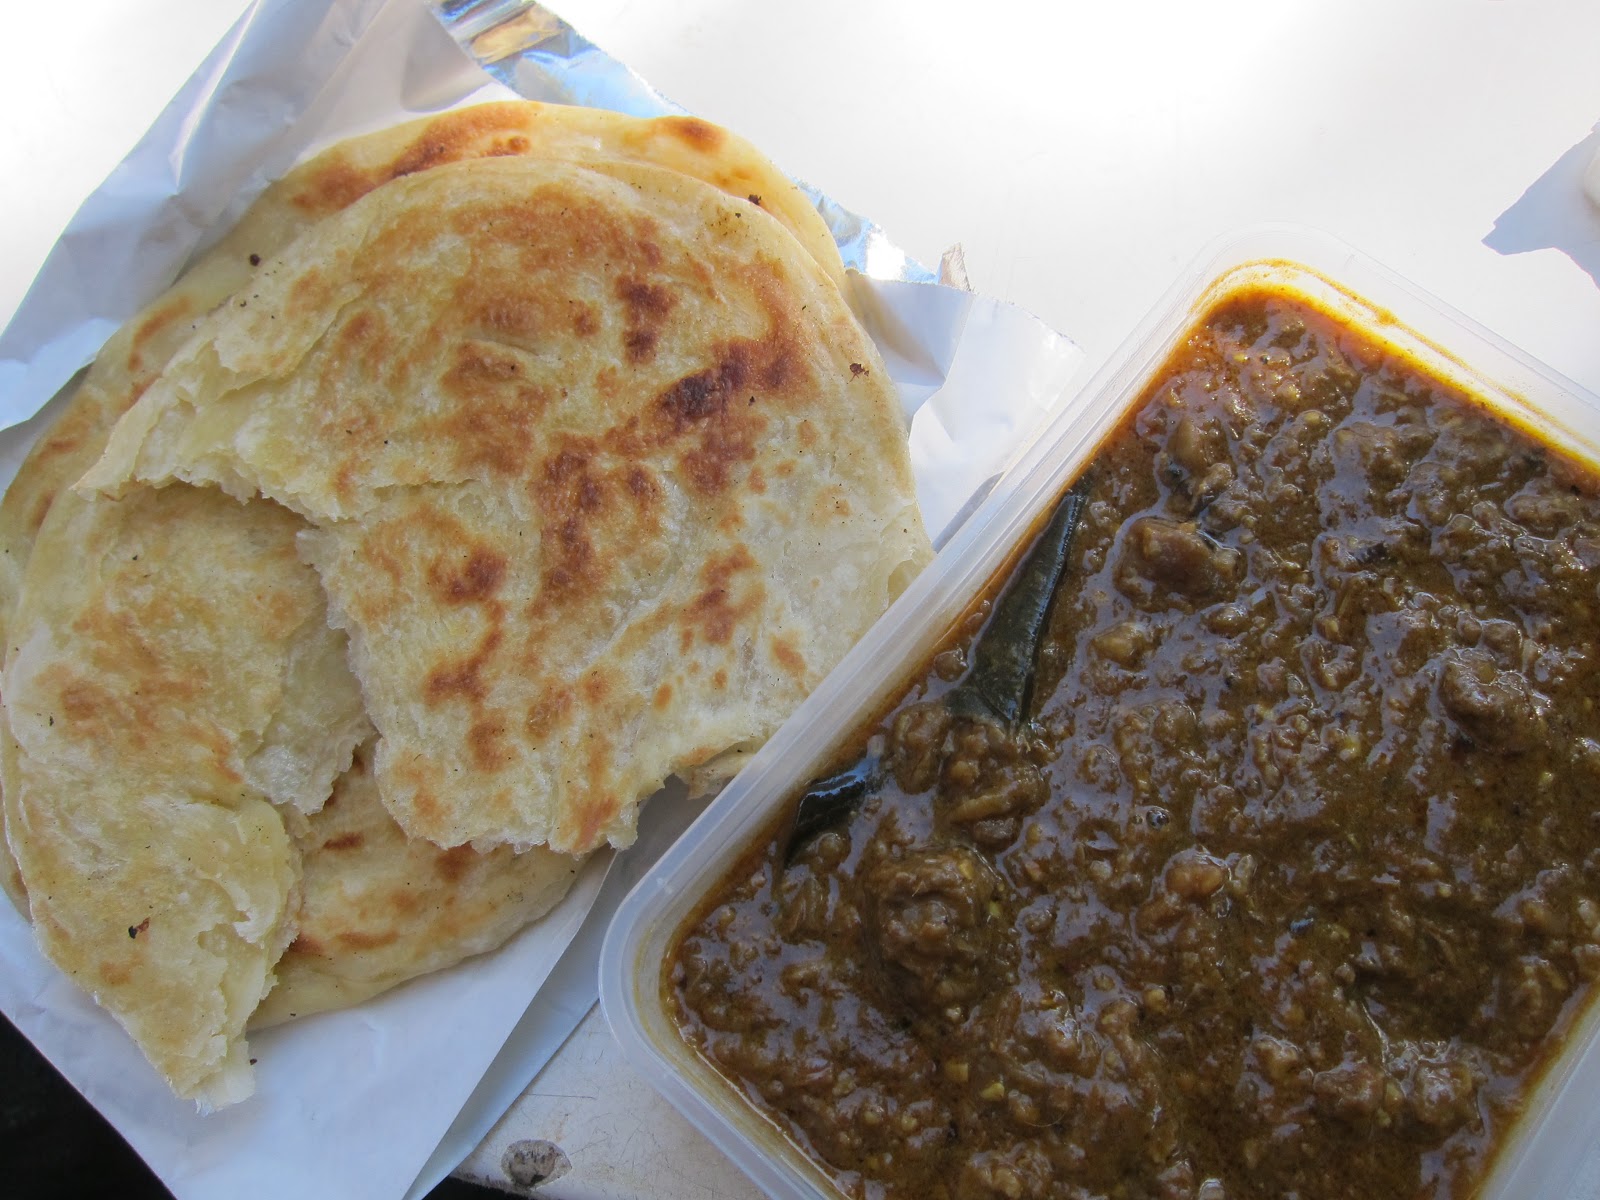
Sunday morning dawned bright and sunny - perfect for being out and about - so we headed off to Addison Road Market in Marrickville to do a little bit of produce shopping and to find our breakfast. Unable to make up our minds on what to choose, we ended up trying a selection of dishes. Of course we can't visit the market without tasting the delicious hawker style roti - this time served with a rich and flavoursome lamb curry sauce. Surely this has to be one of the best breakfasts on the planet - one of my all time favourites anyway!


Roti with Lamb Curry Sauce

Delicious rustic style corn fritters were next, served with crispy bacon, homemade tomato relish, a pile of fresh herbs and a dollop of creamy aoli - yummo!


Corn Fritters
with Bacon, Homemade Tomato Relish and Aoili

In a nod to yum cha, we also shared a plate of freshly steamed dumplings - prawn and vegetables wrapped in a sticky rice wrapper, a BBQ pork bun and plenty of hot chilli sauce. I love the clean taste of a steamed dumpling, teamed with that eye watering chilli kick - certainly enough to wake you up on a Sunday morning!


BBQ Pork Bun and Steamed Dumplings


Wandering around the market, I picked up a few produce items, including organic, picked-that-morning broccolini, freshly baked ciabatta bread, crisp red radishes, pumpkin, King Edward potatoes, yellow heirloom carrots, a rack of organic lamb (from a local producer who was trying his product at the market for the first time) and some super soft and rich flavoured white rind cheese.


From Addison Road Market -
Organic vegebtables, Lamb, Ciabatta and Soft White Rind Cheese
When we arrived home from the market, we were definitely too full to eat lunch, so we had a glass of wine sitting in garden instead. I did however make a start on Sunday night dinner. I had gotten my hands on some ox cheek from our local butcher, which I was keen to slowly braise, hoping to bring out some of the amazing rich flavour that this cut of meat can deliver. It's funny, I see this ingredient on menus quite regularly, but until this week had not seen the raw product for sale at the butcher. When I saw it, I grabbed a couple of kilos right away.

Ox cheek requires very long, slow cooking - and we certainly weren't going anywhere - so it was a great time to make this hearty, comforting dish. I cooked it super simply - just seasoned and seared the meat, cooked a pile of onions, chopped carrot, parsley stalk and garlic in a little good quality olive oil and topped the whole lot with some plain beef stock before putting it in the oven for 5 hours at 120C. The resulting meat was buttery and melt in your mouth, with a dark, rich gravy. I think the secret to getting a really rich sauce is using lots of onions - I used sweet Spanish onions, which broke down during the cooking process to give a rich, caramelised flavour and body to the sauce.


Slow Braised Ox Cheek
with King Edward Potato Mash and Buttered Peas

I served the Ox cheek with a creamy mash made from the King Edward potatoes I bought at the market, and buttered peas. Nothing fancy, but hearty and full of flavour. Because the meat is very rich, we only needed small portions, so the leftover meat will be frozen, to be topped with golden puff pastry sometime in the future and reinvented as a delicious pie. A great way to have something special after work that can be thrown together quickly - all the hard work is pretty much done. I was really pleased with my first attempt at Ox cheek and will definitely keep my eyes open for it at the butcher. It wasn't expensive either - although I'm wondering if it will go the way of lamb shanks - something that butchers would almost give away a few years ago, and that now commands a top price due to a sudden fashion for that particular cut of meat. Time will tell.

So, that was the weekend in food.

And then.....
Next weekend we are heading up to my lovely in laws on the Central Coast for a Sunday family lunch, and have decided to make a weekend of it - driving up on Saturday via the Hunter Valley Region. The plan is to explore and enjoy some of the culinary delights of the area on Saturday, spend the night at The Crowne Plaza Hunter Valley and then drive across to the coast Sunday morning. The last time we were there, we discovered a farm that sold the most incredible tasting non homogenised milk, and we are taking an esky this time, so that we can stock up. We also purchased some gorgeous quality free range eggs (most turned out to have double yolks) from the same farmer, so we will be sure to pay him a visit again. Will have to do some research this week on what else we might want to check out - I hear there are cheese producers and all kinds of other food delights in the area, so there will be no shortage of things to do. Will be sure to pack my camera and my notebook, so I can share the highlights with you all.

Have a delicious week!


Sunday, June 3, 2012

Middle Eastern Inspiration

In winter, I really love to eat food that is full of warm, aromatic and earthy flavours - and today's dish has this in spades. I have used a fragrant and warming middle eastern inspired spice mix to flavour frenched lamb cutlets, and added to this beautiful seasonal roasted vegetables, fresh herbs and seeds from one of my favourite fruits, the pomegranate. To top it off, a perfectly balanced sweet and slightly piquant dressing.

This dish is also my first experiement with using quinoa, that superfood favoured by the Incas and popping up on menus everywhere these days. It really seems to be the ingredient de jour, particularly amongst my vegetarian mates. I decided it was about time I gave it a try, so I included it in my lamb dish in place of the cracked wheat or cous cous I would normally use. I really loved the slight chewiness to the grain and the nutty taste. By all accounts it is also incredibly good for you - there is a reason the Incas called it the "mother of all grain"

This dish is really big on flavour, and although there are a few components, it is actually really easy. It really is worth hunting down fresh pomegranate if you can find it - the little bursts of juicy jewel coloured seeds are just beautiful, as well as looking fabulous on the plate.

There are potentially heaps of variations you could try with this recipe - try whatever veges are in season that you like - eggplant, squash, asparagus, sweet potato would all be great. If you are a vego, leave out the lamb and make the vegetable component as a dish in itself, along with the dressing. I was also thinking that chicken thighs or even fish or prawns would work well too. Toasted almonds or pistachios would also add another texture and flavour dimension.

This dish would be lovely served on a big platter as part of a shared, buffet style meal, even at a BBQ. You will fall in love with the middle eastern influenced flavours and the delightfully varied textures.


Middle Eastern Lamb Cutlets
with quinoa, roasted vegetables and fresh pomegranate

You will need:
(For the lamb) 6-8 Frenched lamb cutlets, 1 teaspoon sumac, 2 teaspoons ground coriander, pinch cayenne pepper, 1 teaspoon mild paprika, 1 tablespoon olive oil, 1 tablespoon warm water, salt and pepper.

(For the vegetables) 2 cups cooked quinoa, about 6 cups assorted raw vegetables cut into chunks about 3cm square (I used red capsicum, pumpkin, zucchini, red onion), 1 cup sliced cooked green beans,1 tablespoon olive oil, 1/2 cup fresh pomegranate seeds, 1/2 cup fresh parsley, 1/2 cup deseeded sliced olives, salt and pepper.

(For the dressing) 1 tablespoon olive oil, 1 tablespoon pomegranate balsamic (use plain balsamic if you can't find this), 1 clove minced fresh garlic, 1 tablespoon maple syrup, 1 tablespoon warm water, generous pinch of salt, pepper.

Method:
Preheat the oven to 220C.

Combine the sumac, coriander, paprika, olive oil, cayenne, water and salt and pepper to make a paste. Rub the paste into the lamb cutlets and set aside to marinate.

Whisk together the dressing ingredients and set aside at room temperature until you are ready to serve.

Combine the chunks of vegetables with the olive oil, salt and pepper. Place the vegetables on a baking tray and bake for around 30 minutes, until they are well cooked.

Heat a grill pan (or BBQ) and cook the lamb cutlets - they will not take very long (about 5 minutes), so keep an eye on them so that they are not overcooked. Ideally, they should be a little pink in the middle. Set the cutlets aside to rest.

While the cutlets are resting, gently mix the quinoa, roasted vegetables, green beans, parsely, olives and half of the pomegranate seeds all together in a large bowl.

To serve, place a few generous spoonfuls of the vegetable mixture on the plate, top with the cutlets and then drizzle over a little of the dressing. Add the remaining pomegranate seeds and serve.

Serves 2 - 4 People
******

Sunday, April 1, 2012

Little Bites of Goodness

We have been making a conscious effort in our household to eat a lot more healthily lately - which means cutting down on meat, fat and sugar and upping the vegetable content of everything. Today I am heading off to meet with our book club group (today's book for discussion - Joseph Conrad's tale of colonialism and man's dark nature -  "Heart of Darkness") Just because the subject we are discussing this afternoon is uber heavy, doesn't mean that the snacks for the afternoon have to be - so I made a batch of these delicious savoury muffin bites to take for the refreshment table.

These little muffin bites are full of vegetables, as well as gorgeous sorrel from my garden (you can substitute baby spinach if you can't find sorrel) and very low fat cheese, so they are good for you, as well as being delicious. They are also quick and easy to throw together. They have a very moist, soft texture due to the vegetables and the cheese and do not resemble the more "cakey" style muffins.

These muffins are also my first attempt to include Chia seeds in my cooking. Chia seeds contain an insane amount of anti-oxidants, fibre, protein and omega 3 oils -  as well as having lots of other health benefits - balancing blood sugar levels,helping to regulate blood pressure, having anti aging and anti inflammatory properties and providing a boost of energy without caffeine or drugs.

So, these little bites of healthy goodness will provide a dose of good stuff, whilst not being bad for the waistline or the tastebuds either. They would be great in lunchboxes or as a healthy snack. You can of course bake large ones if you want to - the recipe below will make 6 muffins if you decide to do that. Otherwise, the amount below will bake 12 mini muffins.


Vegetable and Chia Seed Muffin Bites


You will need: 2 cups self raising flour, 1 tablespoon baking powder, 1/3 teaspoon cayenne pepper, 1 teaspoon salt, 1 egg, 1 cup low fat milk, 1/2 cup reduced fat grated cheese, 1 cup low fat cottage cheese, 1/2 cup chia seeds, 1 cup grated carrot, 1 cup grated zucchini, 1 leek sliced finely, 1 cup finely chopped sorrel or baby spinach, olive oil spray.


Method: Preheat the oven to 200C. Spray a pan with a little oil and cook the leeks until soft. Set aside.

In a large bowl, combine the flour, baking powder, cayenne pepper, salt, chia seed, grated cheese. Mix well.

In a separate bowl, whisk together the egg, milk and cottage cheese.

Add the grated carrot, zucchini, leek and sorrel/spinach to the dry mixture and combine gently. Now add the wet mixture and fold through with a spatula until just mixed.

Spray a mini muffin tin with oil and spoon the mixture into the pan.

Bake for 15-20 minutes until they start to turn golden on top. Remove from the oven and allow to cool before removing them from the pan.

Makes about 12 small muffin bites.

******


Sunday, February 19, 2012

Making the Connection

We have been enjoying the beautiful chemical free, sustainable produce from Food Connect over the last few weeks. These guys source produce direct from the farmers and it is picked only a day or so before it is delivered to you. The food is all local and seasonal, so you are not only getting the best quality, you are also getting the best nutrition and ensuring that the farmers are paid a fair price for their product. Everybody wins. We have been really impressed by the quality of the fruit and vegetables we have been receiving - and it has been so inspiring to plan menus around what we get in our box each week.

There is something very special about actually knowing the farmers who are growing our food via regular newsletters and updates on the Food Connect website. You know their stories, what they are up to that week, even what they look like! The farmers receive between 40 and 45 cents in the dollar for their produce - to give you an idea, the big supermarkets like Coles and Woolworths can pay their producers as little as 5 cents in the dollar, while they pocket the profits. I know where I would rather my money went....

One of the goals of Food Connect is also to minimise how far the food travels, both to ensure quality and to aim for a lower carbon footprint. On average, the furthest any of the food we have received so far has travelled is between 50 and 80 kilometers.

I wholeheartedly recommend that you check out their website and see if they operate where you live. As well as fruit and veges, they also do a range of dry goods, bakery items and fresh free range eggs that you can also order as part of your delivery. They operate in Queensland as well as New South Wales and you will find all the info about them here: http://sydney.foodconnect.com.au/

This week when our Food Connect box arrived I saw we had some lovely fresh eggplant, pumpkin and zucchini, so this became the basis for a yummy Summery BBQ meal with a bit of a mediterranean flavour. I added fresh herbs from our garden, a rack of lamb and a tangy Tzatziki sauce to create today's recipe. It is very easy to make, and the fresh flavours are wonderful - a great way to showcase those super fresh, chemical free vegetables.


Herbed BBQ Lamb
with char grilled vegetables and Tzatziki


You will need: 1 frenched rack of lamb (I used an 8 point/cutlet rack), 1 cup continental parsley, handful each of fresh oregano and basil, 2 large cloves garlic, salt & pepper, squeeze of lemon, 2 tablespoons extra virgin olive oil.

For the vegetables: 1 red capsicum seeded and sliced into thick strips, 1 eggplant cut into strips, 2 zucchini cut into strips, 6 slices pumpkin cut into strips. (the strips should be about 1cm thick) olive oil, salt.

For the Tzatziki:1 cup thick Greek style yoghurt, 1 large clove garlic, 1/2 cup finely diced continental cucumber, 1 teaspoon fresh chopped continental parsley, pinch cayenne pepper, squeeze of lemon, 1 teaspoon finely chopped fresh mint, salt and pepper.

Method: Combine the parsley, basil, oregano, garlic, lemon, olive oil, salt and pepper and either blend in a good processor or pound in a mortar and pestle until it makes a paste/marinade. Brush all over the lamb rack and allow it to marinate for an hour or so (overnight would be fine too)

Brush all of the veges with a little olive oil and season well. Set Aside.

Combine the tzatziki ingredients, mix well and refrigerate until needed.

Before cooking the lamb, remove it from the fridge about 40mins before cooking it. For best results, meat should not be too cold when you place it on the heat. Taking it out a little before you are ready to cook it will result in a more succulent and tender result.

Heat a Weber or covered BBQ. Cook the lamb for about 30 minutes, basting with any extra marinade as you go. Remove the lamb and allow it to rest while you cook the vegetables.

Add the vegetables to the BBQ and cook until lightly charred and tender.

To serve, pile a serving plate with the veges and drizzle with tzatziki. Carve the lamb and arrange on top of the veges.

******

Sunday, February 5, 2012

Pumpkin and Ricotta Ravioli

I really love pasta and have been known to make my own, but over the years I have learned a great standby if you want to make your own tortellini or ravioli quickly. I always keep a pack or two of the Chinese Gow Gee wrappers in the freezer so that I can make a batch of tortellini if the mood takes me. All the hard work is done, and all you need to do is think about what kind of delicious filling you want to put into them. You can buy Gow Gee wrappers at any Asian supermarket and they are very cheap. If you have never tried this cheat's way of doing filled pasta, give it a go.

Last Monday, as it was "No Meat Monday", I decided to make a vegetarian tortellini, using pumpkin and some ricotta cheese that I had in the fridge. It was an easy dish to do after work and it tasted just lovely. Instead of a traditional style sauce, I simply sauteed some young zucchini (in season right now) and added this to some chopped ripe heirloom tomatoes, a few herbs and some good olive oil. I really loved eating the tortellini with this sauce that wasn't really a sauce. It was fresh and tasty, and you could taste all the different tomato varieties with each bite.It is a great way to enjoy pasta in Summer, that tastes lighter than a full throttle, simmered sauce.

I have noticed that heirloom tomatoes are becoming more available, so next time you are at the greengrocer, check out these different varieties. As well as having different tastes, you will find them in all sorts of colours, which adds a great visual impact to your dishes. My tomatoes were red, orange, green and purple-ish, yellow and even dark cherry coloured. Just beautiful.


3 Steps to making the tortellini


As with making any filled pasta, it is a good idea to make sure that your filling is cold, otherwise the pasta will soften and possibly fall apart as you make them. The cold mixture is much easier to work with, so let your pumpkin cool down before making your filling. Even better, cook it the day before.

When using Gow Gee wrappers, your tortellini may also be a little more delicate than commercially made filled pasta. Just be aware of this and treat them with a little more TLC when you are draining them. It is a good idea to place them individually on the plate with tongs, instead of using a serving spoon, just to make sure you don't burst them.

Hope you all enjoy this beautiful no meat option. We will definitely be adding it our vegetarian repertoire.


Pumpkin and Ricotta Ravioli
with heirloom tomatoes and summer zucchini

 
You will need: 1 packet Gow Gee Wrappers, 1 egg, 1 cup cooked mashed pumpkin, 1 cup ricotta cheese, 1/2 cup grated parmesan cheese, pinch of nutmeg, 1 clove minced/crushed garlic,salt and pepper.


For the sauce: 2 small zucchini finely diced ,1 clove finely chopped garlic, 1 cup finely diced tomatoes (I used a variety of heirloom tomatoes). 1 tablespoon chopped continental parsley, 1 tablespoon finely chopped basil, olive oil, salt and pepper. Parmesan for the top of the dish (shaved or grated)

Method: Combine the ricotta, pumpkin,parmesan cheese, nutmeg, garlic, salt and pepper in a bowl. Mix well. Taste for seasoning and adjust if required.

Whisk the egg in a bowl with a tablespoon of water.

To make the tortellini, spoon some of the pumpkin mixture into the middle of the gow gee wrapper. Do not use too much mixture or the tortellini may burst during cooking. Brush one side of the wrapper with the egg mixture.

Fold the Gow Gee wrapper in half and press down firmly, ensuring you squeeze any air pockets out of the tortellini in the process. Bring the two corners together and fasten them, by squeezing them firmly so they stick together - add a little of the egg mixture to use as "glue" if you need to.

Put the tortellini on a clean dry tea towel in one layer, until you are ready to cook them.

To make the sauce, heat a splash of olive oil in a pan. Add the zucchini and garlic and cook gently until just cooked (it should still be a little bit firm)

Combine the still warm, cooked zucchini in a bowl with the tomatoes, parsley, basil, a drizzle of olive oil and salt and pepper.

Bring a large pot of salted water to the boil - cook the tortellini until they float to the top of the pot- this won't take very long, just a minute or two. Gently drain the tortellini and place on serving plates. Spoon over the sauce and drizzle a bit of extra olive oil over them if you like. Top with parmesan and serve right away.

Serves 2-4

******


Monday, January 9, 2012

No Meat Mondays

They say the longest journey starts with the smallest step and this year our household is looking to reduce the amount of meat we consume. Our motivation is threefold, we are hoping this will have benefits health wise, fiscally and environmentally. Now let me say right here that we are both definitely carnivores, so at this stage throwing away the notion of eating meat all together is still a way off. Our intention is to still enjoy good quality, sustainable, ethically raised meat, but to go for quality, not quantity, sourcing from small suppliers and avoiding the supermarket style, styrofoam packed mass product where you really have no idea how or where the animal was raised.

In the meantime, we will be exploring a lot more vegetarian meal options as we make the transition to being occasional meat (and fish) eaters. So, I decided to kick off with the advent of "No Meat Mondays" in our house. Every Monday, we will refrain from eating meat and enjoy a cornucopia of fruit and vegetables, legumes, grains and nuts. I will be sharing some of the vegetarian offerings here for you to try and will be experimenting along the way.  I'm sure that my vego mates will be glad that there will be a lot more on offer for them here at Gourmet Goddess, as I try to redress the balance a little.

So, to today's recipe - a warm roasted vegetable and barley salad. Vegetarian or not, you will love the gorgeous flavours in this dish, chock full of veges and the lovely nutty taste of barley. Add a pile of fresh herbs and a tangy dressing and you have a flavoursome and satisfying vegetarian dinner dish. I love barley and decided that I didn't just want to save it for soup in winter. It works really well in this salad. I actually cooked the barley the day before so that assembling Monday night dinner would be quicker and easier. I cooked double the amount and have frozen the rest for when I want to make this again - which I will, it was delicious!

Feel free to use whatever veges take your fancy, although I recommend that you include pumpkin and onion  - they added a delicious richness to the salad that it would be a shame to miss out on. Next time I also plan to throw in some blanched beans and maybe some toasted almonds. Experiement with whatever you have around. No meat Mondays ahoy!!!


Warm Roasted Vegetable & Barley Salad


You will need: 1 cup dry pearl barley, 1 red onion chopped roughly, 1/2 cup roughly chopped continental parsley, 1/2 cup roughly chopped coriander, 1 tablespoon finely chopped mint, about 6 cups vegetables chopped into pieces around 4cm square (I used a selection of pumpkin,zucchini, mushroom and red pepper), olive oil, salt and pepper.

For the dressing: 1/3 cup olive oil, 1 tablespoon honey, 1 clove garlic crushed or pureed, 1/3 cup balsamic vinegar, squeeze of lemon, salt and pepper to taste.

Method: Rinse the barley well under cold water. Strain and then boil in a pot of unsalted water until tender. Rinse and drain well and set aside.

Preheat the oven to 200C. Combine all of the vegetables (not the herbs) and the onion in a bowl with a generous splash of olive oil and a good seasoning of salt and pepper. Mix well until all of the vegetables are coated.

Put the veges on a baking tray lined with baking paper and cook until they are soft and tender. Mine took around 40 minutes. Turn them occasionally during the cooking process. When done, remove from the oven and allow them to cool a little for about 10 minutes.

Whisk together all of the dressing ingredients (or do what I do and make it in a jar, that way you just have to give it a good shake and you are in business) Taste for seasoning and adjust if necessary.

Gently combine the barley, vegetables and herbs with the dressing. Try not to smash up the soft vegetables too much - you want some nice chunks in there.

Serve with some extra fresh herbs on the top.

Serves 4-6 people.

******

Monday, February 21, 2011

Stay Cool

Life has taken a hectic turn over the past few weeks, so apologies that my usual updates haven't been as frequent. As well as day to day work responsibilities keeping me busy, hosting interstate guests and pre wedding preparations, I also attended my first molecular gastronomy class - titled "Foams & Emulsions" Very exciting stuff! A wonderful mix of mathematics, chemistry and cooking that pushed my food nerd buttons in all the right ways. I walked out of my first class with my mind churning over new ideas and with a better technical understanding of why certain ingredients behave the way do, the effects of temperature, the chemical make up of ingredients and the distillation of flavour. All the things that happen when you create any dish.

We made a beautiful aromatic herb foam that we served on Kingfish sashimi, as well as a tangy citrus foam, a Mojito foam (yep, it tasted just like the cocktail). On the sweet side, there was an amazing raspberry espuma (a kind of mousse) and a decadent dark chocolate ganache espuma that tasted so rich, but was also light and ethereal. The application for these techniques are so varied and I am looking forward to having a bit of a play in the kitchen to see what I can come up with. I love the idea of flavour without bulk - particularly when creating degustation menus made up of numerous courses. I plan to continue my molecular gastronomy classes throughout the year and will share the results of some of my experimenting as I go.

Speaking of molecular gastronomy, I am counting down the days until I get to be in the same room as my culinary crush, and all round gastronomic icon Heston Blumenthal on 15 March. http://www.events.com.au/default.aspx?s=events_display&eventid=367  Can't wait to hear him talk about his food and his adventures in molecular gastronomy. I just worship the guy - to me , he is what cooking is all about.

Enough news, now to today's recipe -

A chilled soup is a lovely start to a meal, particularly in hot weather. I am a big fan of chilled soups, although you do not see them very often on menus these days. (A bit retro maybe? Don't mind if I do!) As well as being a delicious start to a meal, small servings of chilled soup make a great finger food option. Serve the soup in chilled shot glasses or Chinese tea cups. One of my favourite chilled soups is a variation on the classic French Vichyssoise - a creamy soup of leek and potato. My version adds some fresh zucchini to the mix and I serve it with fresh chives and homemade croutons. Directions for making croutons are at the bottom of the post.

Regular readers will recall that I catered a degustation birthday party a few weeks ago. We started the menu with my chilled zucchini and leek soup. You could use all kinds of vegetables in place of the zucchini - fresh in season asparagus would be great, or perhaps some spinach. The recipe is very forgiving, so play around and see what works for you. Here is my version as served a few weeks ago...


Chilled Zucchini and Leek Soup


You will need:

3 medium zucchini, 2 large peeled potatoes, 2 leeks (white/pale green part only), 4 cloves chopped garlic, splash of olive oil, 1 litre chicken or vegetable stock, 2 bay leaves, 1 tablespoon fresh chives, 1 cup small sized croutons**, 1 cup pouring cream (or milk if you want something with a lighter taste), 2 tablespoons salted butter, pinch cayenne pepper, pinch freshly grated nutmeg, salt and pepper to taste.

Method:Heat the olive oil in a soup pan. Add the leeks and garlic and cook on a medium heat for about 8 minutes, or until the leeks are translucent and soft. Do not brown them – you want them to be pale as possible.

Chop the peeled potato and zucchini (leave the skin on) into chunks roughly 5cm in diameter. Add these to the leek mixture and stir through. Allow to cook for a further 5 minutes. Add the bay leaves and the stock (the vegetables should be covered by the liquid – top up with water if necessary)

Bring to the boil and then simmer for about 25-30mins, or until the vegetables are very soft. Remove from the heat and take out the bay leaves (very important! if you leave the leaves in you will end up with a soup that has an unpleasant bitter taste)

Once you have removed the bay leaves, puree the mixture until very smooth. I use a hand blender for this, but a food processor would be fine. While the mixture is still warm, add the cream, nutmeg, cayenne and butter. Keep blending until well combined. Taste for seasoning and add salt and pepper as required. If the mixture is too thick, add some extra milk. The soup should have a pleasant, velvety consistency.

Allow the soup to chill completely - overnight is best - before pouring the soup into small bowls or cups and serving with a sprinkling of freshly cut chives and croutons. I find chilling the soup in a pouring jug makes for easier serving later. Chinese tea cups are ideal for serving this soup and are very inexpensive.

This recipe will serve 10-12 people if using Chinese tea cups. Serves 6-8 if using small bowls.

** To make croutons: Cut plain white bread into small cubes, until you have about 2 cups of cubes. Combine in a bowl with a generous splash of olive oil, plenty of salt and pepper and a teaspoon of paprika. Mix thoroughly but gently with your hands. Place the bread in a single layer on a baking tray and bake in a moderate oven until lightly golden. This will take 10-15 minutes. Allow to cool. Store in an airtight container.

******

Tuesday, February 8, 2011

Corn and Zucchini Muffins

As most of you know, baking isn't usually my bag, but occasionally I like to get out the mixing bowl and make up a batch of something tasty. Whilst I can usually take or leave sweet muffins, I do really enjoy the savoury ones. They are beautiful straight out of the oven, served with good quality butter. Try and stop at one.

My vegetarian savoury muffins today were made with what I happened to have around and you can easily adapt these muffins to include whatever you have in the cupboard or the fridge. Throw in some grated carrot, or some spinach, a handful of herbs, some leftover cooked pumpkin chopped into small chunks, rocket, sundried tomatoes, olives, some fresh chilli. A great way to use up bits and pieces. If you aren't vegetarian, you could also add some finely chopped bacon, ham or proscuitto. Experiment with different cheeses too - some crumbled feta or blue cheese would give your muffins a real flavour punch.

The recipe below will make 10 - 12 standard sized muffins. You could also use small cocktail sized muffin tins and make mini muffins, which would be great as finger food. Serve them as they are, or cut them in half and add some cream cheese spiked with some fresh dill and smoked salmon - delicious.

As well as loving the taste of these muffins, I also love that they are easy to throw together - baking doesn't always have to be a three act drama, thank god! The preparation of the mixture took about 10 minutes, then you can relax while the oven does the rest. And here they are....


Corn and Zucchini Muffins


You will need: 2 cups self raising flour,1 tsp Dijon mustard, 2 tbsp chopped spring onion, 1 cup grated cheese (I used Mozzerella, but use Cheddar or whatever you like), 1/4 cup grated parmesan cheese, 1 medium sized zucchini grated, 1 cup creamed corn, 1 cup cold vegetable stock, 2 eggs, 2 tablespoons extra virgin olive oil, 1 tablespoon poppy seeds, pinch cayenne pepper, salt.


Method: Preheat the oven to 200C.

Sift flour in a bowl then stir in cheeses, spring onion and zucchini. Set aside.


Combine the stock, eggs, mustard and oil in a jug and whisk together. Stir in the creamed corn, cayenne pepper and a generous pinch of salt.

Pour the wet mixture into dry mixture then stir gently to just combine all ingredients. Be careful not to overmix or the muffins will not rise.


Spoon the mixture into a greased muffin tray. I also line mine with patty pans - makes getting them out so much easier. Sprinkle the tops of the muffins with poppy seeds.

Bake in your preheated oven for 25 minutes or until golden. Allow the muffins to rest in the pan for at least 5 minutes before removing them.

Serve warm with good quality butter.


******

Friday, December 3, 2010

Seasonal Treasure

Whilst I am not a huge fan of summer, (give me autumn or winter any time!!)I am a fan of summer produce. I'm loving watching the late spring/early summer fruits and vegetables start to appear at the greengrocer. All those lovely berries and stone fruits, summer herbs, mangoes - yum! This time of the year also gets me thinking of what to cook for the Christmas lunch table.I admit that at the moment my proposed menu changes almost daily, as I am reminded of all the great ingredients that will be available over the next few weeks. The only thing I am sure that we will be serving is the french champagne we have put away for the occasion (thanks to a trip to the duty free shop on the way home from New Zealand recently!) Nothing says celebration like a good slug of bubbly!

But I digress..... back to this season's treasures -

My love of zucchini flowers has been well documented on this site - I adore the sweetness of the flesh, the delicate flowers and the versatility of this gorgeous vegetable. Whilst I tend to stuff mine and oven roast them (drizzled with some good olive oil), this time I went for the more common option of serving them in a light tempura batter. For the filling, I chose a delicious combination of 3 cheeses and pumpkin, seasoned with a touch of nutmeg which adds a beautiful aromatic note to this lovely vegetarian dish.

I always think zucchini flowers look incredibly elegant in presentation, and are a great dinner party option. You can serve them alone or with a simple tomato based nepolitana sauce like I have today. Fried zucchini flowers need to be cooked at the last minute and served right away. You can prepare them up to the tempura stage, but you should only start cooking them once your guests are sitting at the table. Soggy tempura is not a good look folks!

The idea of stuffing a zucchini flower may seem a bit fiddly, but once you have performed the task, you will discover it is actually quite easy - and the results are really worth the effort. They are not always easy to source - if you are having trouble ask your greengrocer to order them in for you. Be aware that they do not keep well, so cook them within a day or so of purchasing them. The flesh should be firm and the flowers should not have any sign of brown spots or be too moist to touch - this is a sign that they are not fresh.

If you have never eaten zucchini flowers, I would urge you to give them a try - especially right now while they are in season and at their best.


Tempura zucchini flowers
with pumpkin and 3 cheeses


For the zucchini:
You will need: 10-12 baby zucchini (flowers attached of course!) 1/2 cup fresh ricotta, 1/2 cup cooked mashed pumpkin, 1 tablespoon grated parmesan cheese, 2 tablespoons grated mozzerella cheese, 1/4 teaspoon grated nutmeg, 1 tablespoon finely chopped continental parsley, pinch of cayenne pepper, salt and pepper.

Method: Combine all of the ingredients except the zucchini and mix well. Set the mixture aside.

Carefully remove the stamens from the inside of the zucchini flowers - they should just snap off. Be careful not to destroy the petals of the flowers in the process.

Gently fill the flowers with your filling - I sometimes use a piping bag to do this, but have also just used a teaspoon - both methods work well. (Although the piping bag option is a tad neater)

Set aside your zucchini ready for the next step.....

For the tempura:  
You will need: 3/4 cup plain flour ,1/4 cup cornflour, pinch of bicarbonate of soda ,1 egg, lightly whisked ,1 cup chilled soda water. Oil for frying.

Method: Sift the flour, cornflour and bicarbonate of soda in a medium bowl. Make a well in the centre. Add the egg and soda water and use chopsticks to gently whisk until just combined (do not overmix - the mixture should be lumpy). Place the bowl in a larger bowl filled with iced water.

Add enough oil to a large saucepan to reach a depth of 6cm. Place over high heat. To test when oil is ready, a cube of bread turns golden-brown in 10 seconds.

Place extra flour on a plate. Dip the vegetables in the flour to lightly coat. Dip one quarter of the vegetables, one at a time, into the batter. Shake off any excess. Deep-fry for 2-3 minutes or until golden brown and tender.

Drain on paper towels. Serve with your favourite tomato nepolitana sauce (I put olives in mine)

Spoon sauce onto serving plate/plates and serve immediately with wedges of lemon.

******

Thursday, November 4, 2010

Char! Char! Char!

I love the flavour of BBQ or char grilled food. Something about that smoky flavour and caramelised character really adds another dimension of flavour and texture to the food. Today's recipe uses this technique, along with delicious fresh herbs and the lovely rich citrus kick of preserved lemons to make a very special roasted chicken. I cooked the chicken on the Weber - over the coals with the lid on - and I flattened the chicken, Portugese style to speed up  the cooking time and maximise the exposure of the meat to all those lovely coals. You can of course cook the chicken in the oven or on a standard hooded BBQ if you aren't able to do the coals thing. I teamed the chicken with a very simple char grilled vegetable salad and ate it with some lovely rustic sourdough bread.

If you haven't used preserved lemon before, I have included instructions for how to prepare it for cooking in the recipe below. You use only the rind - the rest of the preserved lemon will be very salty and inedible. You will find preserved lemon at middle eastern grocery stores and gourmet food shops. It is very easy to make your own preserved lemons, but they take about a month to be ready for use. Make them when lemons are in season and at their best. I just wash the lemons well and slice a deep cross into the top of them (they should open up like a flower but still be in one piece) Then I pack them into sterilised jars to which I add a few peppercorns, a bay leaf, a few cloves and a stick of cinnamon. Then I pack them in salt and top them up with lemon juice. They then go into a dark place for about a month. I turn the jars every few days to keep everything well mixed. The lemons should be completely covered, so you may need to add more lemon juice and salt as you go. Choose jars with airtight lids - you don't want the air getting in to your lemons and spoiling them.

All of the herbs that I used in my recipe were picked fresh right from our garden. I am getting so much pleasure from having some outside space and growing herbs and veges. I currently have 13 different herbs, along with baby Cos lettuce, Roma tomatoes, chillies, beetroot, capsicums and french radishes. I will add to this as time progresses. I am really new to the whole garden thing and it is pretty much trial and error - with advice from friends and some online info. I am blessed with a sunny yard so things seem to be growing very fast. I am looking forward to when the vegetable crops mature and I can take them straight from the garden to the table. We recently aquired a compost bin so we will be recycling our scraps too, to add to the already rich soil that we have. There are lots of worms in the ground and the plants look happy - so far, so good!

Hope that you enjoy this different take on the basic roast chicken....


Lemony Herbed Chicken with Char Grilled Vegetable Salad

You will need: 1 whole chicken
(for the chicken marinade) 4 cloves minced garlic, 1 teaspoon thyme (I used lemon thyme for an extra lemony kick), 1 teaspoon finely chopped tarragon, 1 tablespoon chopped continental parsley, 1 teaspoon minced red chilli, 1/3 cup olive oil, 2 teaspoons pureed preserved lemon*see note, salt and pepper.

(for the char grilled vegetable salad) 1 medium eggplant, 2 medium zucchini, 1 tablespoon balsamic vinegar, 1 tablespoon olive oil, 1 tablespoon chopped continental parsley, 2 medium tomatoes - diced with seeds removed, salt and pepper, extra olive oil.

Method:
(for the chicken) Combine all of the chicken marinade ingredients and set aside.

Wash the chicken with cold water and dry inside and out with paper towels. Lay the chicken on a chopping board breast down. Now, with a sharp knife cut down either side of the backbone. This will remove the backbone/tail in one piece - disguard this backbone. If there is any offal attached to the remaining chicken, trim it off.
Next, turn the chicken over so that it is breast up. With the palm of your hand, push down firmly to flatten the chicken out. Now that the backbone is removed, this will be quite simple to do. You now have one flat chicken!
 
Rub about 2/3 of the marinade mixture over the chicken, including under the skin as much as you can. This should be easy now that the backbone has been removed. Allow the chicken to marinate for at least 30 minutes.
 
Cook the chicken on a BBQ with a hood, or a Weber (preferably over coals if you can, the flavour is even better this way) breast down to start with - for about 40 minutes. Turn frequently and baste with the remaining marinade. Allow the chicken to rest, covered in foil for 15 minutes before serving.
 
(for the salad) Slice the eggplant into pieces about 1cm thick. Cut the eggplant into long or diagonal slices (whatever is easy for you)
 
While the chicken is resting, splash some olive oil on the vegetables and season with salt and pepper. Cook on the BBQ a few minutes each side, until they are tender and you have nice grill marks on the vegetables.
 
Remove from the heat and just before serving, toss through the tomato, parsley, balsamic, olive oil and season generously. Serve with the chicken.

*To prepare the preserved lemon: With a teaspoon, gently scrape the flesh and the soft pith away from the rind - it will come away very easily. Disgard this. Rinse the remaining lemon rind with water to remove the salt that it has been preserved in. Chop the rind very small and then using the flat side of your knife, squash the rind until it is a smooth puree.
 
******

Thursday, October 21, 2010

Very Vegetarian

It was my intention this week to post pics of the housewarming lunch that we held last Saturday, however once the food was on the table I completely forgot to take photos of it before it was demolished. Sorry guys - you will have to close your eyes and imagine what it looked like! We enjoyed a starter of antipasto, along with italian style pork meatballs with a spicy tomato dipping sauce, a selection of cheeses and wonderful olive bread from Bourke Street Bakery. For mains, there was a selection of garlicky leg of lamb cooked over coals, stir fried garlic and chilli prawns, greek sausages, chicken, fetta and spinach sausages, grilled asparagus, tomato, basil and bocconcini salad, 2 vegetarian tarts - mint, pea and fetta and wild mushroom and a roasted pumpkin, rocket and pomegranate salad served with a pomegranate balsamic dressing. Our guests seemed to really enjoy it (special mention must be made of my lovely finacee's spectacular lamb - cooked over coals and so succulent and tender) but as always I over catered - we lived off the leftovers for breakfast, lunch and dinner for 2 days!

Today I thought I would share what we had for dinner last night. A nice vegetarian dish that is cheap and easy to make - zucchini and chickpea fritters. You can serve them as a main or a starter - or grab some nice rolls and turn the fritters into vege burgers. The accompaniment is a creamy horseradish and mint sauce which is a lovely tangy, creamy contrast to the nutty flavour of the fritters. The addition of mint gives a lovely fresh note to this dish. You could easily add other vegetables or herbs to the fritters - I think that grated carrot or some finely chopped spinach would work well. Make sure that you don't scrimp on the seasoning of the fritter mixture - plenty of salt and pepper please. Chick peas and other legumes can be a bit bland if you don't give them a boost with some seasoning. Salt and pepper will help bring out their natural flavour. These fritters are best eaten soon after making and are not suitable to freeze. My recipe will make about 12 large fritters.


Zucchini and Chickpea Fritters with horseradish and mint sauce


You will need:
For the fritters: 1 x 400g tin chick peas rinsed well and drained, 2 medium sized zucchini grated, 1 tablespoon grated parmesan, 1 tablespoon chopped parsley, 1/2 tablespoon finely chopped mint, 2 eggs, 1 cup milk, 1 1/4 cups self raising flour, a couple of pinches of cayenne pepper, salt and pepper.

For the sauce: 1 cup sour cream, 1 dessert spoon horseradish cream (buy this in the mustard/condiment section of the supermarket), 1 dessert spoon finely chopped mint, salt and pepper.

Method: Whisk together the eggs, milk, cayenne and 1/4 teaspoon salt. Gradually add the flour, to form a smooth batter. You may use more or less flour depending on the size of the eggs - the mixture should be the consistency of pancake batter.

Mash the chickpeas. You can also use a food processor for this, but don't make the mixture too smooth - you want some texture there.

Fold in the zucchini, parmesan, parsley and mint into the batter. Season generously and allow the mixture to stand for 10-15 minutes.

To make the sauce, combine the sauce ingredients and mix well.

Heat a frypan and add some vegetable oil. Spoon the fritter mixture onto the pan and cook until golden. I make these fritters a bit larger than say, corn fritters. I used a couple of spoonfuls of mixture each and they come out the size of a hamburger patty. You can of course make them smaller if you like. Drain them on paper towels and serve right away with the sauce.

******

Monday, April 19, 2010

Degustation Delights

On Friday night I entertained dinner guests and decided to put together a degustation menu using new season's ingredients. I haven't done a degustation menu for a while, but I always love creating a menu in this style. I enjoy being able to have a little of this and a little of that, and the joy of creating something that will flow from course to course. The challenge is always to balance variety and texture - to have enough contrast to make things interesting but to not make those contrasts jarring to the palate.

The menu began with a creamy chilled soup of cauliflower and leek, flavoured with a hint of roasted garlic and finished with cucumber and delicious salty salmon roe. The soup can also be served hot, but I really enjoy starting a degustation menu with something cool and fresh tasting. Although the soup is velvety and creamy, serving it cold gives it a lighter dimension. The natural sweetness of the vegetables is a nice contrast to the salty explosions of salmon roe and the fresh cucumber.


Course number two was a mushroon ragout tart - the ragout was made with four different types of mushroom - Porcini, Shitake, Enoki and Oyster varieties. I used a simple shortcrust base and teamed this with a horseradish cream - a combination of horseradish, organic natural youghurt and creme fraiche. The earthy, savoury nature of the mushrooms really shines through when teamed with the tang of the horseradish cream.


Course number three was duck and fennel ravioli served simply with sauteed asparagus and parmesan. The filling was made with duck breast meat, parmesan, caramelised onions and fennel, garlic and a touch of nutmeg. I bought the duck breasts on the bone and after I removed the meat that I needed, used them to make a batch of rich duck stock which I have stored in the freezer. I am already thinking about what I will use the stock for. The rich flavour of the duck meant that it did not need an overly complex sauce - I used Danish Lurpack butter, a touch of salt and some pepper and the asparagus and that was all. This allowed the flavour of the duck to take centre stage.


After the richness of the duck it was time to lighten things up - I chose a salad of watercress, sweet roasted pumpkin, buffalo mozzerella and pomegranate seeds. I made a dressing of extra virgin olive oil, white balsamic, garlic and a touch of maple syrup. I like using watercress as a salad base - the peppery bite is a nice contrast to sweeter ingredients such as the pumpkin and maple. The tartness and texture of the pomegranate seeds works well with the creamy mozzerella - and who can resist that gourgeous ruby colour?


I really love game, so I decided on venison for the fifth course. I marinated vension rump for 24 hours in olive oil, garlic, crushed juniper berries, a splash of white balsamic and a touch of dijon mustard. The meat was then cooked in a pan with a touch of butter and allowed to rest for 10 minutes before carving. I teamed the venison with a puree of potato and parsnip, caramelised balsamic beetroot and a stuffed zucchini flower, which I filled with fresh herbs, ricotta and a touch of lemon rind. For the sauce, I did a stock reduction with redcurrant jelly and a touch of bitter chocolate. The chocolate works beautifully with the venison - but it is only used in very small amounts, just enough to add some richness and complexity to the sauce.


And finally, dessert - I took fresh figs, split them in the centre and baked them for 10 minutes drizzled with honey. Once they were out of the oven, I filled them with tangy fresh raspberries. I accompanied them with honey, pistachio and glace pear icecream that I made ealier in the week. I made the icecream in a loaf tin and served slices instead of scoops. Figs and raspberries are my two favourite fruits, so this was a great way to indulge in both!


One of the challenges of doing a degustation menu is the logistics of the menu - choosing dishes that will not require you to be stuck in the kitchen for the whole evening when you should be drinking wine and being fabulous with your guests. For the above menu, I made the icecream a few days before. I did the filling for the duck the week before and froze the filling - that way all I had to do was defrost it and complete the final tortellini making at the last minute. I also made the caramelised beetroot and stuffed the zucchini (which can be a bit fiddly) the day before. I pre chopped all of the salad ingredients a couple of hours before the guests arrived and also made the sauce for the venison and the potato/parsnip puree. On the night, all I had to actually cook was the zucchini flowers and the venison, heat the figs and do the tortellini.

If you have never tried a degustation menu, don't be daunted. Just make sure you plan well and that you don't choose overly complex dishes that require lots of attention for every course - balance it with some simple dishes such as salads, or soups or terrines that can be made ahead. I find that the work of creating a degustation menu is totally worth the rewards of seeing delighted guests feeling pampered and indulged. I had a ball creating this menu for my guests on Friday night - it was a fun night full of lots of laughter and lots of wine.

And finally, a good degustation menu is nothing without good friends to share it all with, so choose your guests well. Thanks to Chris, Michela, Susan, Mary-Lou, Damon and Andrew for being such fabulous company and riotously entertaining dinner guests on Friday night - a fantastic evening :)

*****