Showing posts with label Eggs. Show all posts

Friday, April 18, 2014

Fluffy Easter Pancakes

Some of the fluffiest, nicest pancakes I've ever eaten are made with buttermilk. Buttermilk is the liquid that is left from churning butter or cream, and although you can buy buttermilk reasonably easily, it is not something that most people would have as a staple in the fridge. This means that if you decide to make buttermilk pancakes one morning, it is likely to involve a special trip to the shops to get it.

Today I'm sharing a recipe I use for pancakes that give the same result as the buttermilk kind, but is much less hassle to make -  with a technique for lightly souring the milk to create a perfect substitute for the buttermilk. These pancakes are deliciously light and fluffy and not overly sweet. You can of course top them with anything you like, but today I have topped mine with mixed berries and maple syrup.

These pancakes make a perfect Easter brunch, or even a simple dessert served with yoghurt, ice cream or any manner of toppings that you can dream up. I have also made small pikelets from this mixture and topped them with jam and cream to make a sort of Devonshire Tea style treat.

However you adapt them to your taste, this recipe is a keeper, with great results every time. Maybe give it a try this Easter long weekend?


Fluffy Buttermilk Style Pancakes
With Berries and Maple Syrup

You will need: 1 cup milk, 2 teaspoons white vinegar, 3 eggs, 2 cups Self Raising Flour, 1 Teaspoon Baking Powder, 2 cups mixed frozen berries, 2 tablespoons caster sugar, maple syrup to serve.

Method: Add the 2 teaspoons of vinegar to the milk, stir through and allow it to stand for a couple of minutes. This will lightly sour the milk.

Combine the berries and the sugar, microwave them for 1 minute and stir well. You could also do the berries in a small pan on the stove, but I find the microwave is quick and easy - and less cleaning up.

Whisk together the milk and the eggs. Add half of the flour and all of the baking powder to the mixture and whisk until smooth. Now add the remaining flour and whisk through, ensuring there are no lumps. If the mixture feels too thick, add a little extra plain milk. If it is too thin, add extra flour.

Allow the pancake batter to rest in the fridge for 10-15 minutes.

Cook the pancakes in a lightly greased or non stick pan. When bubbles appear on the surface, they are ready to turn over. The pan should be moderately hot - watch the temperature, as if the pan is too hot, the pancakes will be overcooked and dark on the outside and not cooked in the middle.

Serve the pancakes with the berries and maple syrup - or anything you fancy.

Makes 4 large or 8 medium sized pancakes.

*******


Sunday, April 6, 2014

Food Diary - Saturday Night Dinner at Home

There are few things I enjoy more than catching up with friends at home over a good meal and a glass of wine. We were long overdue in catching up with our friend Kim (who actually only lives close by - isn't that always the way!) so last night we did something about that and invited him over for a moochy Saturday night dinner at home.

To start, I came up with a dish that is basically posh eggs on toast - a crunchy base of toasted rustic garlic rubbed bread, piled with Prosciutto, fresh greens, a soft poached free range egg - and finished off with luxurious black truffle butter sauce. The combination of the crunchy bread, velvety eggs, salty Prosciutto and fresh greens created a gorgeous contrast of textures - and that decadent black truffle butter sauce created an entree that was wickedly good.


 Soft Poached Egg on Garlic Toast
With Prosciutto, Greens and Truffle Butter Sauce


I recently purchased a small bottle of Tetsuya's Black Truffle Salsa - which is designed to be used to create the famous truffle butter that he serves in his restaurant. I've been lucky enough to dine at Tetsuya's quite a few times now (in fact we are heading there in a couple of weeks for our wedding anniversary dinner) and the truffle butter is something we always look forward to. Lots of other people clearly think so too, so he now sells the base of it so that people can create their own. I decided to make up a batch of the butter and just warm it through, to create a luxurious sauce. The result was an eye rollingly delicious entree.

If you want to get your hands on some of Tetsuya's Black Truffle Salsa for yourself, you can find it in good gourmet stores, or online. If you are searching for it, it comes in a tiny jar that looks like this -


For the basis of main course, I chose something that I haven't cooked at home for ages - venison. Regular readers of Gourmet Goddess would know that I'm a big fan of game meat, and in the last week or so had been thinking that I wanted to get my hands on some venison to create a dish using Autumn produce. I used a beautiful piece of venison loin, which I marinated in olive oil, some garlic, a splash of raspberry vinegar, crushed juniper berries, pepper and allspice.

I then seared the meat in a very hot pan and transferred it to a 200C oven to cook for 10 minutes. After resting the meat, I carved it and served it with a rich, velvety puree of cauliflower and potato (I used the Dutch Cream variety), roasted beetroot ( which I cut into uniform circles with a cookie cutter, to improve the presentation), toasted hazelnuts, beetroot leaves and a jus that I made from beef stock and Pinot Noir jelly (similar to redcurrant jelly, but made with Pinot grapes) and flavoured with bay leaves from my garden. Yum.


Loin of Venison with Cauliflower & Potato Puree, 
Roasted Beetroot, Hazelnut and Pinot Noir Jus


Venison is a fantastic flavoursome and super lean meat that is not hard to cook with, as long as you choose the right cut for the kind of dish you are making. I chose the loin of the venison, which is cooked for a short time and served medium rare, to rare. The only real thing that you really need to watch for is overcooking. It isn't a meat that is really suited for people who like their meat well done, so if you are making it at home, know your diner's preference. Cooking venison to a well done order will just result in a grey, tough piece of meat. A waste of really excellent produce.

I decided not to make a dessert and to serve a selection of cheeses, fresh pear and some quince paste - but after what was a rich entree and main, we decided that we were all satisfied, and that a cheese plate would just be overkill. The cheese platter might end up being Sunday lunch.

If you like game but have never had a go at cooking venison at home, I really encourage you to give it a try. It isn't hard and makes a great key ingredient for a special meal, whether you are sharing it with guests or not.

******


Friday, November 1, 2013

Hazelnut Meringue-A-Rama

Whilst sweet things are not generally my favourite dishes to cook or to eat, I do admit that I love anything remotely meringue-like. Whether they are crispy or mallow-ish, creamy like the Italian style meringue, bite size or king size, I love them. I will say no to cake, but always say yes to pavlova, or pretty meringues in a cake shop window. Today I had a day off and thought I would have a go at making a hazelnut meringue, which is my absolute favourite kind.

The nuts add a great texture dimension, as well as that heavenly hazelnut taste. You could make individual meringues, but today I went with a large round one, which I decided to serve with Chantilly cream and fresh strawberries, which are in season now and are particularly good. I confess that I cracked the meringue a bit when getting it from the tray to the serving dish, but the beauty of this sort of dish is that you can hide any cracks under a delicious topping. No dramas.

The Chantilly cream is very easy to make, (you could add some cocoa to it if you wanted a chocolate cream) but I beg you not to use that awful fake vanilla essence in this recipe - or any other for that matter. Invest in proper vanilla extract - it is worth the few extra dollars I promise. Fake vanilla essence is the work of Satan and has no place in the kitchen, except for cleaning the inside of your fridge with.

Although this dish needs over an hour in the oven, it is actually quite simple, so worth giving a go - even if like me , you aren't really the baking type. You could get really creative with the toppings too - roasted nuts, shaved chocolate, different kinds of seasonal fruit. Drizzling it with raspberry or chocolate sauce would be lovely too. You could also shape the meringue to be taller than mine, if you wanted it to be more pavlova like.

Bon Appetit!


Hazelnut Meringue
with Chantilly Cream & Strawberries


You will need: 4 free range egg whites, 1 cup caster sugar, 1 cup ground hazelnuts, 1 teaspoon white vinegar, 2 teaspoons cornflour, 300ml whipping cream, 2 teaspoons vanilla extract, 2 tablespoons icing sugar, 1 punnet strawberries.

Method: Preheat the oven to 120C. Line an oven or pizza tray with baking paper.

In a very clean, dry, metal or ceramic bowl, beat the egg whites until soft peaks form. Gradually add the sugar, a tablespoon full at a time and continue to beat until all combined. Add the cornflour and vinegar until mixed through.

Gently fold in the hazelnuts until evenly mixed. Transfer the mixture to the baking tray and using a spoon or spatula, form the meringue to the desired shape. I build up the sides a little for presentation purposes and for ease of serving later.

Wipe any excess off the baking paper. Bake meringue for 1 hour and 15 minutes. When it is done, turn off the oven and allow the meringue to cool there, without removing it. You can leave the oven door slightly ajar to speed up the process a bit.

In a bowl, combine the cream, sugar and vanilla extract. Beat together until firm enough to spread. Use this to top the cooled meringue. Finish with the strawberries and serve.

Serves 6-8 people

*******


Sunday, March 17, 2013

Berry Nut Tart

I always love entertaining and catching up with friends and this weekend I got to hang out with my good friend Yvette who has been living and working in Cambodia for the last 2 years. As well as being excited to see her after so long, I was also very excited to meet her lovely Cambodian husband Vanda for the first time. It was Yvette and Vanda's first anniversary and they chose to celebrate it by sharing their vows in our back garden, with Andrew and I as witnesses and my celebrant mother in law Kate and father in law Peter in attendance. Celebratory champagne and lunch followed of course!

I decided on a quite simple family style lunch. Yvette had previously commented on the fact that in Cambodia, there isn't the option to indulge her craving for roasted lamb, so I thought this was the obvious choice for lunch. I deboned and butterflied out a leg of Cooma lamb and allowed it to marinate overnight with plenty of garlic, paprika, olive oil, lemon and orange rind, a squeeze of orange juice, rosemary from the garden, sea salt, cayenne pepper and a few crushed up anchovies. I then char grilled the lamb on the BBQ, and served it with crispy golden potatoes, plenty of seasonal vegetables, gravy and a native Pepperberry and Pinot Noir jelly that I brought back from our trip to Tasmania. The Pinot and Pepperberry was a really tasty accompaniment to the grilled lamb as an alternative to mint jelly.

For dessert, I wanted something that I could do ahead. When having lunch or dinner guests, I try to include at least one course that can be made - or at least mostly prepared - the day before. It makes things so much easier. There is nothing worse than feeling rushed and stressed when your guests arrive. I mean, entertaining is supposed to be fun right? My second criteria for the dessert dish was that it also had to be pretty much dairy free. I chose a French style homemade almond tart that showed off the delicious berries that are in season right now. I had a handful of macadamia nuts in the cupboard too, so I used those as part of the topping, for a buttery tasting, golden crunch. Normally I would serve a tart like this with creme anglaise or ice cream, but I chose a dairy free sorbet instead from Cow and Moon, a local artisan gelato shop that make delicious, award winning frozen treats. I chose a blackberry and blueberry sorbet that was lovely and tangy against the sweetness of the tart.


Berry Nut Tart


This tart could easily be adapted for all kinds of other seasonal fruit. I think that peach or nectarine would be lovely in place of the berries - or you could go really classic and use apples or pears. This recipe would also work well as smaller, individual tarts.


Tart served with Blackberry & Blueberry Sorbet
from Cow & Moon artisan gelato @ Enmore


You will need: 150g soft butter (I used salted butter), 120g caster sugar, 2 teaspoon vanilla extract, 1 tablespoon cornflour, 200g almond meal, 3 eggs, 1/2 cup roughly chopped macadamias, 1 punnet fresh blueberries, 1 punnet fresh raspberries, 1 to 1 1/2 sheets sweet shortcrust pastry (the amount will depend on the size of you tart tin)

Method: Preheat the oven to 180C. Grease and line a tart tin with baking paper. I use a metal tart tin with a removable base - I think they give a good result and it is much easier to get the tart out of the tin.

Line the tart tin with the pastry and then place another sheet of baking paper on the top. Fill with baking beads (or if you don't have them, use dry beans or lentils) Blind bake the pastry in the oven for 15 minutes. Remove and allow to cool.

To make the filling, beat together the softened butter, sugar and vanilla until light and fluffy. Add the cornflour and half of the almond meal and beat together thoroughly. Add the eggs one at a time, beating as you go. Finally, add the last of the almond meal and beat until all combined.

Spread about half of the raspberries and blueberries across the empty tart shell. Pour the filling mixture into the tart and spread out evenly. Press the remaining berries into the mixture.

Sprinkle the macadamias over the tart and bake at 180C for around 30-40 minutes, or until lightly golden. Allow to cool for 20 minutes uncovered before slicing and serving. Can be served either warm or cold.

 
******


Wednesday, February 13, 2013

Cauliflower and Speck Tart

So the weekend is approaching and you want something home baked that tastes luxurious, can be eaten for brunch, lunch or dinner and isn't too much of a drama to put together. Look no further than today's dish - a delicious creamy cauliflower and speck tart. The tart is richer tasting than a plain old quiche, with gorgeous Gruyere cheese, white cauliflower and the delicious salty/savoury character of the speck making it super flavoursome. It has a creamy, melting texture that will make it hard to stop at just one slice.

A hint about cooking the tart - don't be tempted to overcook it - you want it to be in the oven until the egg/cream mixture has just set. This ensures that it retains a lovely creamy texture. You can eat it warm or cold, but warm is my preference. The flavours seem to really come alive and you get to enjoy that rich, creamy texture at it's best.

I have chosen speck for this recipe as I love having that lovely smokey, salty hit that those small cubes of speck give you - but if you can't get it where you are (most delis should have it) you could substitute plain bacon - although the flavour will be a lot milder.

You could easily make smaller individual tarts if you wanted to - the ingredients below will make 4-6 small tarts or one large one.


Straight out of the oven


Cauliflower and Speck Tart
 
 
You will need: 1 large sheet shortcrust pastry, 1/2 cooked cauliflower cut into florets, 1 teaspoon olive oil, 1 clove finely chopped garlic, 1 large brown onion finely chopped, 250g speck cut into small cubes, 6 free range eggs, 1 cup cream, 1/2 cup grated Gruyere cheese, 1/2 cup grated tasty cheese, salt & pepper, pinch cayenne pepper, 2 pinches freshly grated nutmeg, 1 tablespoon finely chopped fresh chives.
 
Method: Preheat the oven to 200C. Line a large quiche or tart tin with baking paper. Press the pastry into the quiche tin. Lay another sheet of baking paper over the top. Fill with baking beads if you have them – if not, you can use dry beans or rice. Blind bake the pastry for about 10-15 minutes. Remove the baking beads and the paper and allow to cool.
 
Heat a pan and add the olive oil, onion, garlic and speck. Cook on a medium heat for about 10 minutes until the onion is transparent and the speck has browned a little. Season with a little salt and pepper. Spoon the mixture evenly into the pastry case. Arrange the florets of cooked cauliflower evenly on top of the speck mixture.
 
In a bowl, whisk together the eggs, cream, cayenne, nutmeg, salt, pepper and about 2/3 of the cheese. Pour the mixture into the pastry case. Top with the remaining cheese and sprinkle with the fresh chives.
 
Bake at 200C for 35-40 minutes or until the egg mixture is just set. Remove from the oven and allow to cool a little before cutting into slices.
 
******


Friday, August 24, 2012

An Italian Classic

Heading home tonight I realised I had no plans as to what to make for dinner - a pretty rare occurence for me! Friday night after a long week, I wanted something with simple ingredients, tasty and satisfying - but also quick to throw together. I love pasta, but we don't tend to eat it very often at home, so I thought that for a treat I would make that Roman classic - Carbonara. It contains just a handful of ingredients, but is full of robust flavours and that gorgeous rich texture that is pretty irresistible.

Carbonara is usually made with either spaghetti or bucatini (thick spaghetti that is hollow in the centre) I chose bucatini, which is thicker and slightly chewier to eat than the more delicate spaghetti. There are a whole range of stories about this famous pasta dish - some say that it was named from the word carbonaro which means charcoal burner in Italian, and that it was a hearty dish made for coal miners. Another story goes that it is named for the specks of black pepper that make up part of the seasoning, that look like coal dust on the top. Regardless of where the name comes from, it is a fabulous dish that can be whipped up in just a few minutes.

This recipe is very simple and traditional. Just some cheese, fresh eggs and some diced speck or pancetta. Carbonara does not - I repeat -  not contain cream. Never, ever, ever! I have eaten some truly awful versions of this dish in my time. I'm having food flashbacks to horrible, wallpaper paste like concoctions containing pressed ham or mystery meat, usually served from a bain marie. Ewwwwwww! It beggars belief that anyone would try to "improve" on something that is already simple perfection just as it is. The Italians didn't feel the need to gussy up the dish by drenching it in cream and god knows what else - and as far as I'm concerned, neither should we.

Carbonara should be made just prior to serving - it is not a "do ahead" recipe, and it is not suitable for freezing either. Cook it fresh while everyone is at the table -  forks in hand, ready to dig in. Buon Appetito!


Bucatini Carbonara
 

You will need: 300g Spaghetti or Bucatini, 250g diced speck (or pancetta), 1 whole peeled clove garlic, 2 large fresh free range eggs, 1/2 cup freshly grated parmesan, splash of olive oil, black pepper, salt.

Method: Whisk together the eggs, a pinch of salt, pepper and about half of the parmesan. Set aside.

Bring a large pot of salted water to boil. Add the pasta and cook until just al dente. Be careful not to overcook it, as it will cook a little more when you create the sauce. Drain the pasta and set aside.

Working quickly, heat the oil in the pasta pot and cook the speck/pancetta and the garlic for about 5 minutes, until the meat starts to colour. Remove the whole garlic clove.

Add the drained pasta to the pot and toss the speck/pancetta through. Remove the pot from the heat and add the egg mixture, combining it quickly. The heat of the pasta will cook the egg mixture in a very short time. Add the rest of the parmesan, season with plenty of black pepper and serve right away.

Serves 2-4 people

******


Friday, October 21, 2011

Prêt à Manger

With the weather turning warm and daylight saving upon us, it is the perfect time to head outside, find a patch of grass and enjoy lunch or dinner in the fresh air. Picnic food should always be easy to transport, simple to store and most of all delicious and un-fussy. Today's recipe is something that ticks all of these boxes and really embodies the French idea of Prêt à Manger (ready to eat). My smoked chicken and broccoli tart is easy to make, but nice enough to serve to guests and is perfect to take to a picnic. It can be eaten warm or cold, by itself or with a side salad and can also be made the day before.

Smoked chicken is a great, flavoursome ingredient that is also terrific in salads. That lovely smoky flavour is delicious, and it works really well in this tart. You can buy smoked chicken at most large supermarkets these days or gourmet delis. The chicken is usually sold in peices - breasts, thighs or drumsticks. I recommend the drumsticks or thighs over the breasts - lots more flavour. Just cut the meat off the bones. (Save the bones for your stock pot) and ensure there are no stray bits of bone in the meat, before adding it to your dish.

This recipe could easily be made into individual one serve tarts or even tiny cocktail sized ones - Great as finger food or BBQ nibbles.

My nasturtium plants have gone crazy in the garden in the last few weeks and are blooming profusely right now, so I decided to serve my smoked chicken and broccoli tart adorned with these lovely edible flowers - perfect for Spring.


Smoked Chicken and Broccoli Tart


You will need: 1-2 Sheets shortcrust pastry (depending on size/shape of the dish you will be cooking it in), 4 free range eggs, 150ml cream, 1/2 cup thinly sliced spring onion, 1 cup finely diced smoked chicken, 2 cups broccoli (or broccolini),  1 cup grated cheese (I used half cheddar, half mozzerella), 1/4 teaspoon cayenne pepper, salt and pepper.

Method: Line a quiche or pie dish with the pastry. Put the dish in the fridge for about 10 minutes to chill down.

While the pastry is chilling, steam the broccoli until only just cooked. (I use the microwave to do this) Set the broccoli aside.

Preheat the oven to 200C.

Lay a sheet of baking paper over the top of the pastry and then place baking weights on top (if you dont have these, dried beans or rice are a good substitute) Cook the pastry for about 15 minutes, until it starts to turn golden. Remove from the oven and set aside.

Whisk together the eggs, cream, cayenne, a generous pinch of salt and a generous seasoning of pepper.

Remove the weights and the baking paper from the pastry case. sprinkle about a third of the cheese over the base, then all of the spring onion and smoked chicken. Top with another third of the cheese.

Arrange the broccoli on top, sprinkle over the last of the cheese and season with a little pepper. Gently pour the egg mixture over the top, ensuring that it is evenly distributed.

Bake in the preheated oven for 20 to 30 minutes, or until the egg mixture is just set. Remove from the oven, allow to cool.

Serve warm or cold.

******

Wednesday, June 9, 2010

Food! Glorious food! - London

Tea with the Queen??
Me outside Buckingham Palace -
HRH was in residence and I didn't even get so much as an Iced Vo-Vo!

When I announced that I was going to spend a few days in London on the way up to Scotland, and that I was looking forward to checking out the food there, a lot of people gasped, clutched their pearls and warned me of the supposed horrors of British cuisine. Lots of people seemed to have tales of either how hideous the food was, or how expensive - or both - and I was regaled with lurid stories of "Chippies" (purveyors of all things fried) , vats of rancid cooking oil, stodgy, bland gluey concoctions, grey mince and soggy cabbage. I certainly arrived in Old Blighty with low expectations. Whilst I had no intention of hitting the posh end of town and sampling the really high end establishments (budget was a factor, so there were definitely no Michelin stars on my horizon!) being a first time visitor I didn't know what lay between a degustation menu at Claridges and a deep fried Mars Bar at the local Chippie. I have to say that I was delighted to find a whole range of well priced, frankly delicious options.

The myth of British food being mad, bad and dangerous to know was blown out of the water for this culinary traveller. I didn't eat a bad meal the whole time and was impressed with the range of fresh ingredients available and the accessability of good quality food at reasonable cost. Like anywhere, the second you find yourself amongst the tourist traps, you know that your chances of finding anything decent to eat drop dramatically. In my opinion, if you eat at a place less than a couple of kilometers away from a famous landmark/monument/tourist spot , you get what you deserve - which will in all probability be something mass produced, overpriced and disappointing. My top foodie travel tip would be - observe where the tourists are heading and then set your course in the opposite direction.

Admittedly, I had a little inside foodie information in the form of my gracious hosts, Mark and Francis - who pointed me in the right direction of what I might like and who also kindly allowed me to stay in their gorgeous home in Stoke Newington. Thanks boys , your hospitality was treasured and I felt very spoiled, having somewhere to really call home during my visit. I was also treated to delicious home cooked Nigerian cuisine, courtesy of Francis' lovely mother (who was also visting) who cooked enough goat, creamed yams, baked fish, spiced fried chicken and delicious vegetable stews to feed the EU. All lip smackingly good I might add - her oxtail braise was to die for! (Even if that second serving required a little lie down afterwards - I ate FAR too much!)

Anyway, I thought I would share a few of my favourite meals from my time in London with you all. Bear in mind that all of these selections are from cafe style establishments, pubs or high street venues - I did not do any fine dining at all. As you will see, there were some great dishes - some that would give a few fine dining restaurants I've visited a run for their money. Here are my top 7 tasty London treats....

Scallops are my very favourite seafood, so I jumped at this delicious entree from a pub on Church Street, Stoke Newington. The black pudding and the scallops together were a match made in heaven - rich and delicious - and the fresh tasting pea puree balanced the dish perfectly and stopped it from becoming too cloying. I really wished they did this as a main course - just three scallops and black pud slices just weren't enough - so moreish!

Hand dived scallops with black pudding and pea puree


The next dish also came from a pub - their house made piccallili relish was perfect with the sweet and salty pork terrine. I love a terrine of any kind and this one was just delicious. The pork was lean and lovely and full of flavour and the different textures - the cruch of the sourdough, the tang and creaminess of the piccalilli and the bite of the terrine made this dish a real delight.

Free range pork terrine with sourdough toast and house made piccallili relish

Who remembers when lamb shanks were the bits that you gave to the dog and that butchers would often give you for free? Well, now we know better than to give this flavour packed cut of meat away gratis and some folks, like the fine people at The Three Crowns Hotel on the Stoke Newington High Street know how to treat their shanks right. And oh my..... do they do it right. Slow cooked meat that literally falls from the bone at a touch, moist, full of aromatics. Lip smacking, unctuous goodness served with a superb cassuolet in a fetching copper serving pot. Pure heaven.

Slow braised lamb shanks with cassuolet

For something a little lighter, this beautiful fresh salad really hit the spot - the spatchcock was so moist and beautifully cooked. It just melted in your mouth.Teamed with the citrus, watercress and fennel, it just screamed "welcome spring!" (which it is in England right now) and it was just lovely.


Roasted spatchcock salad with orange, fennel and watercress

How could I go to England and not have pork sausages at least once? Well, I had them more than once I admit, they were so damn good - and what is it about English bacon? So much better than any bacon I've eaten anywhere! Anyway, I digress - this delicious specimen came from Banger Brothers on Portobello Road in Notting Hill, who specialise in free range, english pork sausages. They don't try and tart them up too much - it is just a first class free range banger in a freshly baked roll with plenty of yummy condiments and a side order of freshly cooked chips with salt and a good dose of vinegar. Very old school and just what I needed to build up my strength for shopping at the Portobello Road Market. Banger Brothers of Notting Hill, we salute you.

Free range British pork sausages with dijon mustard/ chips and vinegar

I love crab meat, and I love it even more when I don't have to spend precious eating time picking out all that sweet, succulent flesh from the shell myself. These crab cakes that I enjoyed not only saved me that pesky and fiddly task, but also delivered the fresh crab meat in a lovely light, crunchy shell of its own. Teamed with a house made pickled cucumber and poppyseed salad, a beautiful saffron aoili on the side and a wedge of lime, it was crabby heaven.


Crab cake with pickled cucumber and saffron aoili


Who would have thought that I would experience the best huevos rancheros I've ever eaten on a blustery grey morning in Shoreditch, London? "Foodhall" in Old Street, Shoreditch is a specialty food store that includes a little cafe at the back and a cheese room 'round the side. It is a also a veritable treasure trove of foodie delights - organic bread, baked goods and milk, a great selection of oils, glazes, wine, spices and dry goods. They also serve the best coffee I had in London. What's not to like? Their huevos rancheros was served with slivers of spicy chorizo, avocado and a char grilled chilli and it was just so, so good! All future forays into huevos rancheros territory will be forever judged by this one. I used to think that my own interpretation of this classic dish was pretty good, (spicy, warming, all those lovely textures) but the "Foodhall" version just blows it out of the water.


Huevos rancheros


So, as you can see, London yielded up lots of culinary treasures and I didn't have to resort to the horrors of a "Chippie" once. Nor did I spend wads of cash to get delicious food. It was all there if you knew where to look. A couple of other delights that deserve a mention (but alas I have no pictures of!) are the spectacular bagels from the 24hour bagel shop "Beigel Bake" at 159 Brick Lane (also in Shoreditch). The constant queue out the door tells you that these people know how to bake a bagel! I enjoyed a freshly baked bagel filled with warm, tender salted beef (We call it corned beef in Australia) and a creamy mustard sauce that literally had me sighing with pleasure. The price will blow you away too - bagels range from about 15 pence to one pound fifty depending on the fillings you choose.

My final recommendation is reserved for what is reputedly the best kebab shop in London (and conveniently located a five minute walk from where I was staying in Stoke Newington) And yes, the store is literally called "The Best Kebab" and you will find it at number 125 on the Stoke Newington High Street. Again, the queue out the door will give you a hint that their kebabs are indeed the best. Frequented by chefs and punters alike (Ainsley Harriot is a regular) this no frills establishment serves up a range of beef, lamb and chicken kebabs cooked to order and served with fresh salads and delicious pickled cabbage that is so delicious. I sampled both the beef and the lamb during my stay. I decided on the lamb option as my last meal in London, and it was a worthy send off. (They even have their own Facebook group full of fans, which I have of course joined)

I will be very excited to explore more food options on my return to London (and yes, I certainly will be returning - particularly to concentrate on some of the great looking food stalls I saw along the canal in Camden, that I didn't get the time to try. And who knows, next time I might also go a bit upmarket and visit some of the swankier food establishments) But let's just clear up once and for all that myth that English food is all heart attack inducing fry ups and stodge. As you can see, I had some fantastic food and didn't have to pay a fortune for it either. Rule Brittania!

*****


Sunday, April 11, 2010

Eye on the Pie

On the weekend I was on a mission to use up a whole lot of bits and pieces that I had in the fridge and freezer - a couple of sheets of pastry, some eggs, a few slices of bacon and proscuitto, a handful of cheese, a tomato, some parsley. I am actively trying to eliminate food wastage and also reduce what I purchase, so using up leftovers and random bits and pieces has become all the rage in my house. A few days ago I came up with a good way to do this with yummy breakfast pies - a nice change from a normal weekend cooked breakfast. This recipe would also be an ideal picnic or brunch dish. You could easily make these ahead and just reheat them before serving, or even eat them cold. This recipe makes six individual pies - you could of course make a large one if you wanted to.

These pies are meant to be home style and rustic - I personally didn't bother getting them all perfect. It was meant to a relaxed Sunday breakfast after all and I was hungry and eager to get them cooked and on the plate as soon as possible. My partner Andrew polished off the leftover pies for lunch the next day, so there was definitely no waste here!


Bacon, egg and proscuitto breakfast pies

You will need: 2 sheets ready rolled puff pastry, 4 slices bacon chopped roughly, 4 slices proscuitto chopped roughly, 1 cup finely chopped spring onion, 1 large tomato diced finely, splash of olive oil, 1/2 cup grated cheese (I used mozzerella), 6 eggs, 1 tablespoon water, 2 tablespoons chopped continental parsley, pepper and salt.

Method: Preheat the oven to about 200C.

Heat a pan and cook the bacon for 2 or 3 minutes. Add the spring onions, tomato and proscuitto and cook for 1 minute. Remove from the heat.

In a bowl, whisk together the eggs, water and season very generously with salt and pepper. Se aside.

Grease six individual pie tins. Cut each piece of pastry into four, leaving you with eight smaller squares. Line the six tins with the pastry. Use any leftover pastry to fill any gaps or to make extra edges (see the picture above) The extra edges will give you more puffy, crispy bits to tear at!

Prick the bottom of the tins in a couple of places. Place the filling evenly in the bottom of each pie.
Now sprinkle over the cheese and pour the egg mixture into the pie bases.

Finish with some pepper and the parsley. Bake for about 25 minutes until puffed and golden (be sure they are cooked on the bottom) If the bases are a bit soft, just remove them from the tins and let them bake for 5 minutes on a baking tray so that they crisp up.

*****

Sunday, December 6, 2009

You say potato......

Everyone seems to love rosti/potato cakes and today's recipe uses them as the basis for a dish that can have many incarnations. In my version, I have included some lovely new season zucchini to add extra flavour and lovely flecks of green colour, as well as beautiful smoked trout that transforms the dish into something special.  It makes an indulgent breakfast or brunch, but is also suited as an entree or starter, or even finger food if you scale down the size. You can also omit the trout and substitute grilled vegetables such as asparagus or zucchini for a lovely vegetarian dish. Whilst the dish may look a bit fiddly, it is actually very quick and easy to put together. I really love smoked trout and that is what I have used today, but if you are a fan of smoked salmon then it is a good substitute.

A note about the rosti technique - to ensure that your rosti is cooked correctly, it is important to follow the technique in the recipe below for removing as much moisture out of the mixture as possible. Don't be tempted to omit this step, or your rosti could fall apart and be unpleasantly soggy, causing the cook to swear loudly and have to start over. We don't want that, so use the "teatowel technique" to avoid any problems.

Here it is......


Potato and Zucchini Rosti with smoked trout and minted yoghurt


You will need: (for the rosti) 2 raw whole potatoes, 2 small or 1 medium zucchini, 1 egg, 1 tablespoon plain flour, dash of tabasco sauce, salt, pepper. Oil for frying. 100g smoked trout or smoked salmon.
(for the dressing) 2 tablespoons thick continental style yoghurt, 1 tablespoon finely chopped fresh mint leaves, extra mint to serve.

Method: First, combine the yoghurt and mint for the dressing and set aside in the fridge.

Grate the potato and the zucchini and place in the middle of a clean cotton teatowel (you can also use clean muslin or cheesecloth too, but a teatowel works just as well) Twist the teatowel up so that the ingredients are contained in a tight bundle. Hold over the sink and squeeze really hard to get as much moisture out of the potato and zucchini as possible.

Place the potato and zucchini in a bowl with the egg, flour, tabasco, a generous pinch of salt and a good seasoning of pepper. Using a fork, mix until well combined. The mixture will be quite loose - don't be concerned, it is how it is meant to be.

Heat a frypan (non-stick is good) and add a shallow layer of oil. Add a soup spoon of the rosti mixture to the pan and gently shape/flatten them to form pikelet size fritters. Cook the rosti in batches of 3 or 4, keeping an eye on the heat and turning them a couple of times during cooking. Don't have it blistering hot, or the rosti will be burnt on the outside and raw in the middle. Medium/hot will give you a better result.

Arrange the rosti on the serving plates with a dollop of the yoghurt and a piece of the smoked trout/salmon in between. Finish with a final slice of the trout/salmon and some mint. Serve immediately.

Makes 4 serves

*

Saturday, September 19, 2009

Frittata - With a little help from my friends......

I'm heading off with my other Beatles obsessed friends to our mate Damon's house this afternoon to play the eagerly anticipated "Beatles Rock Band". Word has it that he has set up his attic to accomodate us (closest thing we have to "The Cavern"!) and I have no doubt it will be a riotously entertaining time for all. Lots of gin and tonics and bad singing will ensue, I'm sure. Now, even the real Fab Four must have had to stop for a snack break occasionally, so I cooked a few things this morning to make sure that we keep our strength up for those dodgy renditions of "I am the walrus". The recipe I'm posting today is one of the things I have made to take to Damon's.

Today's dish is a simple to make mushroom, leek and fennel frittata but I have given it a bit of a twist by serving it with a delicious, fresh tasting horseradish and mint cream. I will be serving small slices of it with a dollop of the cream on the top. Of course you can serve the frittata alone if you want to. This dish works as a finger food but would also be a nice spring entree or a vegeatarian main course. It would also be perfect for a picnic.
Either way, you'll love it. (Yeah! Yeah! Yeah!)


Mushroom, Leek and Fennel Frittata with Mint and Horseradish Cream

You will need: (For the frittata) 1 doz free range eggs, 1 cup cream, 1/2 cup grated cheddar cheese, 1/3 cup grated parmesan, 1 bulb fennel sliced finely, 1 large onion sliced finely, 1 large leek sliced finely, 1/2 cup sliced spring onion, About 3 cups sliced mushrooms, 1 tablespoon finely chopped continental parsley, 1 tablespoon Dijon mustard, splash of olive oil, salt and pepper.

(For the topping) 1 cup sour cream, 1/2 cup natural yoghurt (I use an organic Greek style yoghurt), 1 tablespoon each of chopped continental parsley and fresh mint, 1 tablespoon horseradish cream ( You will find this in the mustard/condiment section of the supermarket)

Method: First, combine all of the topping ingredients well and then refrigerate until you areready to serve.

In a frypan, add a splash of olive oil, the spring onions,regular onion, fennel and leek. Cook on a moderate heat for about 5 minutes. You do not want the ingredients to brown, so keep an eye on it. Add the mushrooms, season with salt and pepper. Cook for another 5-8 minutes, until the fennel and leeks are soft. Turn off the heat and set aside.

In a mixing bowl, combine the eggs, cream, grated parmesan, Dijon mustard and salt and pepper. Whisk until well combined.

Line a baking dish with baking paper. Tip the leek/fennel mixture into the dish and spread it out evenly. Sprinkle the cheddar cheese over the top and mix it in a little bit, so it doesn't all sit on the surface. Pour over the egg mixture and ensure it is evenly distributed.

Sprinkle with the parsley and cook in a moderate oven for about 20 mins, until the frittata is set. Let it cool for at least 10mins before cutting it into pieces. Serve topped with a spoonful of the horseradish cream mixture and some extra mint leaves.

This recipe will make around 40 small pieces or will serve 6-8 people as an entree or main course.

*

Sunday, August 30, 2009

The Great Muffin Experiment

I was in the mood for baking this morning and as many of you would know I'm not a big sweet fan, so I thought I would experiment with savoury muffins. I decided on vegetable based ones, full of zucchini and flavoured with cheese, spring onion, olives and sundried tomatoes. The result was a lovely light and flavoursome muffin that would make a great breakfast or brunch, perfect with a bowl of soup or a nice addition to a picnic.
These will freeze really well, so it's worth making a couple of batches if you have freezer space. Alas I don't, so I will be taking these to work to give to my favourite geeks in the I.T department tomorrow. I make sure that they always get the results of my muffin experiments -I tell them it is a form of bribery - it always pays to have the tech guys on your side! I was happy with the recipe today, particularly the lightness of the texture. I was worried they might be a bit heavy, but they were quite the opposite. I think I will use this recipe for the basis of other savoury muffins in the future. I am already having ideas for other varieties. Watch this space...

Cheesy Zucchini Muffins with sundried tomato and olives

You will need: 3 cups plain flour, 6 teaspoons baking powder, 2 large grated zucchini, 1 cup finely chopped spring onion, 2 tablespoons chopped olives, 2 tablespoons finely chopped sundried tomatoes, 1 1/2 cups grated cheddar, 1/2 cup grated parmesan, 4 eggs, 1 cup milk, 2/3 cup olive oil, 1 tablespoon poppy seeds, salt and pepper.

Method: Preheat the oven to 180C. Line a non stick muffin pan with paper patty cases.
Sift the flour and baking powder into a generous sized bowl. Add the olives, zucchini, sundried tomato, spring onion, parmesan and all but 2 tablespoons of the cheddar cheese. (You will save this for the top of the muffins later) Season generously with salt and pepper. Mix well with your hands.

In another bowl, whisk together the eggs, oil and milk. Add this wet mixture to the dry ingredients and mix until just combined with you hands. Do not overmix or your muffins will be very flat and heavy.

Fill the prepared muffin pans with the mixture and sprinkle the leftover cheese and poppy seeds over the top of the muffins. Cook for 25-30 mins. Let them cool in the pan for about 10mins before taking them out and letting them cool further on a wire rack.

Makes about 20 muffins.

*

Monday, July 13, 2009

Go-Go-Gourmet Gadgets

When it comes to kitchen gadgets/machines, I believe that most of the time "less is more". I'm always wary of cramming my storage space with gadgets that may only be used once or twice a year, or that are designed to do only one thing. How many people have bulky popcorn machines, pancake,bread or fairy floss makers etc taking up cupboard space? A couple of years ago I did a ruthless cull of any kitchen equipment/cookware that was past it's prime or that I never really used, giving some away to friends and donating the rest to a charity shop. Not only did it free up my cupboard space but it also made me realise how little you actually need, even if you cook as much as I do. It make me think about generations of cooks before us who produced wonderful dishes with the most humble of kitchen tools. I'm not advocating that we all throw out our food processors or the tools that really make our cooking lives simpler, just that for me, having a hard look at what I owned and didn't actually use or need led me being more conscious and to consuming/purchasing less. Now, instead of being seduced by every cookware store I see I am a lot more pragmatic - Do I really need this? How much will I actually use it? Does it require lots of space/cleaning? Do I already have the tools to do the same job?

Don't rule out recycled cooking gear if you need to add to your tools - I have bought some great quality equipment over the last few years - vintage mixing bowls, serving platters, glassware, chopping boards, tablecloths and other goodies, all from secondhand stores or charity shops. Give everything an extra thorough clean and away you go. As well as saving you lots of money, you are also recycling and being more enviromentally responsible, which can only be a good thing.

Of course I do have my own favourite kitchen must-haves - good knives, my heavy mortar and pestle big and deep enough to hold a large batch of spice paste and to crush nuts/spices without half of them ending up on the floor or on the bench, my trusty hand blender, a microplane (one of my best purchases ever), stainless steel mixing bowls (that do double duty as a double boiler when placed over a pot of boiling water), decent sized chopping boards, my favourite pan which was a birthday gift from Michael last year(I use it almost every day) Obviously your must haves are going to depend on what you tend to cook - I don't have a lot of cake tins/baking stuff, because I rarely bake, but if you are always cooking cakes and biscuits, then that equipment is going to be a priority for you.

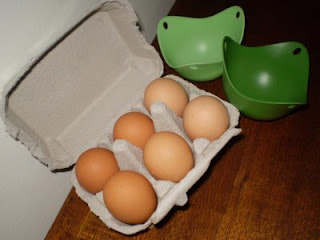
I do occasionally add to my cooking tools - I recently bought a grill pan (found at a discount cooking store reduced from $130 to $35!) I have already used it quite a lot, so it was a good purchase. I was also interested in trying the silicone poaching "pods" that I have seen popping up in cookware stores lately. My egg poaching skills have always been a bit hit and miss (invariably they fail when I have guests, don't you hate that??) so I bought myself a pair of poaching pods and I was really happy with the results......


Product: Silicone Poaching Pods
Price: Mine were $19.95 (a pair)
Where do I get them?: Specialist cookware stores


How they work: You simply oil the pods lightly (makes the eggs slip out very easily) and then break an egg into each of them. You place them in a pan of boiling water and put a lid on the pan. The eggs float on the water and poach perfectly. You slide the eggs out of the pods and voila! No more dodgy/broken/sodden poached eggs!
You'll love them if: Your track record with poaching eggs is as bad as mine!
Gourmet Goddess gadget rating: 9/10 - simple to use, easy to clean and very effective.

*

Sunday, June 28, 2009

Huevos Rancheros

Hola amigos! Sunday brunch again and today I wanted something piquant, bold and a bit different. Huevos Rancheros fits the bill perfectly. The literal translation means "Ranch eggs" and this dish originated in Mexico, where it would be the mid-morning meal for farm workers. There are many, many variations of this dish - some are served on a corn or flour tortilla, some add red peppers, corn, black beans or cheese. Some add a side serve of avocado or even sour cream. (I suspect this is a recent Tex-Mex addition and I personally think it makes the dish too heavy) I prefer to keep it all quite simple and rustic and omit all the accompaniments. I think that it has so much flavour that it doesn't need help to be moreish and delicious. I serve my version with some warm flatbread and eat it right out of the pan.

I like my Huevos Rancheros spicy, so I have added plenty of chilli, including some fresh chilli on top to serve, but of course you can leave the chilli out completely if you want to. My version also includes Chorizo - omit it for a lovely vegetarian dish. If you were making this for a few people, you could make it in one large dish, or even do individual ones in small rammekins. As well as being a hearty brunch, this dish is perfect for a fast and easy dinner option.

You will notice that I haven't included a recipe for the tomato based sauce* - use your own basic nepolitana style sauce or even a good quality store bought sauce (my preferred brand is Barilla) if you don't want to make a special batch. My tomato sauce contains capers, anchovies, lots of garlic and chllies, but use whatever you like.

So, here it is - my version of the rustic Mexican classic....


Huevos Rancheros


You will need: 1 cup tomato based sauce* per person, 1-2 organic free range eggs per person, Half a cup of roughly chopped Chorizo, 1 tablespoon chopped black olives, A few dashes of tabasco sauce (optional) , 1 tablespoon finely sliced spring onion, flatbread or soft tortillas to serve, 1 teaspoon finely sliced red chilli (optional)

Method: Combine the olives, Chorizo, tomato sauce, tabasco together and pour into an ovenproof dish. Make a small well in the sauce and break the egg gently into the mixture. Repeat for all of the eggs.

Bake in a hot oven for 10-15 mins depending on how much you like your eggs cooked. (I like them a bit runny in the middle, so the yolk mixes with the sauce - yum!)

Top with spring onion and chilli and serve right away with warm flatbread or soft tortillas.

*